EasyManuals Logo

HP ProBook 4525s Service Manual

HP ProBook 4525s
148 pages
To Next Page IconTo Next Page
To Previous Page IconTo Previous Page
Page #106 background imageLoading...
Page #106 background image
f. Display assembly (see Display assembly on computers with 15.6-in displays on page 74)
g. Palm rest (see
Palm rest on page 69)
h. Hard drive (see
Hard drive on page 72)
i. Top cover (see
Top cover on page 81)
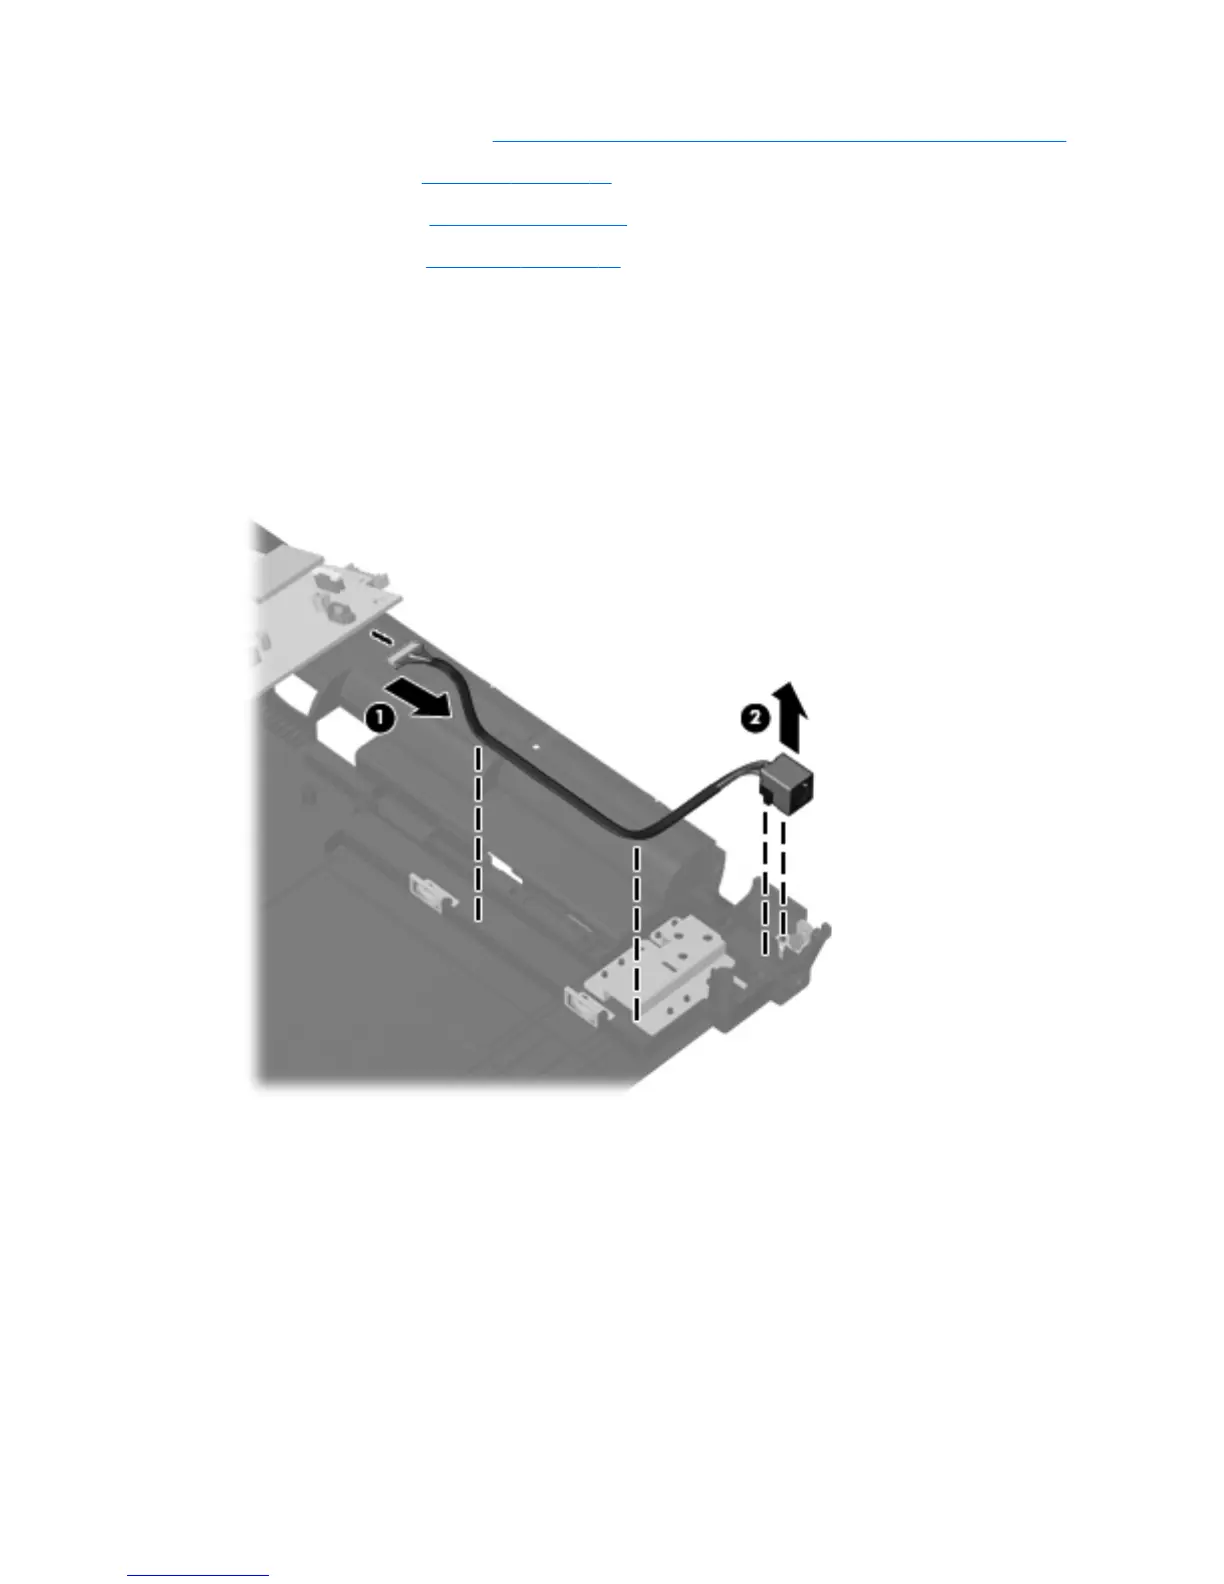
Remove the power connector assembly:
1. Position the computer right-side up with the right side toward you.
2. Disconnect the cable from the system board (1) and remove the tape and cable from the routing
channel in the base enclosure.
3. Lift the power connector (2) from the base enclosure.
Reverse this procedure to install the power connector.
98 Chapter 4 Removal and replacement procedures

Table of Contents

Other manuals for HP ProBook 4525s

Questions and Answers:

Question and Answer IconNeed help?

Do you have a question about the HP ProBook 4525s and is the answer not in the manual?

HP ProBook 4525s Specifications

General IconGeneral
GraphicsATI Mobility Radeon HD 4250
ProcessorAMD Turion II, AMD Athlon II
Display15.6-inch diagonal LED-backlit HD anti-glare (1366 x 768 resolution)
MemoryUp to 8 GB DDR3
Storage250GB, 320GB, 500GB HDD
Operating SystemGenuine Windows 7 Professional, Genuine Windows 7 Home Premium, Genuine Windows 7 Home Basic
Battery6-cell Lithium-Ion
ChipsetAMD M880G
Optical DriveDVD+/-RW SuperMulti DL
Wireless802.11b/g/n, Bluetooth 2.1
AudioIntegrated stereo speakers, Integrated microphone
Ports3 USB 2.0, VGA, HDMI, RJ-45, headphone/microphone combo jack
Card ReaderSD/MMC
Webcam2 MP Webcam

Related product manuals