9
ProCurve Switch vl Modules
Installing the Modules
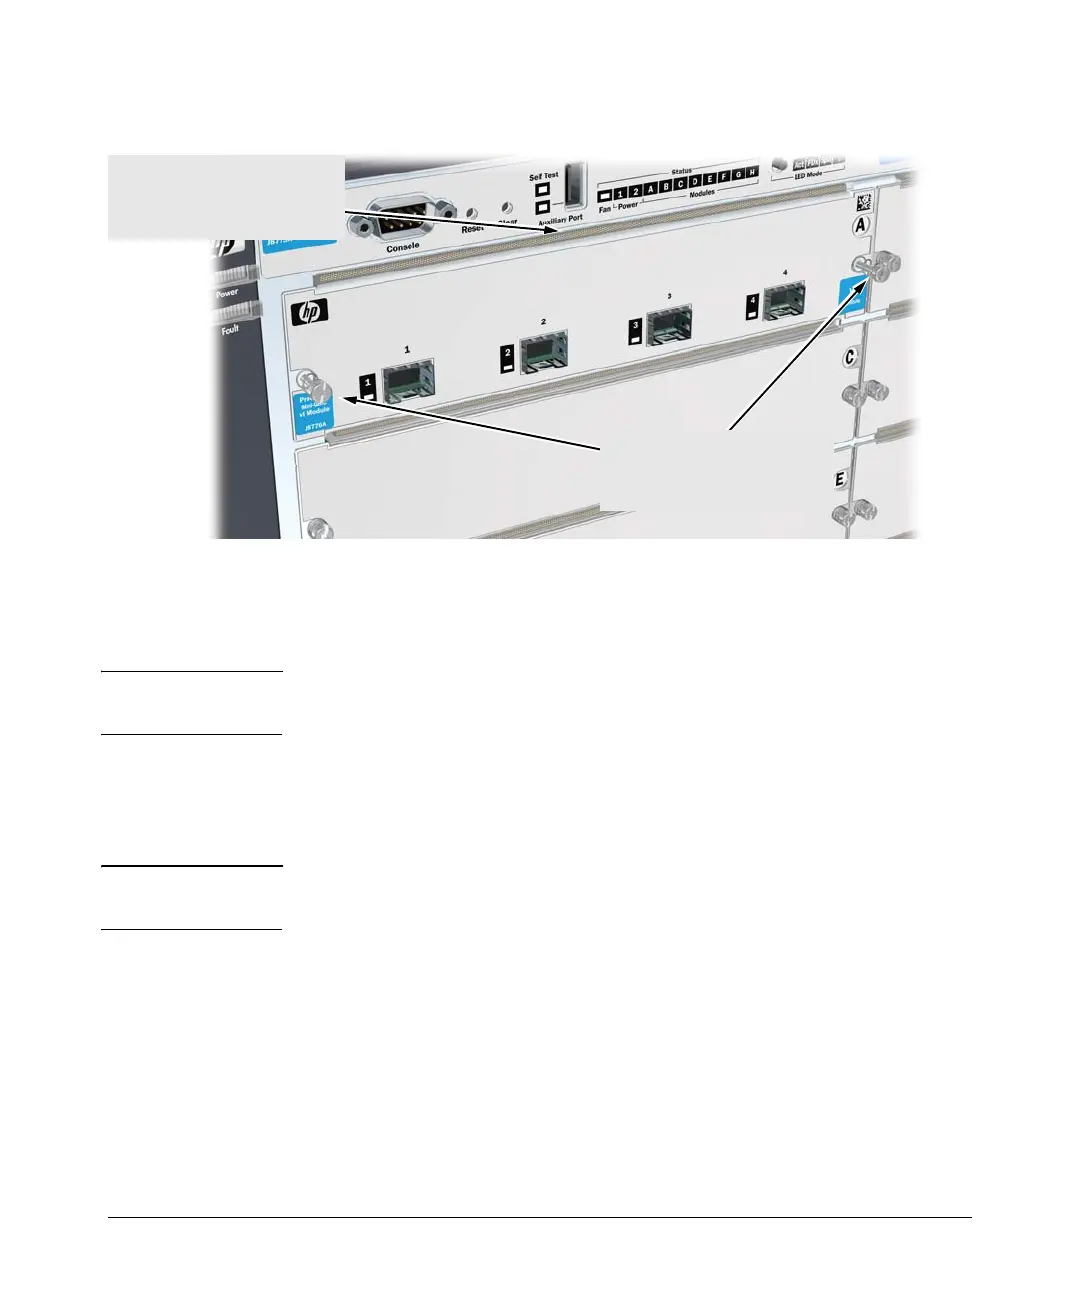
Figure 5. Tighten module retaining screws
Installing or Removing the Mini-GBICs
Note Hot swapping mini-GBICs is supported. You can install or remove a mini-GBIC
with the switch powered on, a reset will not occur.
You can install or remove the mini-GBIC from the mini-GBIC vl Module, or the
Gig-T/SFP vl Module, without having to power off the switch. Use only
ProCurve mini-GBICs with the letter “B” (or greater) at the end of the product
number (for example, J4858B or J4860C).
WARNING The ProCurve fiber optic mini-GBICs are Class 1 laser devices. Avoid
direct eye exposure to the beam coming from the transmit port.
Then tighten the retaining screws
on the module until they are secure,
but do not overtighten them.
The module is fully inserted when
the module bulkhead is contacting,
or very close to contacting
the face of the switch.
 Loading...