EL-MF877-00 Page 8
Template Revision B
PSG instructions for this template are available at EL-MF877-01
HDD Module Processing and
Installing(if necessary)
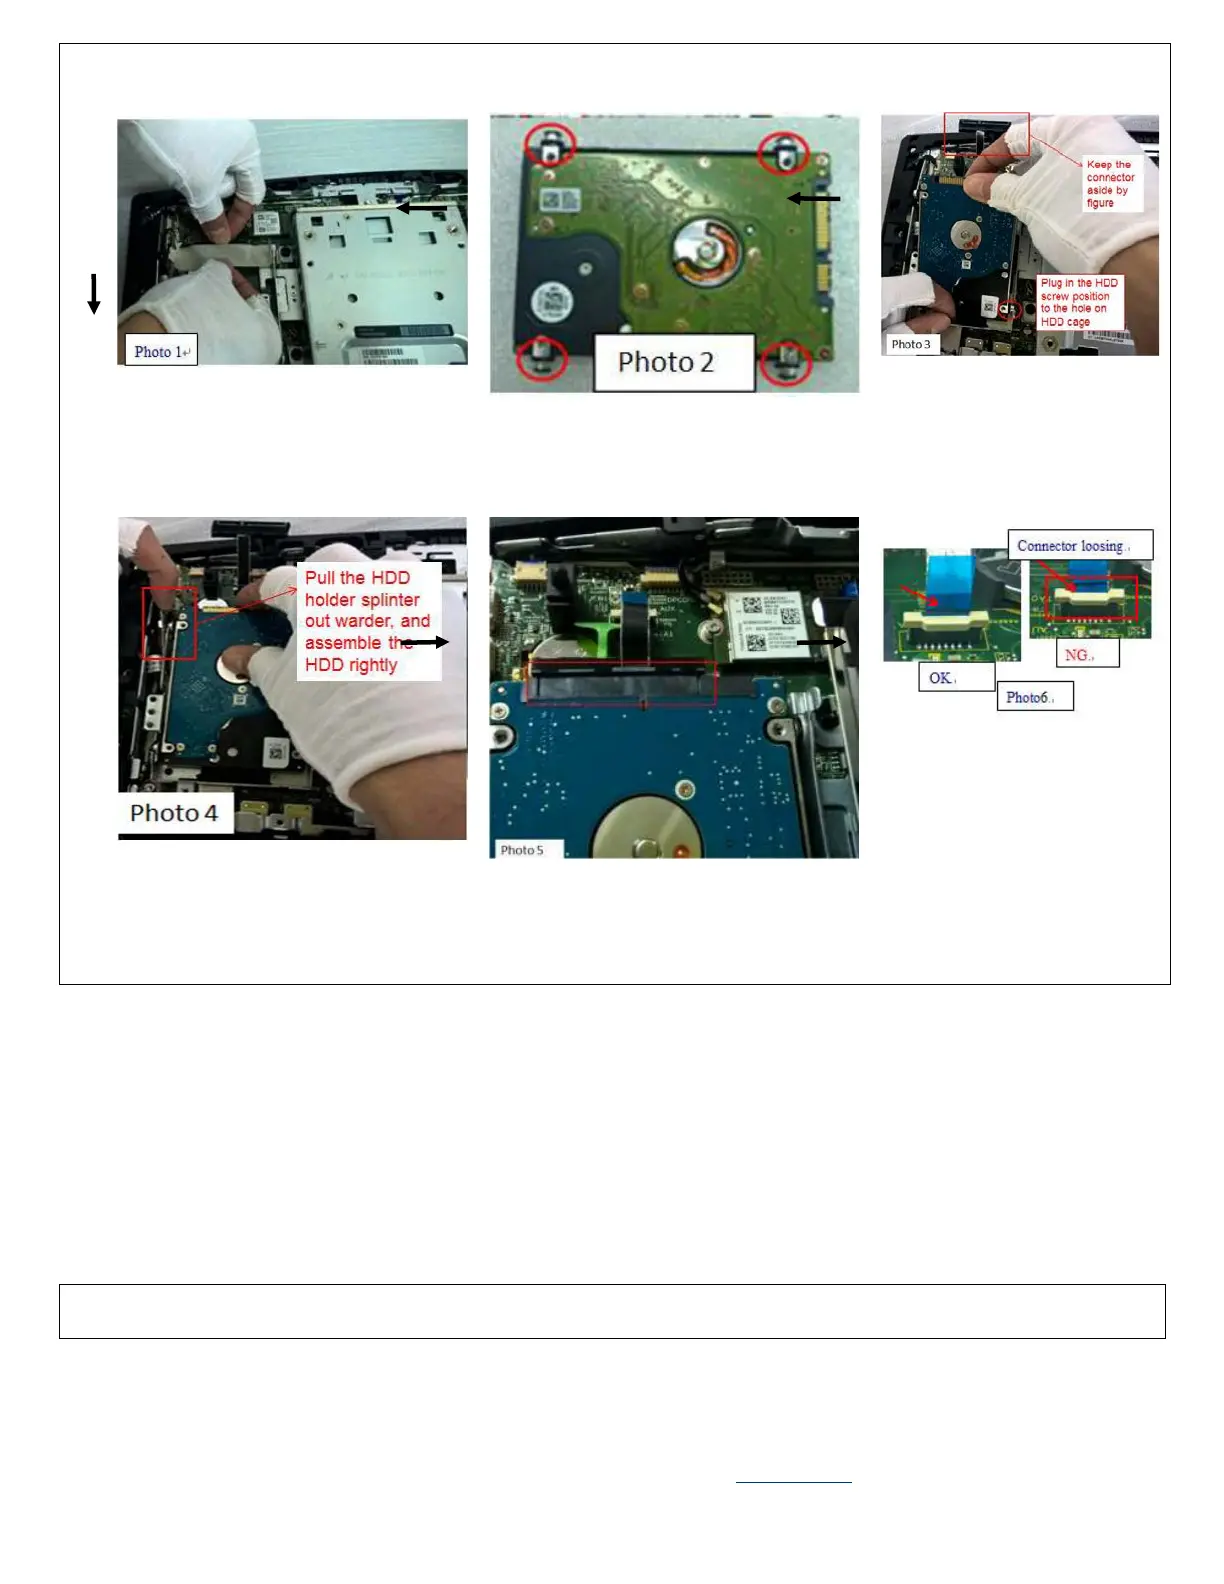
Do not remove the HDD cage
Remove the tape on the HDD cage See
photo 1
Take 4 screw to lock
the HDD,(#1)1.5+/-0.3kgf.cm
Plug the HDD screw holder to the
hold on HDD cage
See photo 3
Slide the HDD holder
splinter and assemble
the HDD to the HDD
cage rightly
Insert the SATA cable
to the HDD
See photo 5
Check the connector is
inserted rightly
See photo 6
Disassembly process (Remove the HDD cage)

 Loading...