Do you have a question about the HP X32 and is the answer not in the manual?
Information and precautions for safe service operations.
Guidelines for professional repairers and handling components.
Steps and tools required before disassembling the monitor.
Procedure for removing and replacing the power board.
Guide to repairing HDMI, DisplayPort, USB, and audio connectors.
Procedures to test monitor functionality after repair.
This document is a Maintenance and Service Guide for the HP X32 monitor model, providing comprehensive information for trained service personnel. It covers essential safety information, product features, illustrated parts, and detailed procedures for removal, replacement, and repair of components, along with diagnostic tests and troubleshooting.
The guide begins with important safety information, emphasizing that only trained service personnel familiar with the product should perform maintenance. It outlines critical precautions, such as ensuring a dry and clean working environment, personal safety, using approved tools, and disconnecting power before opening the product. It also highlights the sensitivity of electrical components to electrostatic discharge (ESD) and the need to follow ESD safety procedures. The document advises caution regarding batteries, noting that some products contain more than one and should not be disassembled or exposed to high temperatures. It also refers to government requirements for battery recycling and disposal. The guide stresses that repair must be performed by professional service technicians in a repair center, not by end-users, and warns about the high voltage area on the primary side during servicing. It specifies the use of lead-free solder wire for repairs, matching capacitor polarity and specifications, and avoiding short circuits caused by near pins. It also cautions against getting the board wet, as water and moisture can cause malfunctions. When soldering, technicians are advised to work quickly to avoid overheating the circuit board and to keep the soldering iron tip clean and well-tinned. After repair, a close inspection of the circuit board and a function test are required to confirm proper operation.
The guide also addresses RoHS (Restriction of Hazardous Substance in Electrical and Electronic Equipment Directive) requirements, stating that all electrical and electronics products launched in the EU and other countries after June 2006 must meet these requirements. It specifies that if original parts are RoHS compliant, replacement parts must also be RoHS compliant.
General descriptions of the monitor are provided, categorizing service into two levels: Level 1 for cosmetic/appearance/alignment service and Level 2 for circuit board or standard parts replacement. Firmware updates are mentioned as being available on support.hp.com, if applicable. Before returning a repaired product to the customer, an AC leakage current check on exposed metallic parts is mandatory to ensure electrical safety.
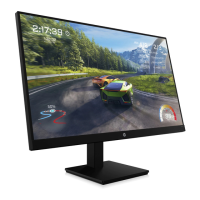
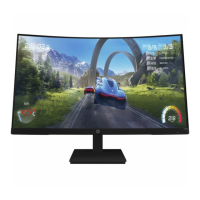
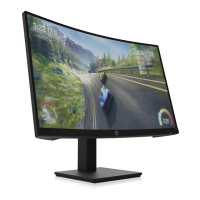
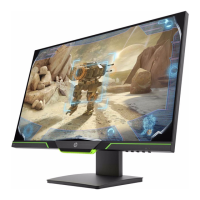
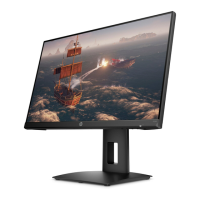
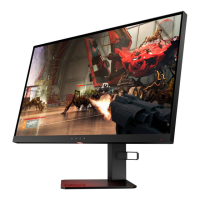
The monitor features section details the capabilities of the HP X32 model. Depending on the specific model, it may include an 80.1 cm (31.5 in) diagonal viewable screen area with 2560 × 1440 resolution, offering full-screen support for lower resolutions with custom scaling to preserve the original aspect ratio. It features a Liquid Crystal Display (LCD) with active matrix and in-plane switching (IPS) technology, along with swivel and height adjustment capabilities. The monitor boasts a wide color gamut, covering sRGB color spaces, and a non-glare panel with an LED backlight. It provides a wide viewing angle, allowing comfortable viewing from various positions. Pivot capability is available on select products, enabling rotation of the monitor head from landscape to portrait orientation. The monitor includes four on-screen display (OSD) buttons, three of which can be reconfigured for quick access to commonly used operations. OSD adjustments are available in several languages for easy setup and screen optimization. Color space presets for gaming are also included. An energy saver feature helps meet requirements for reduced power consumption, and a security cable slot on the rear allows for an optional security cable.
The document illustrates the front components of the monitor, identifying the menu button, OSD buttons, and power button, along with their respective functions. The menu button opens the OSD menu, and the OSD buttons are used for navigation. The power button turns the monitor on or off. Similarly, the rear components are detailed, including OSD buttons, power button, power connector, HDMI port, DisplayPort connector, audio-out (headphone jack), and a security cable slot.
Instructions are provided for locating the serial number and product number, which are typically found on a label on the rear of the monitor or under the front bezel. These numbers are crucial for contacting HP support.
The "Illustrated parts catalog" section provides an exploded view of the monitor, labeling major components such as the DECO, LENS, MIDDLE FRAME, MYLAR, POWER BOARD, KEY BOARD, LED BOARD, BASE, STAND, REAR COVER, MAINFRAME, SCALER BOARD, CONVERTER BOARD, and PANEL, along with various screws. A table lists each item with its part name and quantity.
The "How to order parts" section specifies that the HP authorized repair center can purchase the power board from HP, providing the HP spare part number and manufacturer part number for the X32 model. It also lists EU distributors (Farnell, RS Component, and Digikey) where capacitors and connectors can be purchased, providing component descriptions, locations, distributor information, and distributor part numbers for specific capacitors (470uF 20% 25V) and connectors (HDMI, DisplayPort, Audio). It notes that the rear cover and chassis may need modification to hold connectors if they don't match exactly. Cables can be purchased from the HP part store, and internal and external power supplies are available from EET.
The "Removal and replacement procedures" section outlines the steps for disassembling and reassembling the monitor. It begins with "Preparation for disassembly," which includes reading safety information, cleaning the room, identifying the disassembly area, and preparing for material flow. It also lists required equipment such as a press fixture, working table, screwdriver, knife, gloves, cleaning cloth, ESD protection, and a scraper bar with specified dimensions.
Detailed steps are provided for removing the rear cover, starting with placing the monitor face down on a cushion. The hinge assembly is removed by pushing up a hook. The rear cover screws are then removed with a screwdriver, and the cover is lifted from the top side by hand. Technicians are instructed to disconnect connectors, tapes, and aluminum foil. The mainframe is then removed by unscrewing it. The mylar is torn out, and the power board, mainboard, and converter board are removed by unscrewing them. Finally, the middle frame and panel are removed by unscrewing them.
For "Power board" replacement, the guide specifies the part number ADPCK1908FGB and reiterates the disassembly preparation steps. It shows the location of the power board connector and warns that after unplugging the power supply, the capacitance is still charged, and technicians should not touch or discharge the capacitor. It also shows how to locate the part number on the board.
The "Connector repair" section covers HDMI, DisplayPort, USB, and audio connectors on the main board (part number CBPRPA8H1F1). It lists the connector identifiers (J2 for HDMI, J3 for DisplayPort, M1 for Audio) and their locations. Important conditions for connector repair are outlined: it is only for out-of-warranty cases, must be performed by professional repairers in a repair center, requires electrostatic protection, uses lead-free solder wire, and demands careful matching of specifications and part numbers. It warns against short circuits from inappropriate operation and against allowing any liquid on the board. The guide also reiterates the ERP Lot5 requirements for professional repairers.
Specific repair steps are provided for the "Audio connector M1," "HDMI connector J2," and "DP connector J3." For the audio connector, it involves using a hot air gun to melt solder, a soldering iron and absorber to remove solder, gently pushing the M1 out, lifting the connector, placing the new component, and soldering it. Similar steps are outlined for the HDMI and DisplayPort connectors, emphasizing the use of a soldering iron and desoldering pump to remove solder, followed by a hot air gun to melt remaining solder, lifting the connector, placing the new component, and soldering.
The "Function test" section provides a table listing test items (HDMI test, DP test, Audio test), operating descriptions, and tools used. For HDMI and DP tests, it requires confirming correct image display and sound playback using a computer or DVD player. For the audio test, it involves changing volume and balance to confirm smooth and loud enough audio using a speaker.
Finally, the "Support and troubleshooting" section offers a table of common problems, possible causes, and recommended solutions. Problems include a blank or flashing screen (disconnected power cord, monitor off, improperly connected video cable, system in Sleep mode, incompatible video card), blurred/indistinct/dark image (low brightness), "Check Video Cable" message (disconnected monitor video cable), "Input Signal Out of Range" message (video resolution/refresh rate set too high), monitor not entering Sleep mode (power saving control disabled), and "On-Screen Menus are Locked" or "Power Button is Locked" messages (OSD lock function or power button lock enabled). Solutions range from connecting cables and powering on the monitor to adjusting OSD settings, exiting Sleep mode, and disabling lock functions by pressing and holding specific buttons.
| Screen Size | 31.5 inches |
|---|---|
| Resolution | 2560 x 1440 (QHD) |
| Refresh Rate | 165 Hz |
| Panel Type | VA |
| Aspect Ratio | 16:9 |
| Adaptive Sync | AMD FreeSync Premium |
| Color Gamut | 99% sRGB |
| VESA Mount | 100 x 100 mm |
| Response Time | 1 ms |
| Ports | 1 x HDMI 2.0 |
| Viewing Angle | 178° horizontal / 178° vertical |
| Brightness | 400 nits |
| Contrast Ratio | 3000:1 (Typical) |