Do you have a question about the HP X24c and is the answer not in the manual?
Essential safety precautions for service personnel to minimize risks during operations.
Key service guidelines and precautions for professional technicians performing maintenance.
Details on Restriction of Hazardous Substances (RoHS) compliance for product parts and materials.
Overview of the manual's content and service levels.
Information on how to obtain and apply firmware updates for the monitor.
Steps required before returning a repaired product to ensure safety and proper function.
Description of the monitor's key specifications and capabilities.
Illustration and descriptions of components located on the front of the monitor.
Illustration and descriptions of components located on the rear of the monitor.
Guide to finding the serial and product numbers on the monitor's label.
Information and procedures for ordering spare parts and components for the monitor.
Essential steps and equipment needed to prepare the monitor for disassembly.
Detailed steps for removing and replacing the monitor's power board.
Instructions for repairing or replacing specific connectors like HDMI, DP, and Audio.
Procedures to confirm all monitor functions are working correctly after repair.
Common problems, their causes, and recommended solutions for monitor issues.
This document serves as a Maintenance and Service Guide for the HP X24c model monitor, providing comprehensive information for service personnel regarding its upkeep, repair, and troubleshooting. The guide outlines essential safety precautions, service procedures, and details for ordering and replacing parts, ensuring the safe and reliable operation of the equipment.
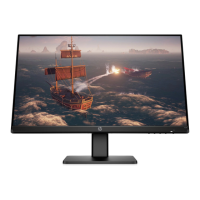
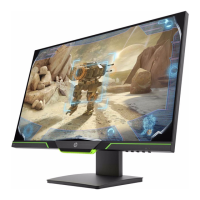
The HP X24c monitor is designed with a range of features to enhance user experience and provide flexible display solutions. Depending on the specific model, it typically offers a diagonal viewable screen area with a high resolution, supporting full-screen display for lower resolutions while preserving the original aspect ratio through custom scaling. The display incorporates an anti-glare panel with an LED backlight, which contributes to a comfortable viewing experience by reducing reflections. A wide viewing angle is a key feature, allowing for clear visibility from various positions, whether sitting, standing, or moving from side to side.
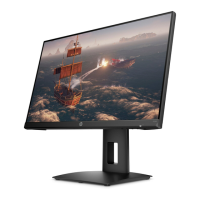
Ergonomic adjustments are a significant aspect of the monitor's design, including tilt, swivel, and height adjustment capabilities. These features enable users to customize the monitor's position for optimal comfort and productivity. For alternative mounting solutions, the monitor is equipped with a removable stand, allowing for flexible integration into different setups. Connectivity options are robust, with DisplayPort video input and High-Definition Multimedia Interface (HDMI) for digital video and audio transmission. An audio headphone jack is also included for personal audio output.
The monitor supports plug-and-play functionality, simplifying setup when connected to a compatible operating system. For security, a security cable slot is provided on the rear, allowing for the attachment of an optional security cable to deter theft. User interface is managed through On-Screen Display (OSD) adjustments, available in multiple languages, which facilitate easy setup and screen optimization. Digital content protection is ensured through High-Bandwidth Digital Content Protection (HDCP) on all digital inputs, safeguarding copyrighted material. Furthermore, the monitor incorporates an energy saver feature, designed to meet requirements for reduced power consumption, aligning with environmental standards.
Maintenance and service aspects are thoroughly covered in the guide. It emphasizes that repair must be performed by professional service technicians in a repair center, and end-users should not attempt these procedures. The guide provides critical safety information, including warnings about high voltage areas on the primary side and the importance of using lead-free solder wire for repairs to meet RoHS requirements. When replacing capacitors, technicians are instructed to match polarity, specification, and part number to the Bill of Materials (BOM) and location. Precautions against getting the board wet and avoiding overheating during soldering are also highlighted. After any repair, a close inspection of the circuit board and a function test are mandatory to confirm proper operation and power supply functionality.
The guide details the process for locating the serial number and product number, which are essential when contacting HP for support. It also includes an illustrated parts catalog, making it easier to identify major components. Information on how to order parts is provided, specifying that the power board can be purchased from HP authorized repair centers, while capacitors and connectors are available from designated EU distributors like Digi-Key and RS-Component. Specific part numbers and locations for components like DisplayPort, HDMI, and Audio connectors are listed to aid in accurate ordering and replacement.
Preparation for disassembly is a critical section, outlining steps such as reading safety information, cleaning the disassembly room, identifying the disassembly area, and preparing necessary equipment like press fixtures, screwdrivers, knives, gloves, cleaning cloths, ESD protection, and scraper bars. Detailed instructions are provided for removing the monitor base, disassembling the VESA cover, separating the rear cover, and removing internal components like acetate tape, backlight, aluminum foil, shielding case, and various screws. The guide also covers the removal of the main board and power board, with a specific warning about the capacitance remaining charged after unplugging the power supply.
Connector repair procedures are meticulously described for Audio, HDMI, and DisplayPort connectors. These procedures involve using a hot air gun to melt solder, a soldering iron and de-soldering pump to remove solder, lifting the old connector, placing the new component to match the footprint, and soldering it in place. Each step is accompanied by visual aids to ensure clarity.
Finally, the guide includes a function test to be performed after repairs, ensuring that all monitor functions are working correctly, including HDMI, DisplayPort, and audio tests. A comprehensive support and troubleshooting section lists common problems, their possible causes, and recommended solutions. This covers issues such as a blank or flashing screen, the monitor being off, improper video cable connection, system in Sleep mode, incompatible video cards, blurred images, "Check Video Cable" messages, "Input Signal Out of Range" messages, and locked OSD or power buttons. Solutions range from connecting power cords and video cables properly to adjusting brightness, changing settings, and disabling OSD or power button lock functions. This holistic approach ensures that service personnel have all the necessary information to maintain and repair the HP X24c monitor effectively and safely.
| Color | black |
|---|---|
| Screen Type | lcd |
| OS Compatibility | not applicable |
| Screen Size | 23.6 inches |
| Panel Type | va |
| Aspect Ratio | 16:9 |
| Resolution | 1920 x 1080 |
| Refresh Rate | 144hz |
| Horizontal Viewing Angle | 178 degrees |
| Vertical Viewing Angle | 178 degrees |
| Response Time | 4 milliseconds |
| Brightness | 300 candela per square meter |
| Contrast Ratio | 3000:1 |
| Synchronization | freesync premium (amd adaptive sync) |
| HDR | no |
| Display Port Inputs | 1 |
| Width with Stand | 21.1 inches |
| Net Weight without Stand | 11.72 pounds |