Do you have a question about the HP X27qc and is the answer not in the manual?
This document serves as a comprehensive Maintenance and Service Guide for the HP X27qc model monitor, providing essential information for trained service personnel. It outlines the monitor's features, details the process for ordering spare parts, and offers step-by-step instructions for removal and replacement procedures, diagnostic tests, and troubleshooting common issues. The guide emphasizes safety precautions and adherence to regulatory requirements throughout all service operations.
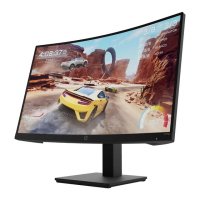
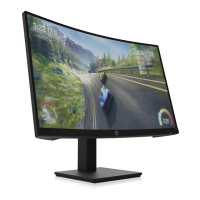
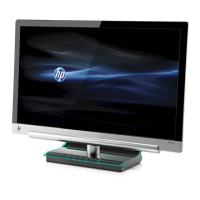
The HP X27qc monitor is designed for an immersive viewing experience, featuring a 68.6 cm (27-inch) curved display with a 1500mm radius. It boasts a 2560x1440 resolution, offering an ultra-wide backlit display with full-screen support for lower resolutions. The antiglare panel, coupled with an LED backlight, ensures comfortable viewing in various lighting conditions. A wide viewing angle allows for clear visibility from sitting, standing, or side-to-side positions.
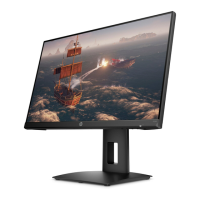
For user comfort and ergonomic adjustability, the monitor includes both tilt and height adjustment capabilities. Connectivity options are robust, featuring a DisplayPort (DP) video input and a High-Definition Multimedia Interface (HDMI) video input, with an HDMI cable provided for immediate use. An audio-out (headphone) jack is also included for personal audio. The monitor supports Plug and Play functionality, simplifying setup with compatible operating systems. For security, a security cable slot is provided on the rear for an optional security cable.
The monitor's on-screen display (OSD) offers adjustments in several languages, facilitating easy setup and screen optimization. It incorporates High-bandwidth Digital Content Protection (HDCP) copy protection on all digital inputs, ensuring secure content display. For mounting flexibility, a VESA mounting bracket allows attachment to wall-mount devices or swing arms. Users can also activate a low blue light mode setting to create a more relaxing and less stimulating image, and an energy saver feature helps meet requirements for reduced power consumption.
The front components of the monitor include a series of control buttons. The Menu/OK button confirms selections when the OSD menu is open and opens the OSD menu when closed. The Next Active Input/Up/Increase button switches the monitor's input source to the next active input when the OSD menu is closed, or opens the information menu at HDMI, or performs auto adjustment at VGA. The Color Modes/Down/Decrease button opens the Color menu for screen adjustments when the OSD menu is closed, and navigates forward through the OSD menu or decreases adjustment levels when open. The Brightness+/Input/Exit/Back button opens the Brightness+ adjustment scale when the OSD menu is closed, and switches to the next video input port when closed. Finally, the Power button turns the monitor on or off.
Rear and side components include the power connector for connecting the power cord, an HDMI port for connecting an HDMI cable to a source device, a DisplayPort in connector for connecting a DisplayPort cable to a source device, and a headphone jack for connecting headphones. A label on the rear of the monitor panel provides the serial number and product number, which are important for contacting HP support.
Maintenance features are extensively detailed, with a strong emphasis on safety. The guide stresses that only trained service personnel familiar with the product should perform service, and that all maintenance must be preceded by reading the "Important Safety Information." Key safety precautions include ensuring a dry and clean working environment, disconnecting power before opening the cabinet, following ESD safety procedures for electrical components, and proper handling of batteries.
The guide outlines two levels of service: Level 1 for cosmetic/appearance/alignment service and Level 2 for circuit board or standard parts replacement. It also addresses RoHS (Restriction of Hazardous Substance in Electrical and Electronic Equipment Directive) requirements, specifying that replacement parts must be RoHS compliant if the original parts were. Firmware updates, if available, can be found on support.hp.com.
Preparation for disassembly involves cleaning the room, identifying the disassembly area, and preparing for material flow. Required equipment includes a press fixture, working table, screwdriver, knife, gloves, cleaning cloth, ESD protection, and a scraper bar of specific dimensions.
Detailed removal and replacement procedures are provided for various components. For the Rear Cover, instructions include removing four screws, splitting the left and right sides apart, using a scraper bar to open the gap, tearing off tapes, disconnecting pins, and removing screws. For the Main Board and Converter Board, specific screws must be removed. The middle frame and panel also require screw removal for disassembly. The key board removal is also described. All boards must be disassembled from the housing, and all wires disconnected from the board.
The power board removal section highlights the part numbers PLPCKH362UQA1 and PLPCLH421UQA5. A critical warning is issued regarding the power board: after unplugging the power supply, the capacitance remains charged, and users are advised not to touch it until it is discharged. The location of the part number on the board is also indicated.
Connector repair procedures for HDMI (CN5101), DP (CN551), and AUDIO (CN601) connectors are provided. These repairs are intended for out-of-warranty situations and must be performed by professional repairers in a repair center, not by end-users. Electrostatic protection is required, and lead-free solder wire must be used. Instructions include using a soldering iron and de-soldering pump to remove solder, using a hot air gun to melt solder, lifting the connector, placing the new component, ensuring it matches the circuit board footprint, and soldering the new component. Important considerations for connector replacement include checking specifications and part numbers, careful insertion to avoid short circuits, preventing liquid contact with the board, and working quickly to avoid overheating. After repair, all ports must be tested.
A function test section ensures that all functions are working correctly after repair. This includes HDMI, DP, and Audio tests to confirm image display, sound playback, and volume functionality using a computer or DVD player and speakers.
The troubleshooting section lists common problems, their possible causes, and recommended solutions. For a blank or flashing screen, solutions include connecting the power cord or pressing the power button. If the power button has no effect, pressing and holding it for 10 seconds can disable the Power Button Lockout feature. For a blurred or dark image, connecting the video cable properly or adjusting brightness via the OSD menu is suggested. Messages like "Input Signal Not Found" or "Input Signal Out of Range" indicate issues with video cable connection, incompatible video cards, or unsupported video resolutions/refresh rates, with solutions ranging from connecting cables to changing display settings. If the monitor does not enter sleep mode, activating Auto-Sleep Mode in the OSD menu is recommended. "OSD Lockout" or "Power Button Lockout" messages require pressing and holding specific buttons to disable these functions. If the desktop computer does not turn on, solutions include checking the power cord connection, pressing the monitor power button, or exiting sleep mode. If the monitor is in Power Saver mode, changing the power mode to Performance in the OSD menu is advised. Finally, if the computer turns off when the monitor enters sleep mode, adjusting Windows display orientation settings or changing the monitor's power mode to Performance is suggested.
| Screen Size | 27 inches |
|---|---|
| Resolution | 2560 x 1440 (QHD) |
| Refresh Rate | 165 Hz |
| Panel Type | VA |
| Response Time | 1 ms (MPRT) |
| Aspect Ratio | 16:9 |
| Contrast Ratio | 3000:1 |
| Curvature | 1500R |
| VESA Mount | 100 x 100 mm |
| Adaptive Sync | FreeSync |
| Viewing Angle | 178° |
| Ports | 2x HDMI 2.0, 1x DisplayPort 1.4, 1x 3.5mm Audio Output |