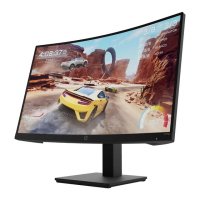
Function test
After repair, be sure to confirm that all functions are working.
Support and troubleshooting
The following table lists possible problems, the possible cause or each problem, and the recommended
solutions.
Function test
After repair, be sure to confirm that all functions are working.
Table 4-1: Function test
Confirm whether image displays and sound plays
correctly on the monitor.
Confirm whether image displays and sound plays
correctly on the monitor.
Change volume and balance to confirm whether
volume is smooth and loud enough.
Confirm whether image displays and sound plays
correctly on the monitor.
Confirm whether image displays and sound plays
correctly on the monitor.
Change volume and balance to confirm whether
volume is smooth and loud enough.
Table 3-1: Solving common problems
Screen is blank or video is
flashing.
Power cord is disconnected.
The monitor is turned off. .
Press the front bezel power button.
NOTE: If pressing the power button has no effect, press
and hold the power button for 10 seconds to disable the
Power Button Lockout feature.
Video cable is improperly connected.
Connect the video cable properly. See Connecting the cables
on page 9 for more information
Press any key on the keyboard or move the mouse to exit
sleep mode.
Video card is incompatible
Open the OSD menu and select the In put menu. Set Auto-
Switch Input to Off and manually select the input
Image appears blurred,
indistinct, or too dark.
Open the OSD menu and select Brightness to adjust the
brightness scale as needed.
“Input Signal Not
Found” is displayed on
the screen
The monitor video cable is
disconnected.
Connect the appropriate video signal cable between the
computer and monitor. Be sure that the computer power is off
while you connect the video cable
“Input Signal Out of Range”
is displayed on the screen
Video resolution and/or refresh rate
are set higher than what the monitor
supports.
Change the settings to a supported setting. See Preset
display resolutions on page 34 for more information.
The monitor is off but it did
not seem to enter in to sleep
mode.
Auto-Sleep Mode is not turned on.
Open the OSD menu and select Power. Then select Auto-
Sleep Mode and set auto-sleep to On.
“OSD Lockout” is displayed
The monitor's OSD Lockout function
is enabled.
Press and hold the Menu button on the front bezelfor10
“Power Button Lockout” is
displayed.
The monitor 's Power Button
Lockout function is enabled.
seconds to disable the OSD Lockout function.
Press and hold the power buttonfor10seconds tod is able
the Power Button Lockout function.
The desktop computer does
not turn on.
The monitor is turned off.
Be sure that the monitor power cord is plugged in to an
AC outlet and press the monitor power button.
The monitor is in sleep mode.
Press any key on the keyboard ormove the mouse to exit
sleep mode.
The monitor is in Power Saver
mode
Open the OSD menu, select Power, and then change the
power mode to Performance.

 Loading...