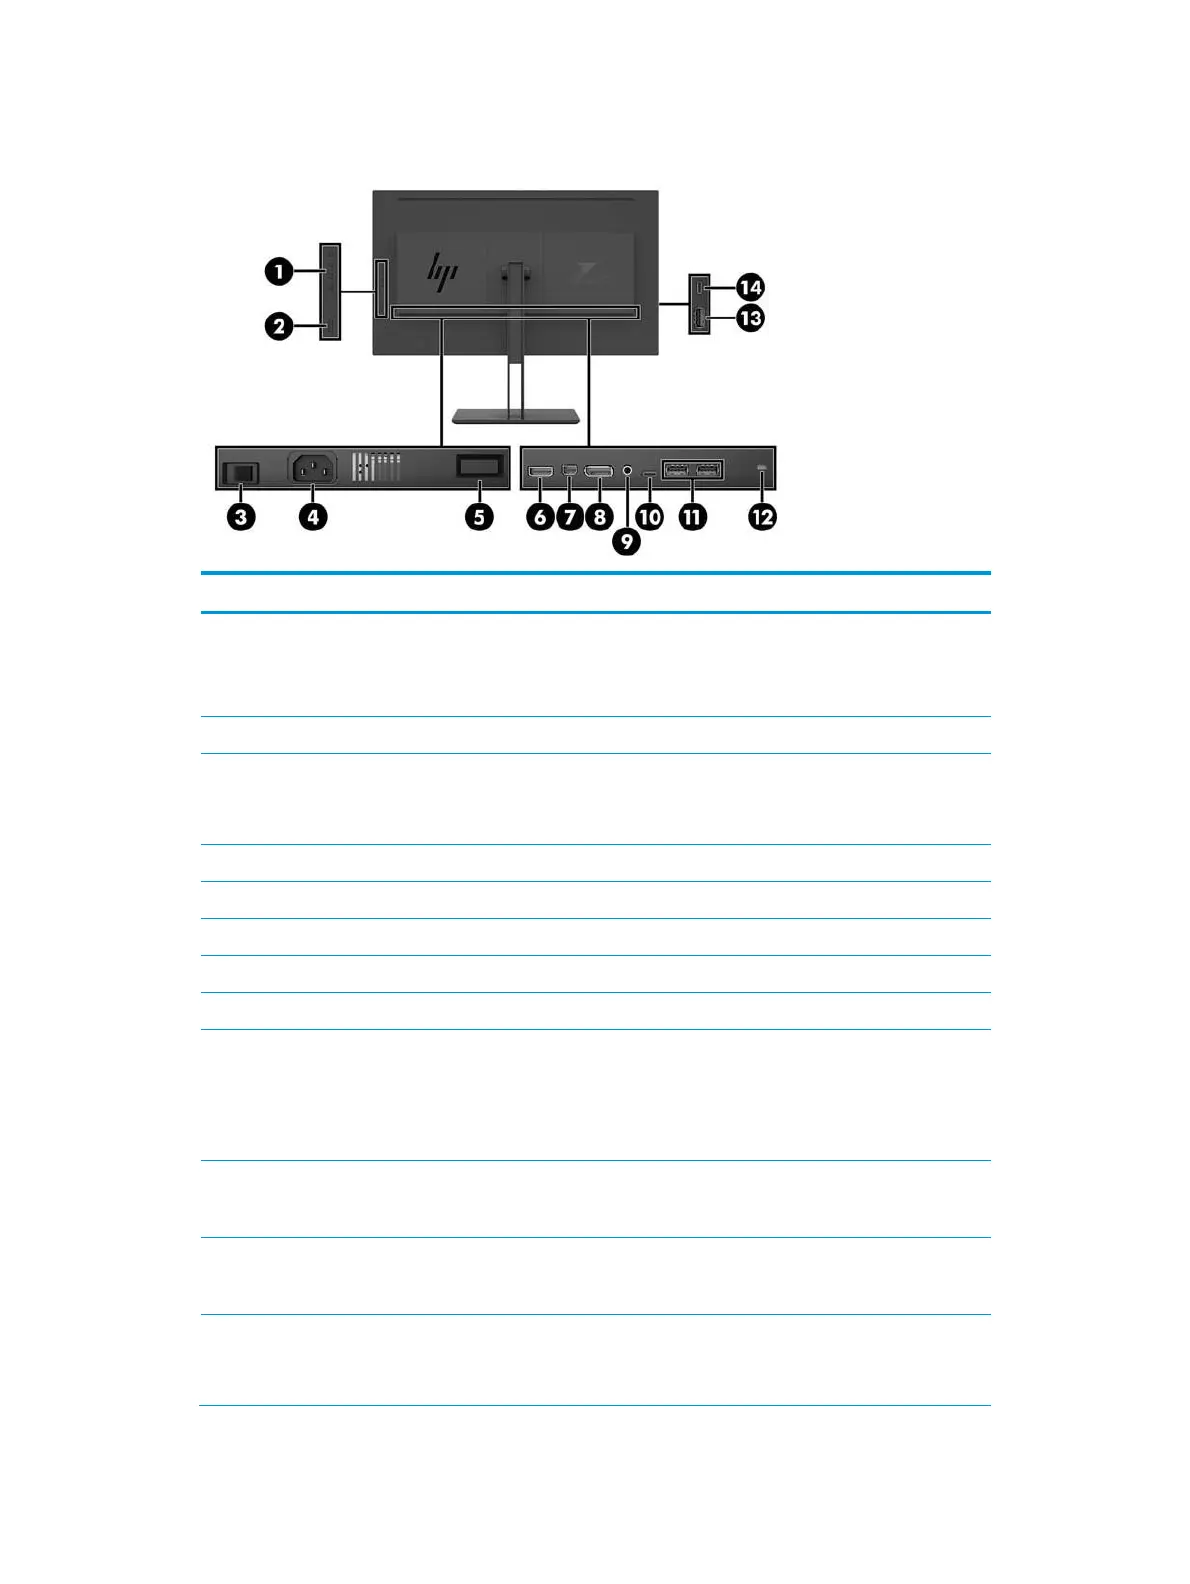
Rear components
Use these buttons to navigate through the OSD menu based on the
indicators above the buttons that are activated while the OSD menu is open.
NOTE: You can assign the Function buttons in the OSD menu to quickly
select the most commonly used operations.
Press the button to turn the monitor on or off.
Turns on or off all power to the monitor.
NOTE: Putting the switch in the Off position will yield the lowest power
state for the monitor when not in use.
Releases the stand from the monitor.
Connects the HDMI cable from the source device to the monitor.
Connects the Mini DisplayPort cable from the source device to the monitor.
Connects the DisplayPort cable from the source device to the monitor.
Audio-out (headphone)
jack
Connects optional powered stereo speakers, headphones, earbuds, a
headset, or a television audio cable.
WARNING! To reduce the risk of personal injury, reduce the volume before
using headphones, earbuds, or a headset. For additional safety information,
see the Product Notices provided with your product.
USB Type-C port with
battery charging
(upstream)
Connects a USB Type-C cable to a source device.
USB Type-A ports (2) with
battery charging
(downstream)
Connect the USB hub cable from the source device to the monitor.
Connects a security cable to a stationary object.
NOTE: The security cable is designed to act as a deterrent, but it may not
prevent the monitor from being mishandled or stolen.