7
Installing the Power Supply
Installation Steps
Follow these steps to install the power supply into the back of the switch:
1. Remove the power supply slot cover with either a flat-bladed or
Torx T-10 screwdriver. Retain the slot cover for future use.
Caution Make sure the AC power is not connected to the power supply being installed
before installing the power supply into the switch. The switch can be receiving
power from the other power supply during the installation of the second unit.
2. Insert the power supply into the opening making sure it is centered
in the opening. This will assure that the guide rails on the bottom of the
power supply engage the rails on the bottom of the switch. Then, slide the
power supply all the way in until its bulkhead contacts the back face of
the switch.
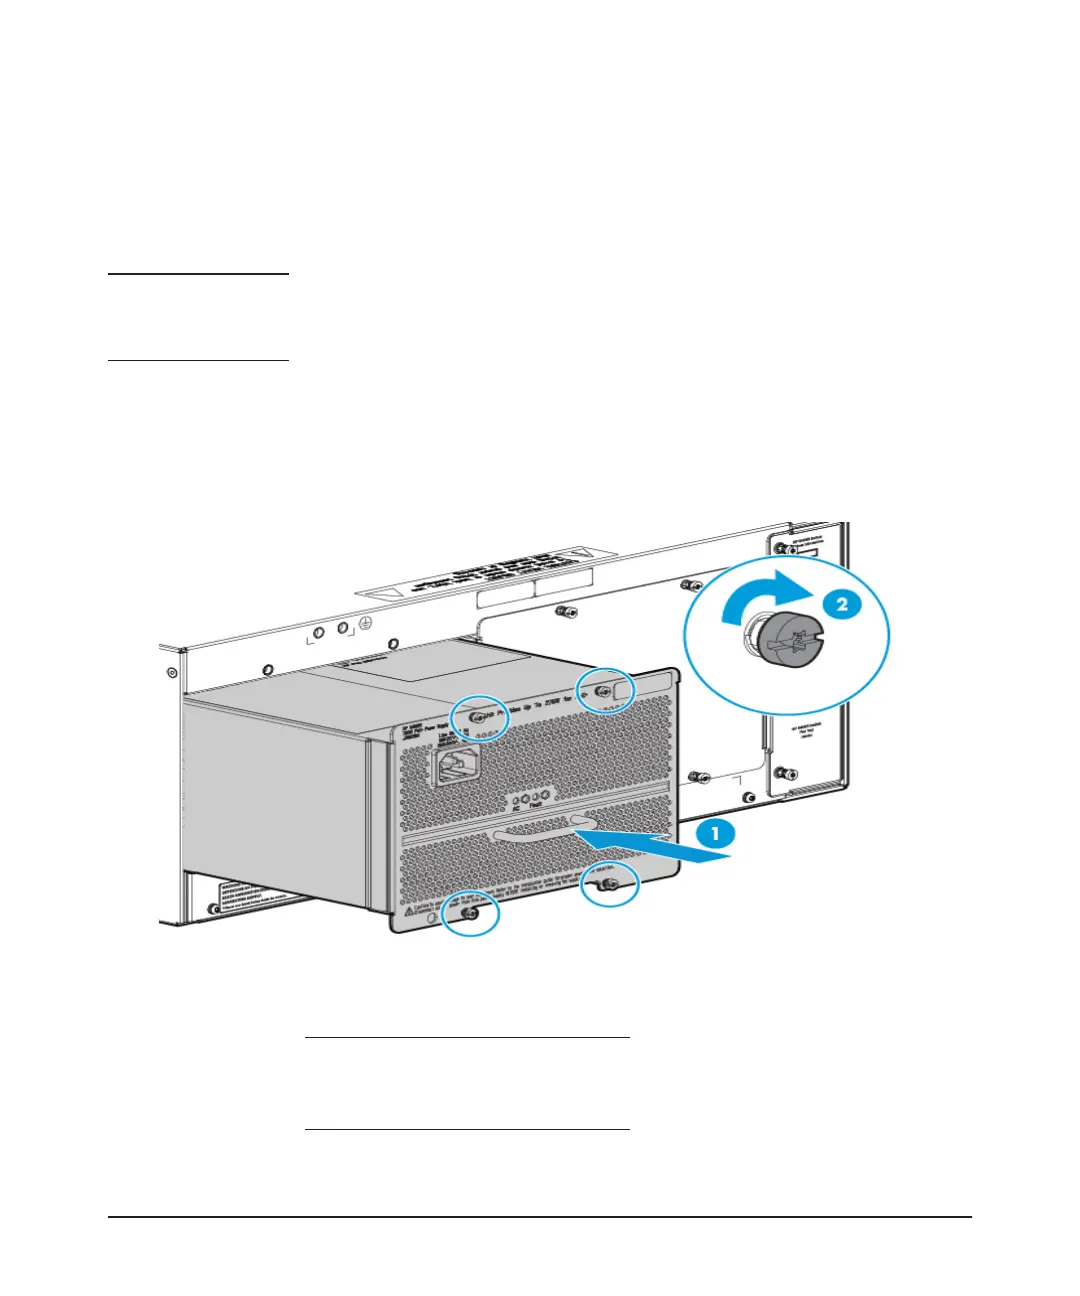
Figure 4. Installing a power supply
1 Insert the power supply into
the switch chassis.
2 Retaining screws