Procedure
1. Install the server rails, as illustrated on the
installation instructions that ship with the rail kit.
NOTE: To leave room for future storage expansion,
install the base storage enclosure under the server
node. The system has a maximum of three
enclosures above the server node and three
enclosures under it.
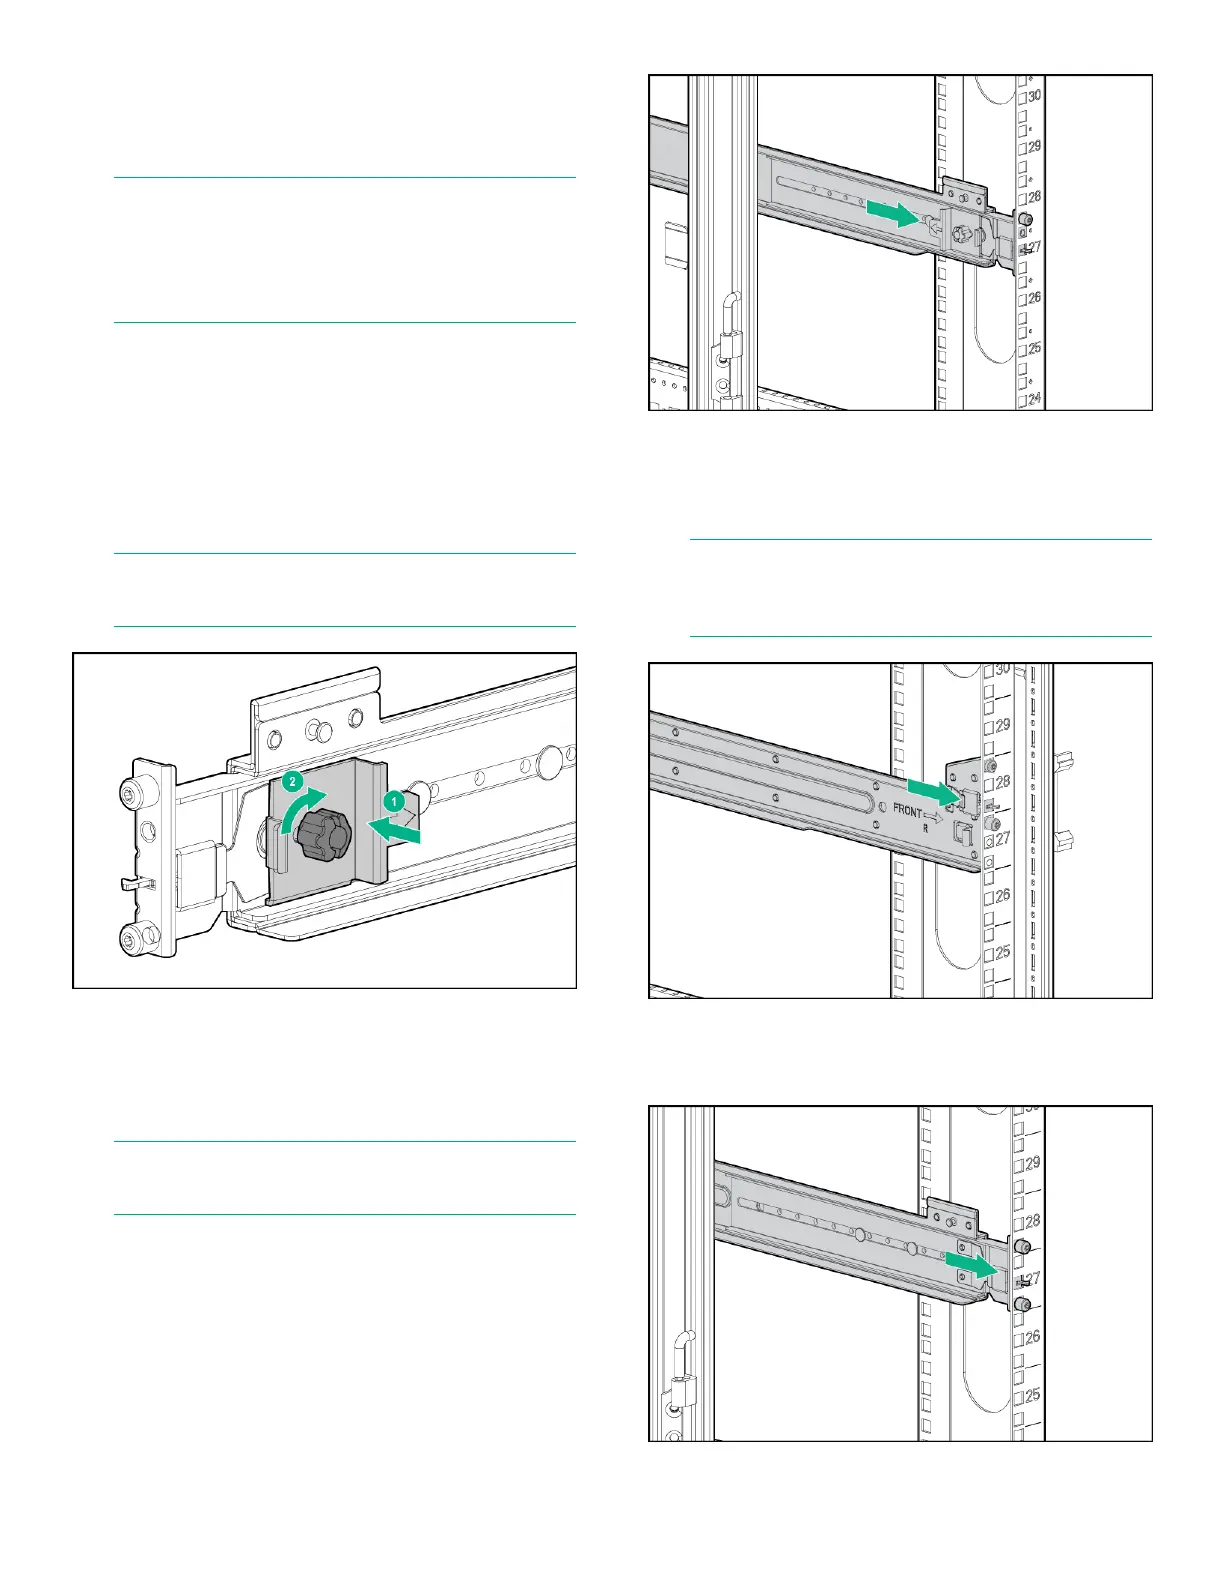
2. Adjust the back bracket on the standard rail kit to
accommodate the storage enclosure.
Attach rear hold down brackets by sliding the tab
with the arrow pointed forward (1) into the
corresponding slot on each side of the rear of the
chassis. Use the black headed thumb screw to
secure tightly to the rail in the second hole from the
rear (2).
NOTE: It is easier to make this adjustment prior to
mounting the rails.
3. Position left and right rack rails at the desired 'U'
position in the rack, adjusting the rails to fit the rack,
as needed. Front and Rear bottom edge of rails
must align with the bottom of EIA boundary in the
lowermost 'U'
NOTE: Rails are marked L and R, with an arrow
indicating the direction the rail is installed.
4. Use guide pins to align the shelf mount kit to the
RETMA column holes.
5. To engage the rear, push the rail toward the back of
the rack until the spring hook snaps into place.
6. To engage the front, pull the rail towards the front of
the rack to engage the spring hook with the RETMA
column in the same manner as the rear spring
hook.
NOTE: Make sure that the respective guide pins for
the square or round hole rack align properly into
RETMA column hole spacing.
7. Secure the rear of the rack rail to the RETMA
column with either the provided round- or square-
hole shoulder screws.
Page 3
 Loading...