Pre-Installation
1. WARNING There must be an adequate wall, column, or truss to support the jib crane. Consult
a qualified structural engineer to determine if the support structure is adequate to support the
thrust and pull of your crane (See Crane Drawing for Thrust and Pull)
2. Ensure there will be sufficient clearance (3” minimum) above the boom throughout the rotation.
3. Check jib crane for physical damage due to shipping.
4. Ensure all capacity stickers and warning labels are clearly visible and properly affixed.
5. Check packing list to ensure no parts have been lost prior to initiating assembly of crane.
6. See Jib Crane Drawing for bolt locations and dimensions.
7. Read
entire manual before installing the crane.
Installation
1. WARNING If multiple cranes were ordered, locate stamped serial number on each crane part
for proper part matching during installation. Although crane parts may appear to be identical,
each crane is assembled and built separately. All parts that do not have the same stamped
serial number may not line up properly for installation.
2. Reference Jib Crane Drawing included in the crane information packet.
3. Make sure the support structure (COLUMN) is plumb for installation. Prepare the COLUMN for
jib fittings.
4. Use the Crane Drawing as a guide to determine the bracket hole layout for the TOP FITTING
bracket and
BOTTOM FITTING bracket. Make sure the bracket holes are p
roperly
aligned.
5. Drill bolt holes for the TOP FITTING bracket and BOTTOM FITTING bracket, and bolt
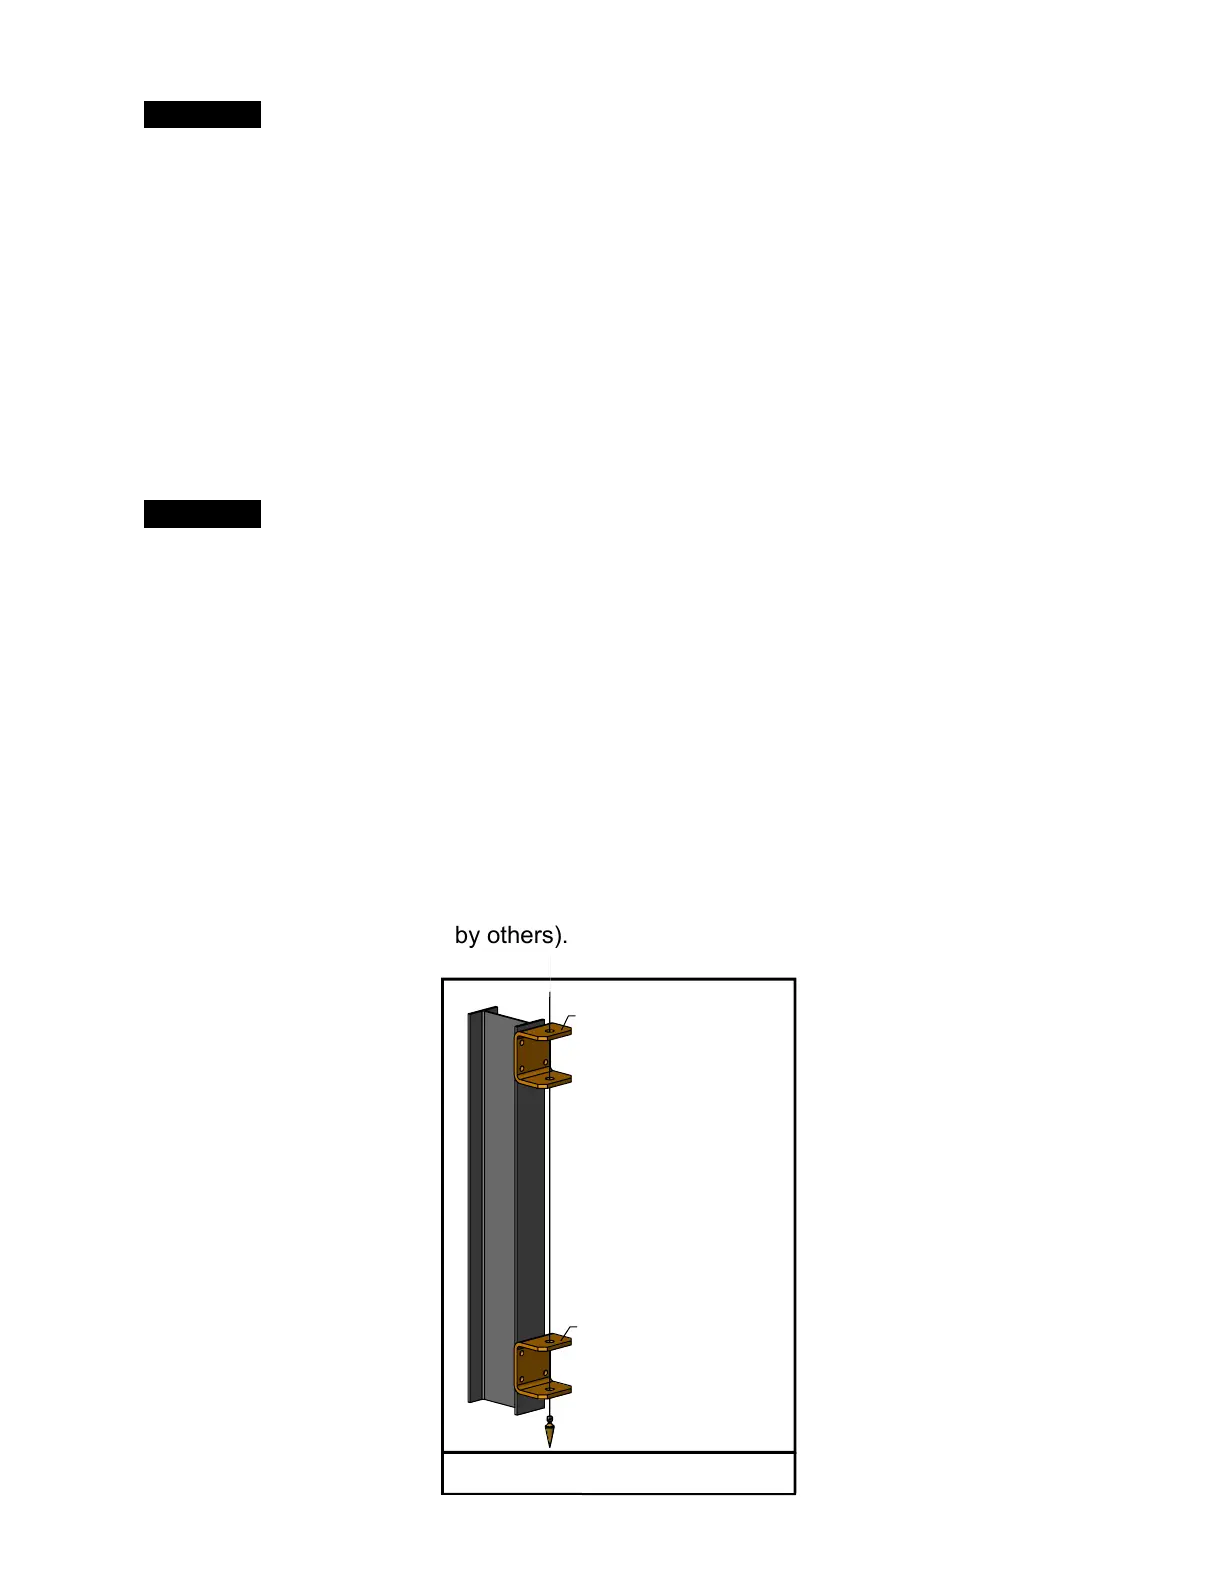
them to supporting structure (COLUMN). Do not torque bolts until brackets are plumb.
See Figure 1. Note: Hardware to bolt fittings to COLUMN is supplied by others.
6. Plumb TOP FITTING and BOTTOM FITTING through pivot holes. If necessary, shim between
COLUMN and fittings (shims by others).
Figure 1Plumbing brackets
UPPER WALL BRACKET
LOWER WALL BRACKET