52
LP-542 REV. 6.2.16
Software Version for Front Panel
Software Version for Boiler
Hardware Version for Boiler
Table 22 – Start-Up Sequence
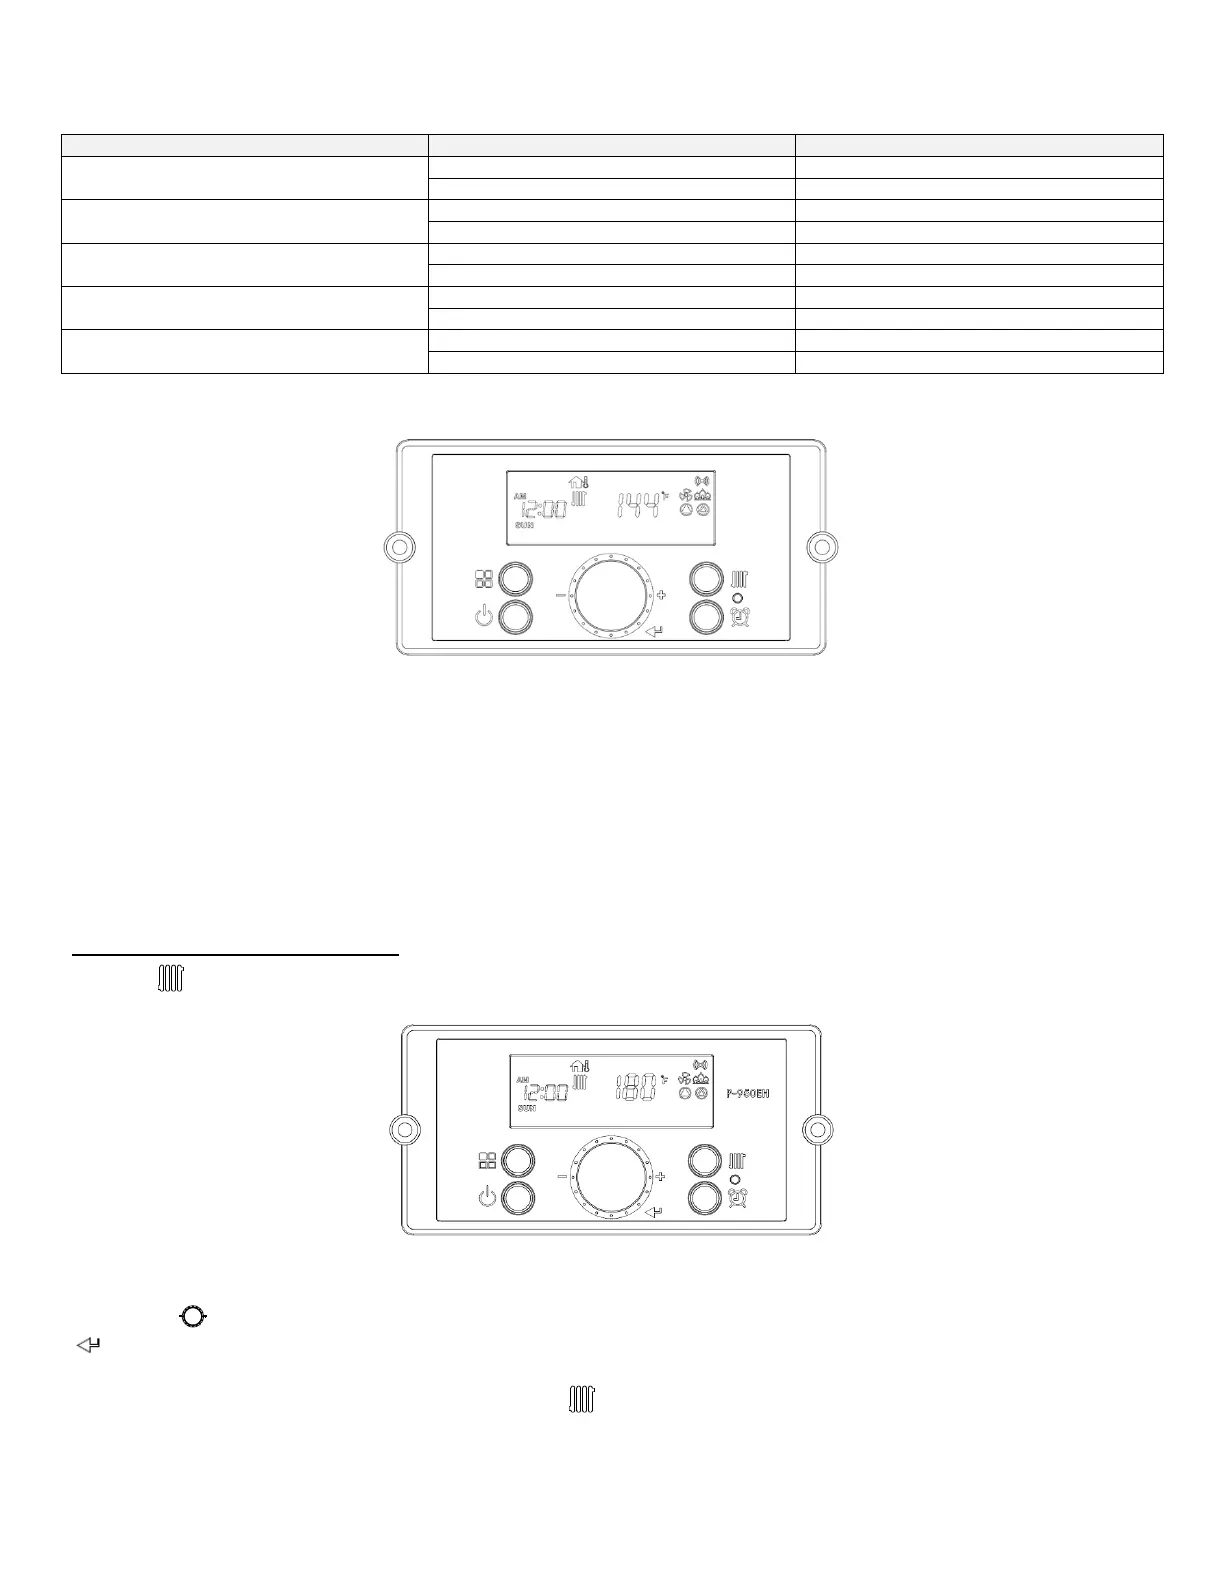
After start-up, the display appears as follows.
Figure 44 – Initial Display Screen Example
NOTE: The initial display screen will differ depending on a number of factors, including whether the boiler detects a call for heat or hot
water.
The Control System can operate through user and service modes that have specific LCD outputs and dedicated controls, including:
Changing the Set-Point Temperature
Changing the Time
Status Display Mode
Installer Mode
Error Mode
Outdoor Temperature Mode
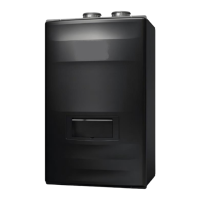
D. CHANGING THE CH SET-POINT
Press the button when the display panel is powered ON. The display will appear as follows. The set-point will flash when the CH
Set-Point can be changed.
Figure 45 – CH Set-Point Screen
Factory CH Set-Point is 180
o
F (82
o
C). CH Set-Point range is 86 – 180
o
F (30 – 82
o
C).
Turn the dial counterclockwise to lower and clockwise to raise the current CH set-point. After changing the temperature, press the
button to save the setting.
NOTE: The CH Set-Point cannot be changed by pressing the button if an outdoor sensor or 0-10V is connected to the boiler. When
using an outdoor sensor, the boiler will automatically change the target temperature based on the outdoor reset curve. When using 0-
10V, the boiler will automatically change the target temperature based on input voltage.