4
4
I
I
n
n
s
s
t
t
a
a
l
l
l
l
a
a
t
t
i
i
o
o
n
n
D
D
e
e
s
s
c
c
r
r
i
i
p
p
t
t
i
i
o
o
n
n
HUAWEI
25
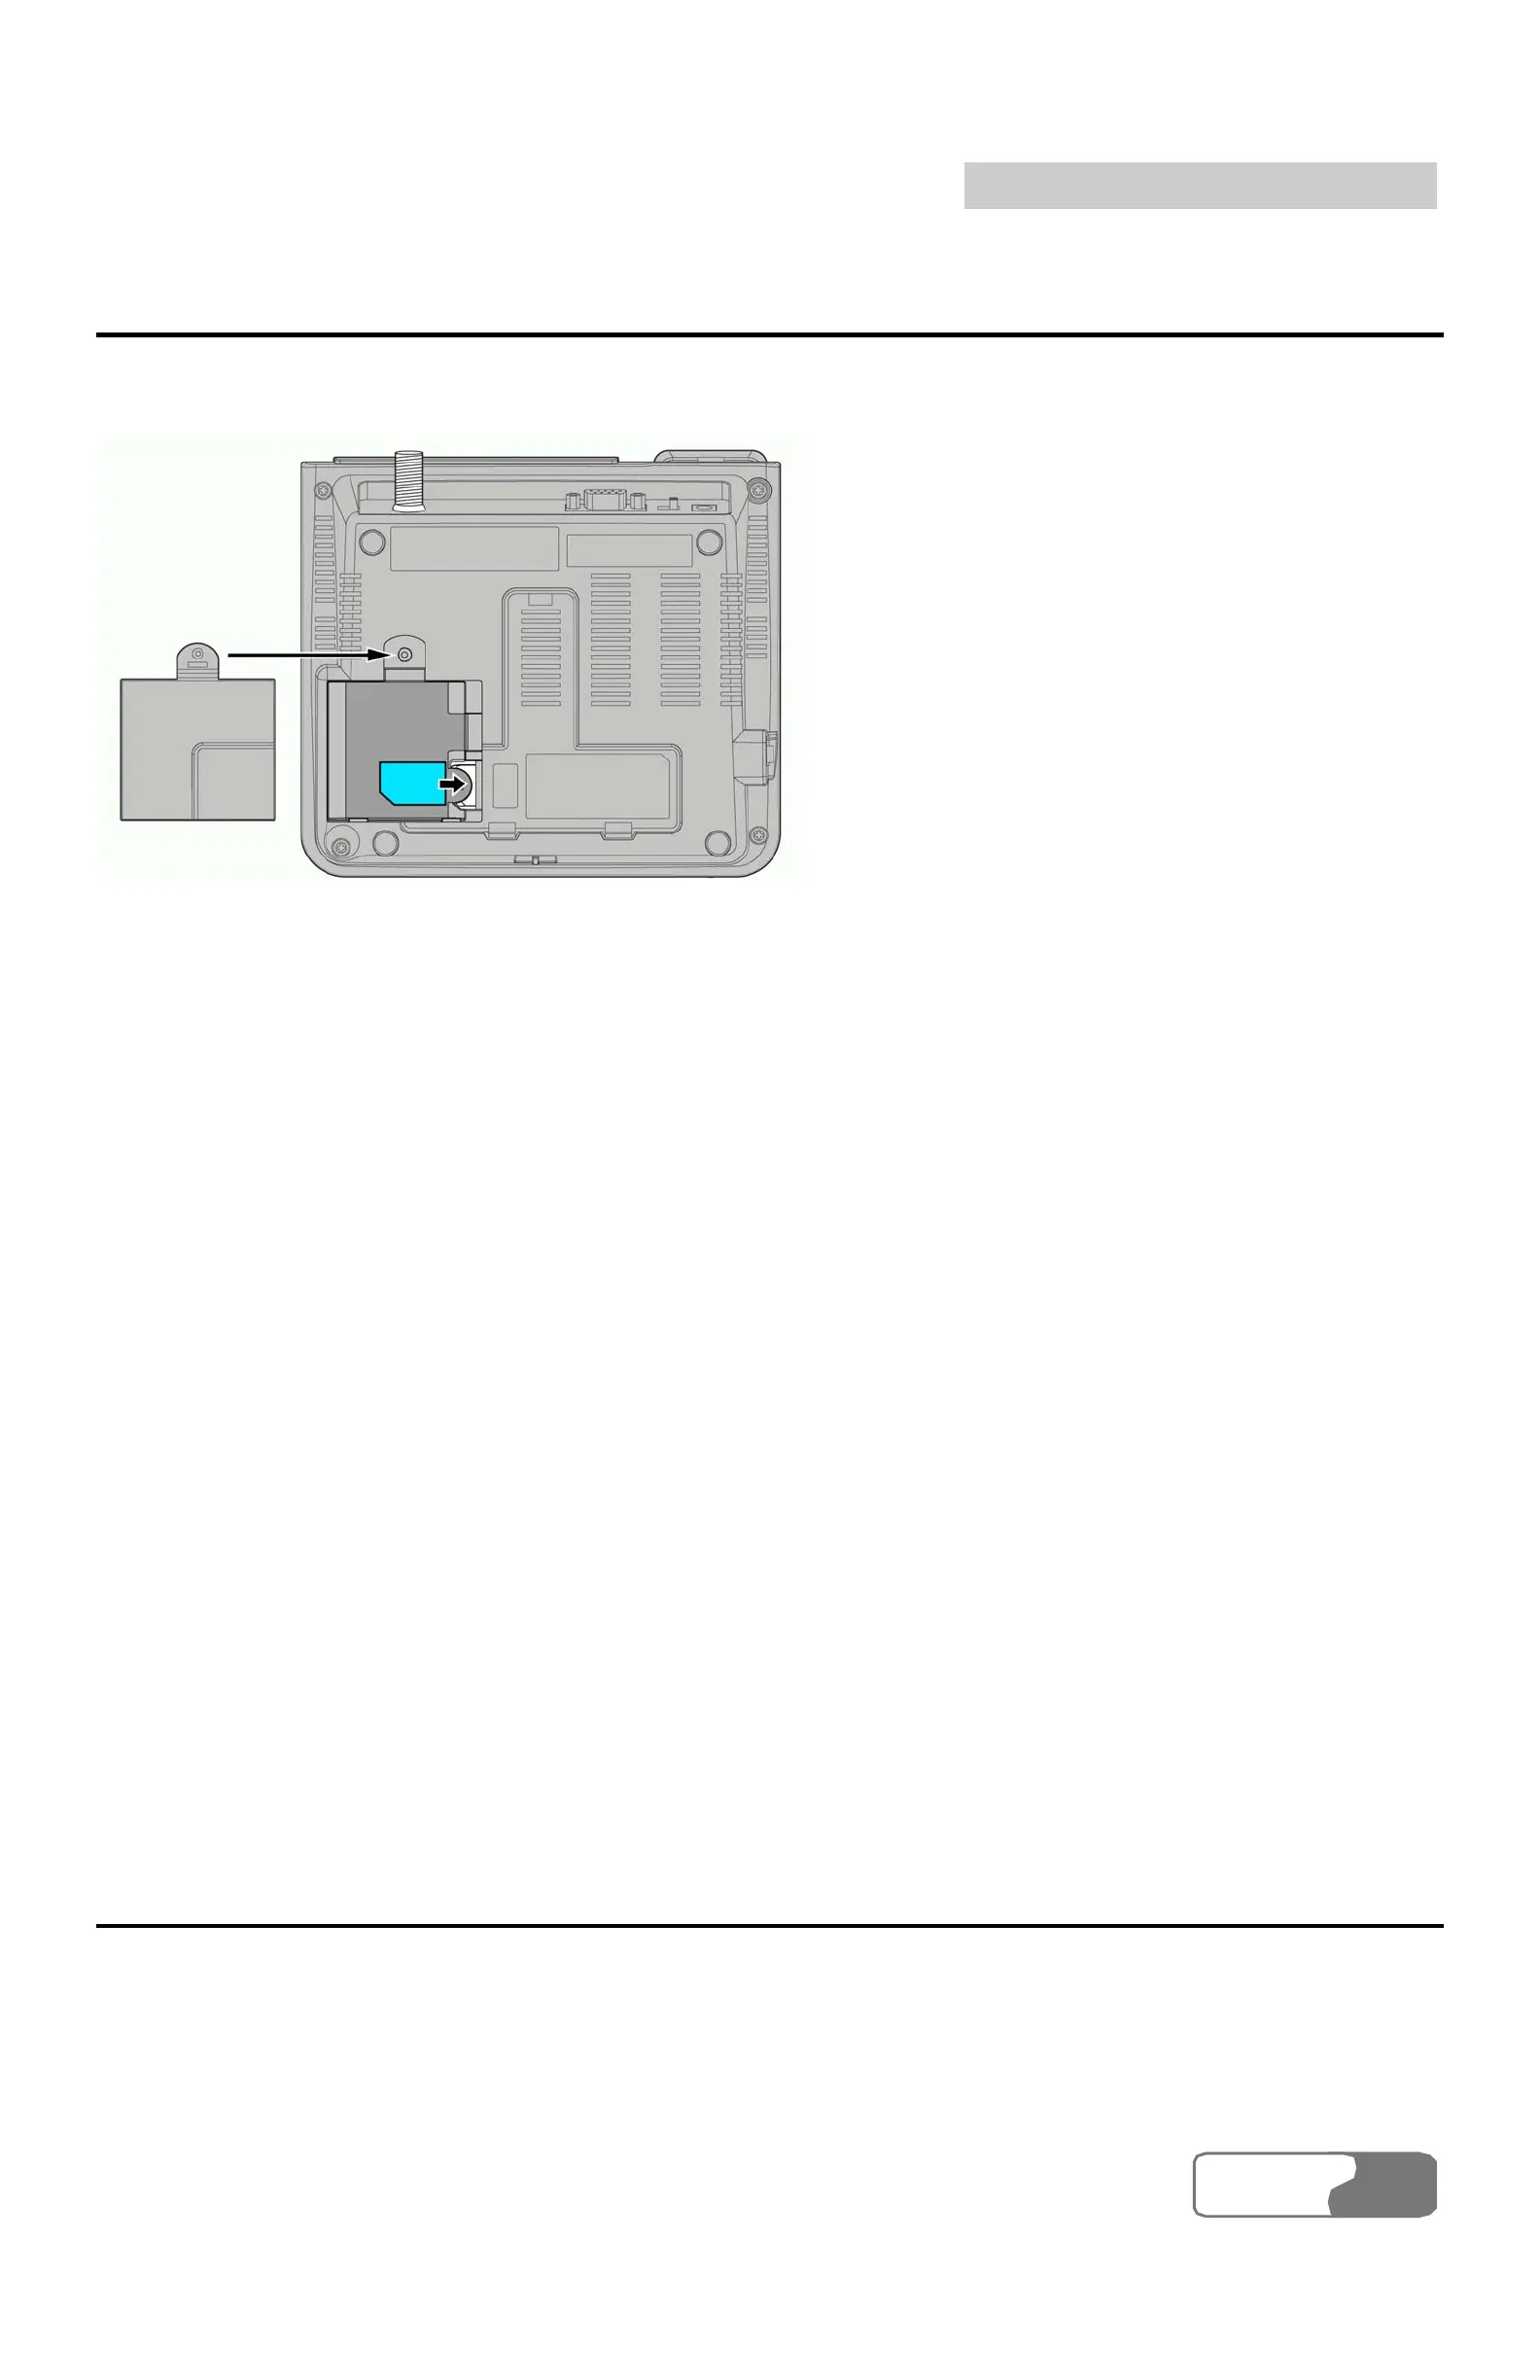
R-UIM Card Installation (Optional)
R-UIM card installation schematic drawing is shown in Figure 4-2.
Figure 4-2 R-UIM card installation
1. Open the spare battery case cover. If it is fixed with the tapping screw, use a
screwdriver to untie the tapping screw and then open the cover.
2. Insert the R-UIM card into the slot, the arrowhead-pointed place shown in
Figure 4-2. Note that you should put the corner-cut side to the outside and the
golden-contact side downwards and then make sure the R-UIM card is
completely inserted into the slot.
3. Put back the battery, cover the battery case and fix the tapping screw
(optional). R-UIM card installation is finished.
Note:
z Consult the carrier that whether you should install an R-UIM
(Removable-User Identity Module) card;
z Before installing the R-UIM card, you must turn off the FWT,
disconnect the FWT from the power adapter and detach the battery. Be
careful when inserting or taking out the R-UIM card.
Connecting the FWT to a PC
The FWT can be connected to a PC to provide data services, maintenance and
debugging.
To support data services, you should purchase the data service suite, in which you