5
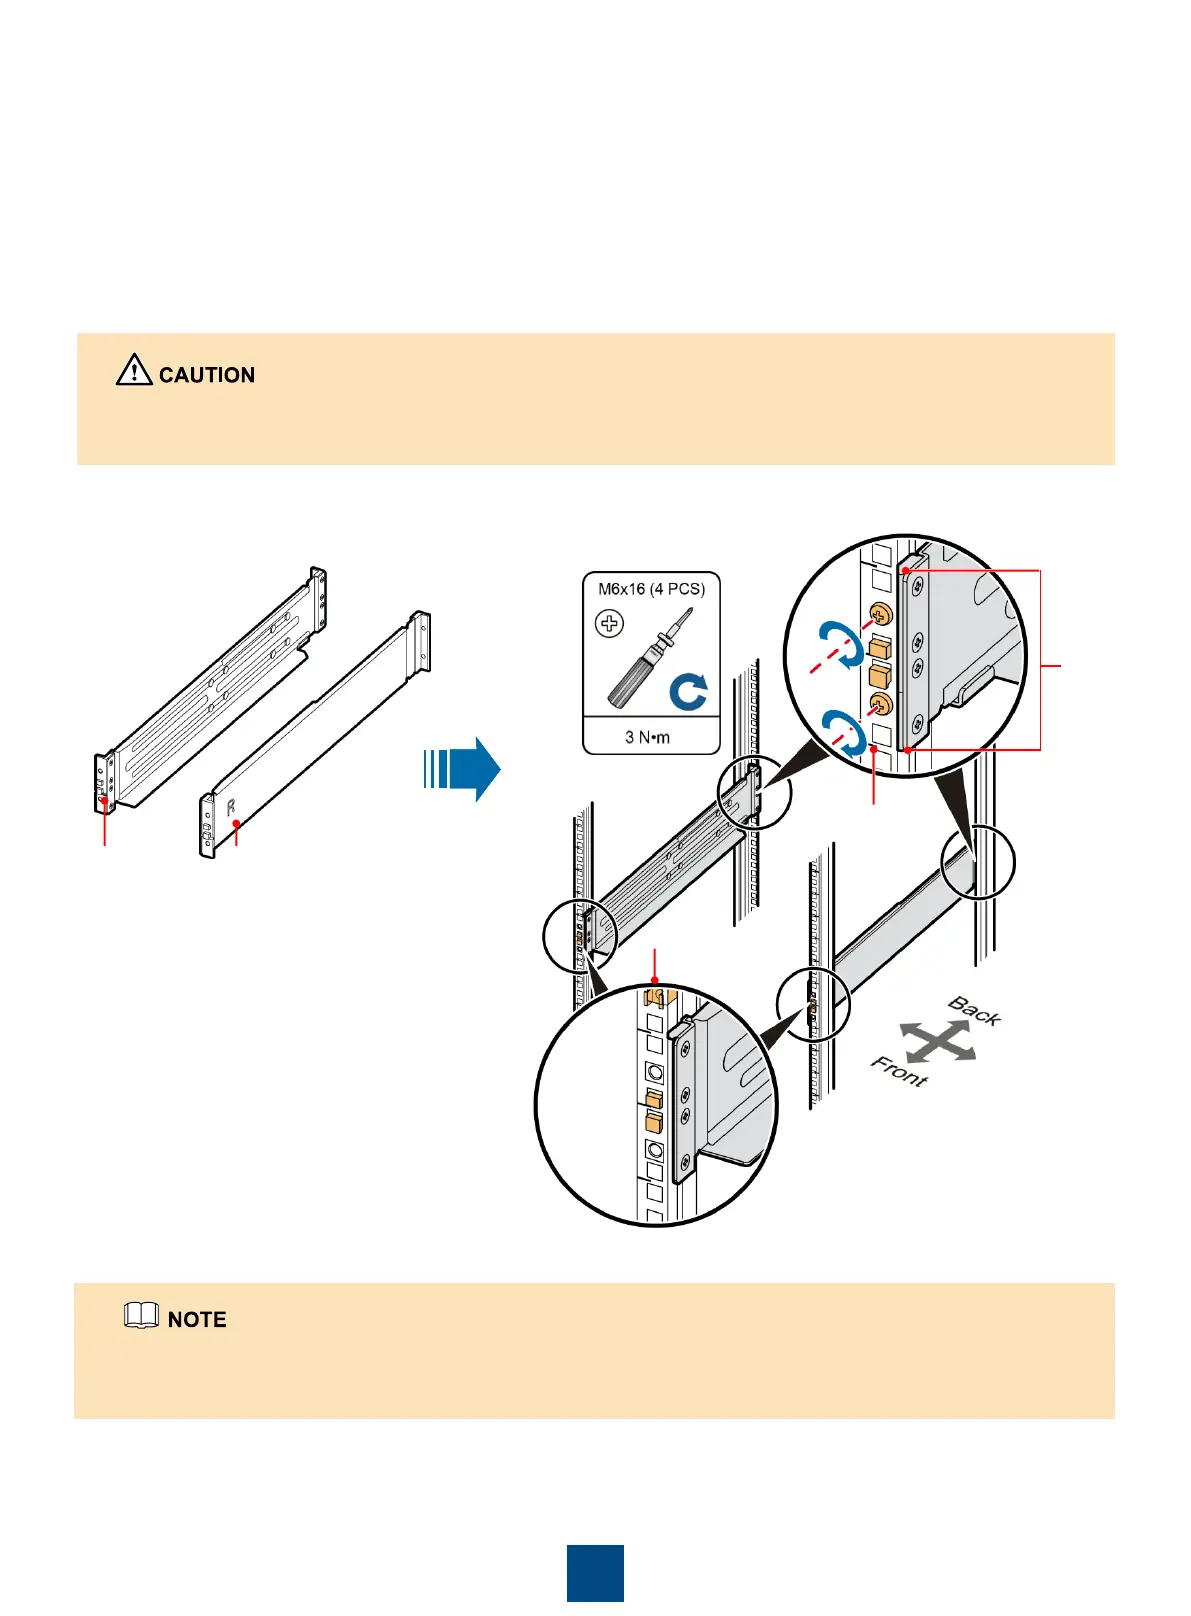
Method 2: Adjustable guide rails (optional) + Floating nuts
Lower edge
of a U scale
The guide rail on the right has the R silkscreen, and the guide rail on the left has the L silkscreen. Do not install them
reversely.
Floating nut
Guide rails are optional and recommended for rack installation. For a 3 U device, install guide rails and two floating nuts.
Secure the device with screws. The floating nuts are delivered with the rack.
A. Fix the position of the guide rails (2 U) on the rack align the lower edge of a guide rail with the lower edge
of a U scale.
B. Engage the mounting brackets on both ends of the guide rail into the mounting holes, and then secure the
back end of the guide rail with M6 x 16 panel screws. Do not install panel screws on the front end of the
guide rail. Use the same method to install the other guide rail.
C. Install floating nuts in the upper part of the guide rails (front side) on both sides. The following figure shows
the installation positions.
The
guide rail
on the
left
The
guide rail
on the
right
2 U

 Loading...