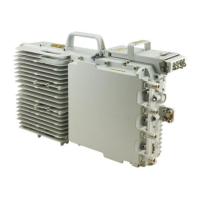
Figure 4-3 Lifting the bottom of the RRU
Step 8 Tighten the captive screws on the two contact pieces of the main bracket until the tightening
torque reaches 1.4 N·m.
Step 9 Install a new RRU, and then waterproof the RRU.
Step 10 Insert all the cables to be connected to the RRU, and then check that the idle cables trough in
the cabling cavity are fitted with waterproof fillers.
Step 11 Close the cover plate of the cabling cavity of the RRU, and then tighten the screw for protecting
the cabling cavity on the cover plate until the tightening torque reaches 1.4 N·m.
Step 12 Power on the RRU. For details, see 3.1 Powering On the RRU.
Step 13 Check whether the new RRU is functional according to the status of the LEDs on the RRU. For
details about the LEDs, see RRU Indicators.
Step 14 Take off the ESD wrist strap or gloves, and then pack up all the tools.
----End
Postrequisite
l Place the replaced RRU into the ESD box or bag. Then, place the ESD box or bag into a
carton padded with foam or into the packing box of the new RRU.
l Fill in the fault form with the details of the replaced component.
l Contact the local Huawei office to handle the faulty component.
RRU3908 V2
Hardware Maintenance Guide 4 Replacing the RRU
Issue 01 (2010-04-10) Huawei Proprietary and Confidential
Copyright © Huawei Technologies Co., Ltd.
4-3
 Loading...