19. Push complete piston from front using brass drift.
Allow clearance, with stand-off, for piston as it
leaves tool.
20. Remove Piston Assembly Bullet, Spacer and
Polyseal Insertion/removal Tool. NOTE: Inspect
hydraulic piston for wear, scoring or damage.
Replace when necessary.
21. Unscrew Adapter, 123761, with wrench.
22. Inspect all seals and parts.
23. Remove trigger cable assembly by removing pin
with parallel punch. Remove dowel pin to discon-
nect cable from trigger.
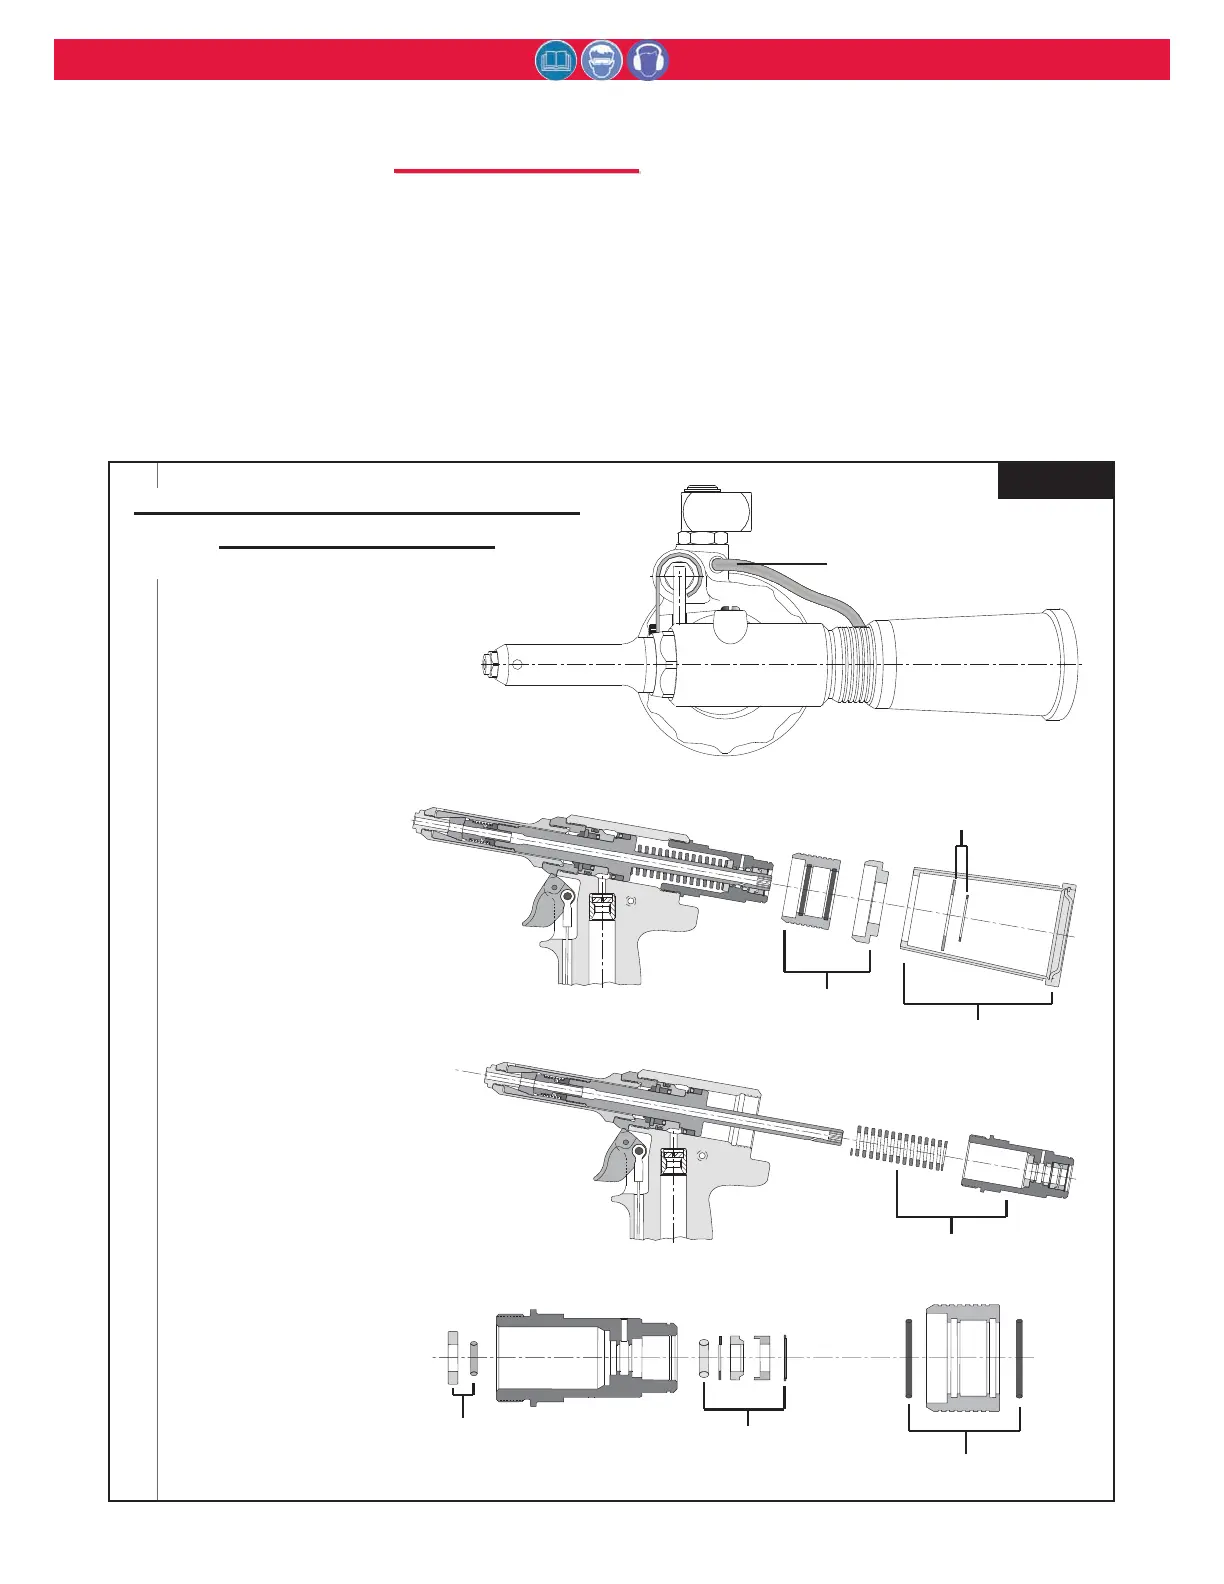
1. Remove Vacuum Tube from
Cylinder.
(2012V only)
2. Place handle/head securely in
vise.Use 0100 TRUARC pliers,
502857, to remove retaining
ring. Reach through window
of pintail bottle. Remove
washer.
3. Remove pintail bottle.
4. Remove bottle adapter and vac-
uum ON/OFF slide.
5. Remove end cap assembly
and spring.
6. Remove washer and O-ring
from spring side of end cap.
7. Remove retaining ring on bottle
side of end cap. Remove
spacer, wiper seal, washer
and O-ring.
8. Remove O-rings from ON/OFF
slide.
Special Disassembly Instructions
for 2012B and 2012V
Figure 3
D
D
ISASSEMBLY
ISASSEMBLY continued