12
202 Series Tooling (HK938) Alcoa Fastening Systems
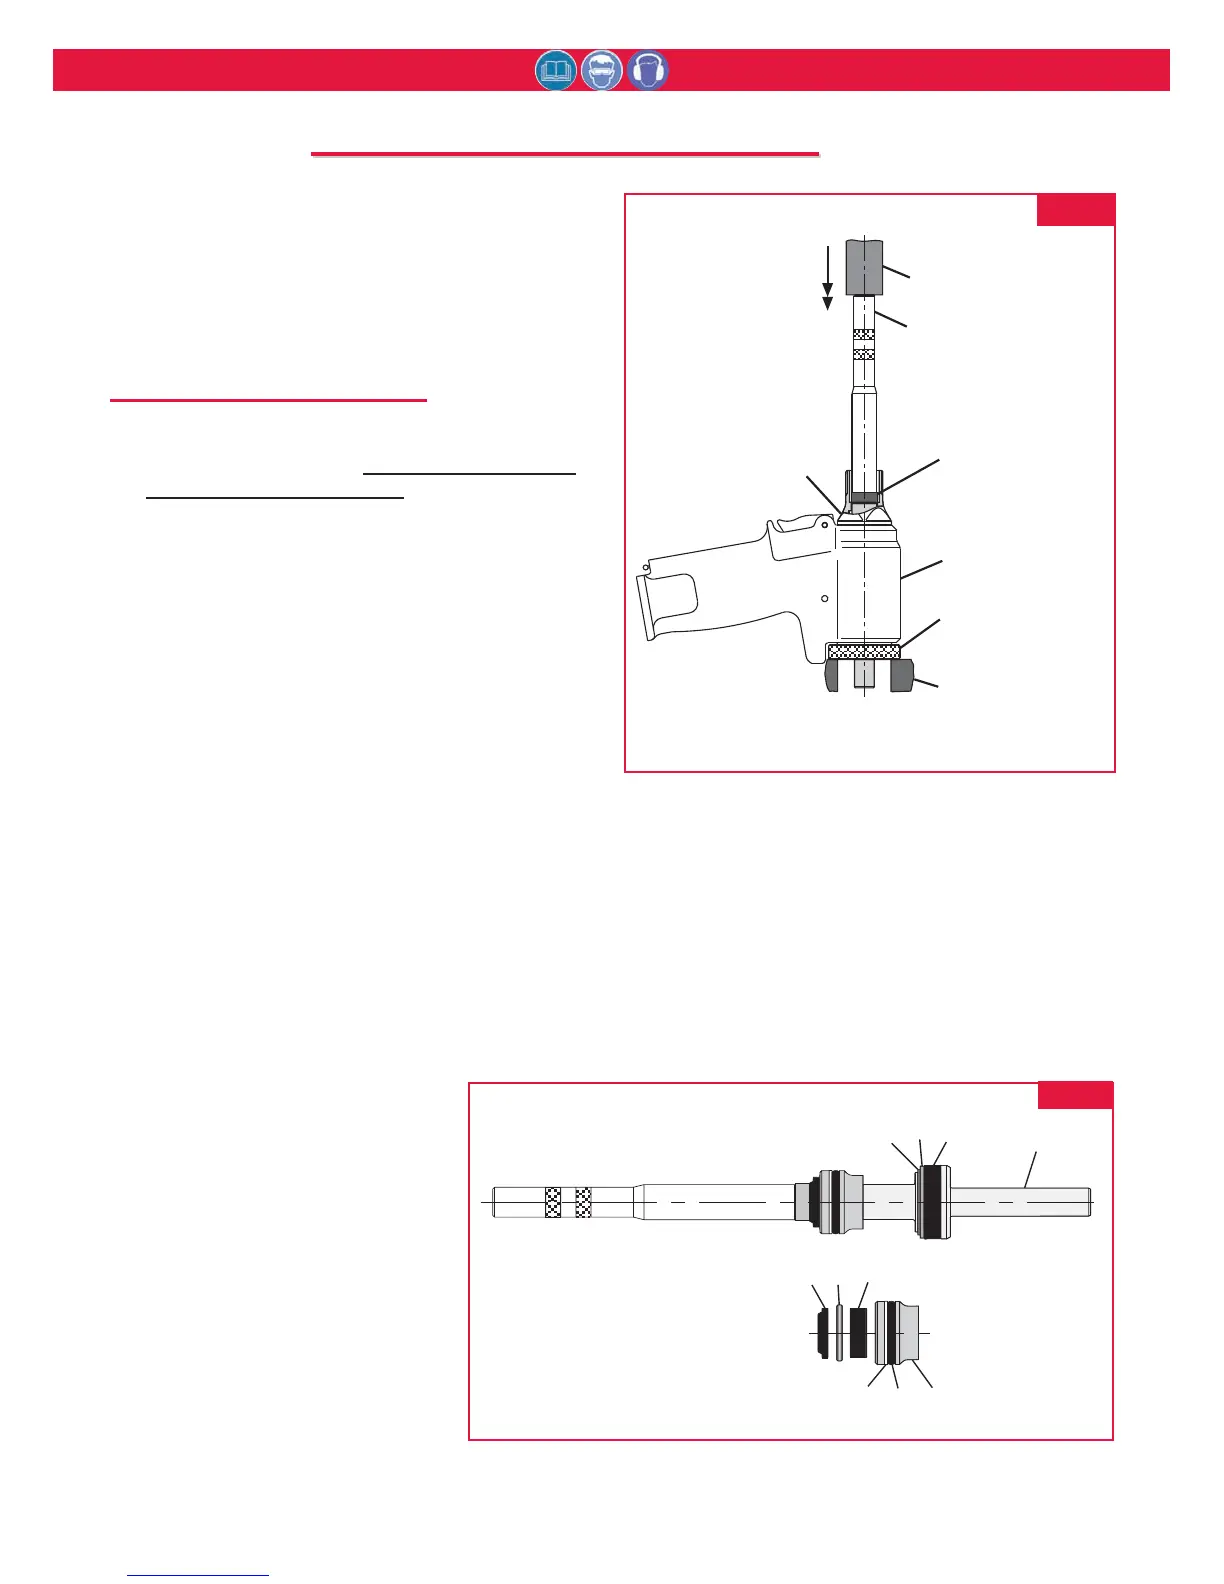
12. Lift Cylinder (35) from handle/head (1) (Fig. 2).
13. Turn handle/head (1) over and drain fluid into
container. Discard fluid.
14. Pull Throttle Valve (52) out of air Cylinder (35).
Remove O-Rings (50) (Fig. 14).
HEAD/HANDLE 202 & 202L:
15. Unscrew End Cap (21) and remove Spring (19),
Spacer (22) and Wiper Seal (23). NOTE: For
202V please reference Disassembly of Pintail
Bottle and Vacuum System procedure.
16. Thread POLYSEAL Insertion/removal Tool
(121694-202), into rear of Handle/head. (Fig. 3)
17. Slide Spacer (123112-2 for 202 or 123112-3 for
202L) onto piston.
18. Thread Piston Assembly Tool (123111-2 for 202 or
123111-4 for 202L) onto piston.
19. Push piston and front gland assemblies out the
back of the Handle/Head (1). Allow clearance, with
stand-off, for piston as it leaves the tool (Fig. 4).
20. Remove piston assembly tool and spacer from
piston. Rethread on the piston assembly tool only,
then slide front gland assembly off the Piston (6).
21. Remove Piston Assembly Tool from Piston (6).
Remove POLYSEAL Insertion/removal Tool from
rear of Head/Handle (1).
23. Remove Retaining Ring (16), Washer (17) and
POLYSEAL (18) from piston. NOTE: Inspect
hydraulic piston for wear, scoring or damage.
Replace when necessary.
24. Unscrew Adapter (8) (Fig. 14).
25. Inspect all seals and parts.
24. If frayed or broken, remove
trigger Cable Assy (2) by
driving Pin (4) out with punch.
Remove Dowel Pin (3) to
disconnect cable from trigger.