10
244 series Pneudraulic Installation Tools (HK989) Alcoa Fastening Systems & Rings
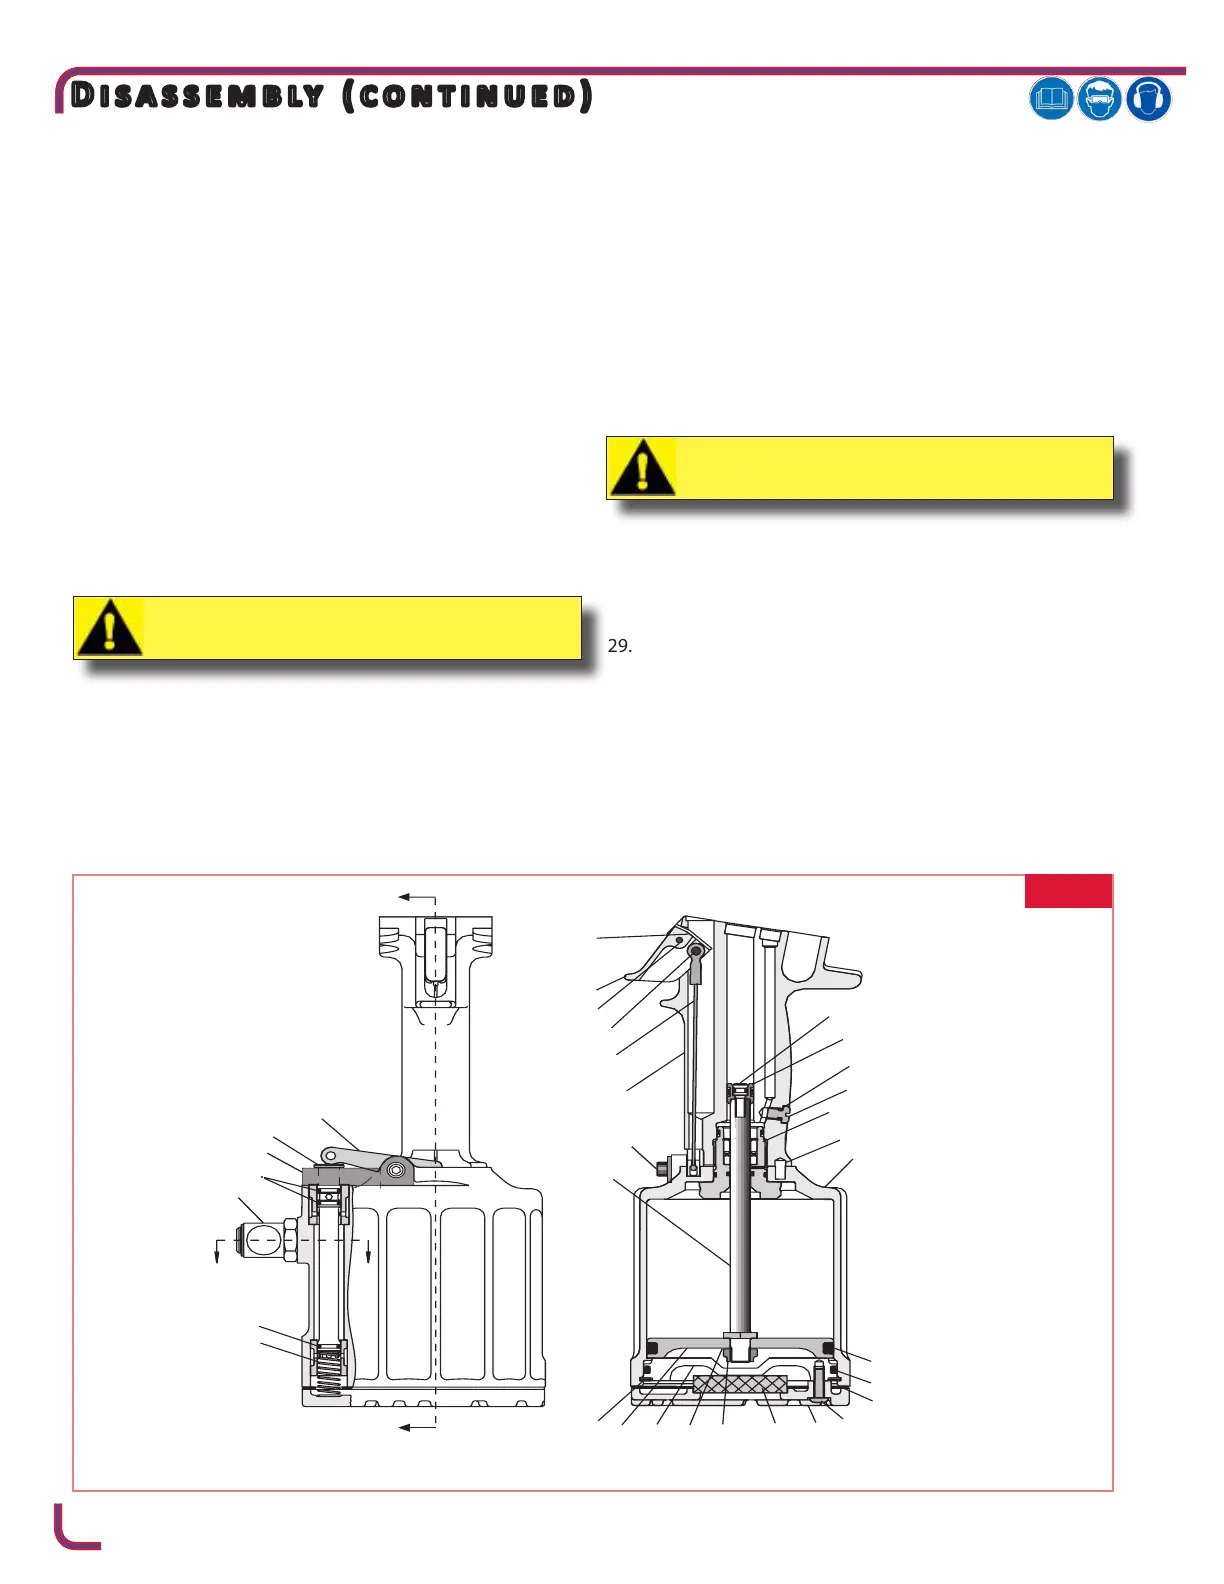
17. Remove Bleed Plug (40) from handle (Fig3).
18. Hold tool inverted in vice. Unscrew three Button Head
Screws (55) with 1/8 hex key (Fig3).
19. Remove Bottom Plate (56), Gasket (54) and Muer (57)
(Fig3).
20. Remove Retaining Ring (62) from Cylinder Assembly (51)
(Fig3).
21. Install Screws (55) into Cylinder Head (60). Carefully pry
under screws to remove cylinder head.
22. Push air piston all the way down in cylinder, lay tool
on its side. Hold Locknut (58) with a 9/16 socket and
extension and with 7/64 hex key, remove piston Screw
(34).
23. Grip Locknut (58) under Air Piston with pliers and pull
piston and rod assembly from handle and cylinder
assembly.
24. Turn cylinder and handle upside down and secure in a
vise.
25. With a 1 3/8 socket and extension, remove Gland
Assembly (41). Handle and cylinder will now separate
(Fig3).
26. Push Piston Assembly (33) out of handle. Push out from
top to bottom.
27. To service handle sleeve and handle, use a blunt-tipped
punch to gently tap sleeve from top of handle through
the bottom. Inspect sleeve for damage or wear, and
replace if necessary. Service O-ring inside handle bore.
28. Remove Swivel Assembly (86) from cylinder. Swivel
Assembly may be disassembled to replace seals (32 &
87) if necessary. (Fig. 9)
29. To remove Polyseal (43) from Gland Assembly (41),
remove Retaining Ring (45) and Spacer (44). (Fig. 9a/b)
FIG. 3
CAUTION: Care must be given not to scratch
piston rod or cylinder during removal.
CAUTION: A plastic or wooden drift must be
used to avoid damaging the handle bore.


 To Next Page