20
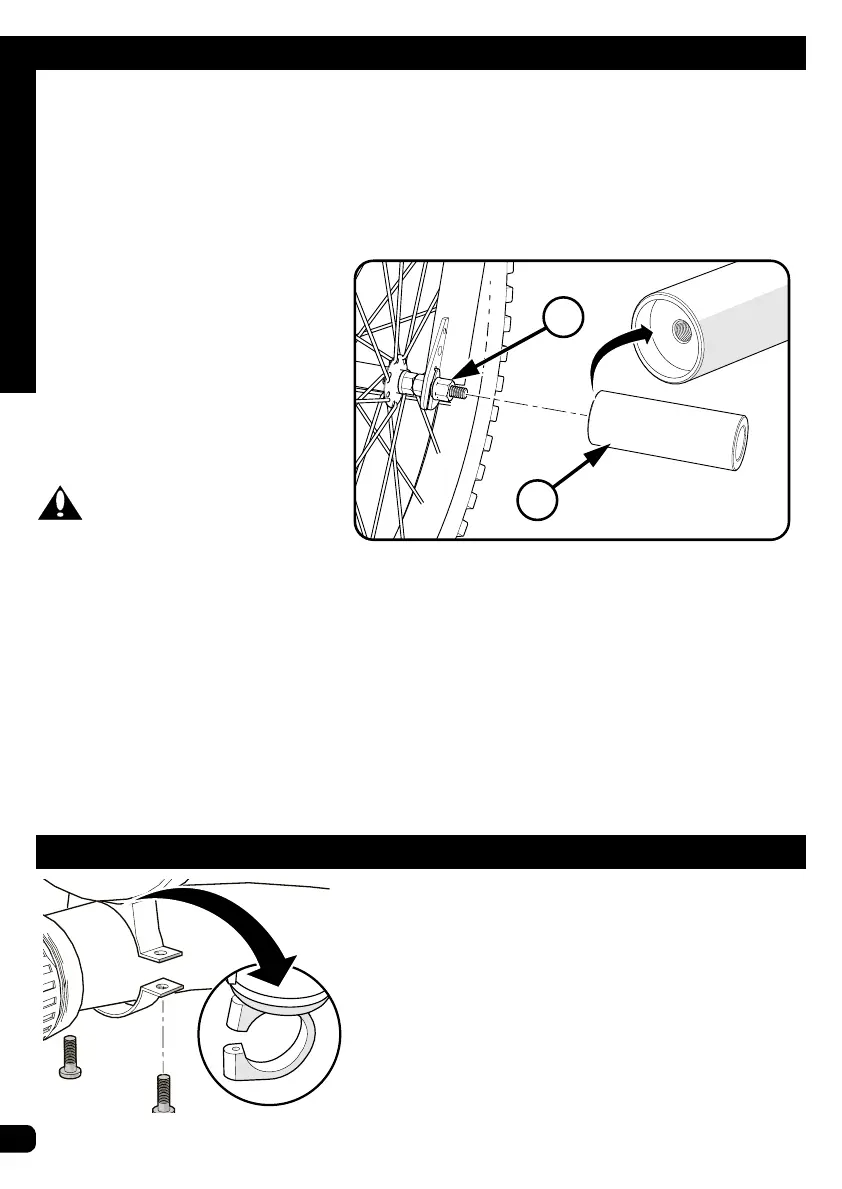
Pegs Installation - Threaded (if equipped)
Assembly
A
B
NOTES
• Front and rear pegs may be dierent sizes.
• The pegs are optional. You may choose not to install them on the axles. Pegs can be
installed on the front, rear or on one side.
• The same procedure is used to install pegs on both the front and rear axles. Front wheel
axle is shown.
Threaded pegs:
• No additional tools are necessary
to install the pegs.
• Put a peg
A
on each end of the
axle.
• Make sure the peg is fully seated
against the frame or fork. Tighten
the peg securely.
• Pegs will go over the axle nuts
B
.
WARNINGS:
• Do not ride beyond your capa-
bilities.
• Pegs should be installed by an adult.
• Check before each ride.
• Ensure there is no damage to frame, fork or wheels during install and use.
• Ensure chain is properly adjusted after install.
• Ensure wheels are properly aligned after install.
• If damaged, stop use and replace.
• Failure to obey these steps can allow the front wheel to loosen while riding. This can
cause injury to the rider or others.
Handlebar Bell (various models)
Installation:
1. Remove screws from Bell.
2. Position Bell on handlebar within easy reach,
with hands on the handlebar grips.
3. Install screws and tighten.
NOTE: Bell may attach with 1 or 2 screws.