2
532405-5_A
HELIX® SERIES CONTROL HEAD Installation Guide
2
|
Install the Gimbal Bracket
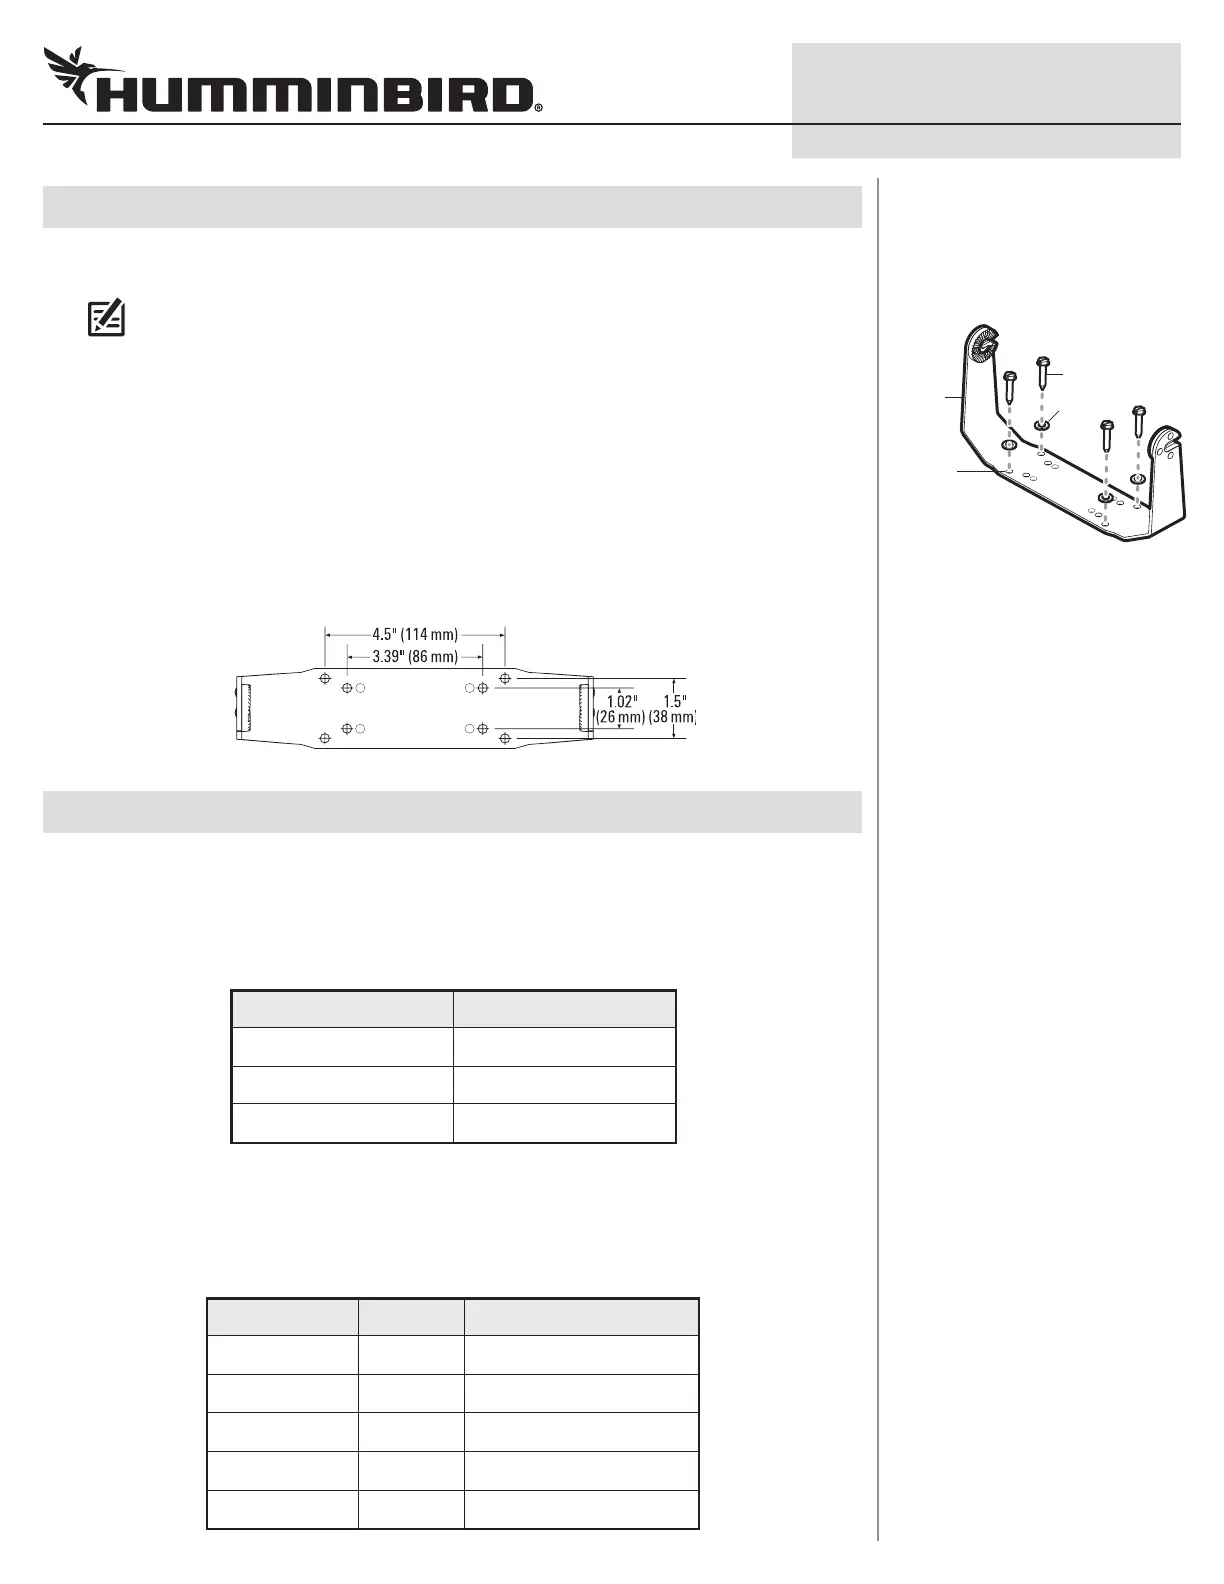
1. Place the gimbal bracket in the chosen position on the mounting surface. Mark the four outer
mounting screw locations using a pencil or center punch.
NOTE: The outer set of mounting holes is recommended. You may use the inside set of
mounting holes if necessary. There may be additional, unused mounting holes on the gimbal
bracket.
2. Set the gimbal bracket aside. Drill the four mounting screw holes using a 5/32" (4 mm) drill bit.
3. Cable Hole: Mark and drill a 1" (25 mm) hole 2" to 4" (50 to 100 mm) behind the bracket. You
will use this hole for routing the cables to the control head in another section.
4. Place the bracket on the mounting surface aligned with the drilled holes. Fill the mounting
holes with marine-grade silicone sealant.
5. Place one flat washer onto each #10 x 1" wood screw. Insert the four screws with washers into
the mounting holes (see the illustration Installing the Gimbal Bracket). Hand tighten only!
Bracket Hole Pattern Measurements
3
|
Connect Power
It is important to review the following information before you start the power installation:
Δ Cable Length: A 6' (2 m) long power cable is included. You may shorten or lengthen the cable
using 18 gauge multi-stranded copper wire. See the Recommended Power Cable Extension
Information table for details.
Recommended Power Cable Extension Information
Extension Length Wire Gauge
1 to 6 ft 18 AWG
6 to 12 ft 14 AWG
12 to 24 ft 12 AWG
Please consult a U.S. Coast Guard ABYC-approved wire gauge
diagram or a certified NMEA Marine Electronics Installer.
Δ Power Supply: The control head must be connected to a 12 VDC power supply using the fuse
size shown in the Required Fuse Size table.
Required Fuse Size
Model Fuse Size Fuse Type
HELIX 8 4A slow-blow or MDL equivalent
HELIX 9 4A slow-blow or MDL equivalent
HELIX 10 4A slow-blow or MDL equivalent
HELIX 12 5A slow-blow or MDL equivalent
HELIX 15 6.25A slow-blow or MDL equivalent
bracket
hole(s)
screw(s)
back
washer(s)
Installing the Gimbal Bracket
 Loading...