6
Electrician Installation Manual
Typhoon Ceiling Fan
1. Do not attempt to operate the fan (or optional light kit) with any wall control that is not
approved by Hunter Pacific for use with its fans. DO NOT use solid state controllers. The
use of unapproved controllers will void your warranty.
2. Do not
mix blade sets from one fan to another as this may upset the balance of the fan. If
only one blade is damaged you are still required to replace with a new set.
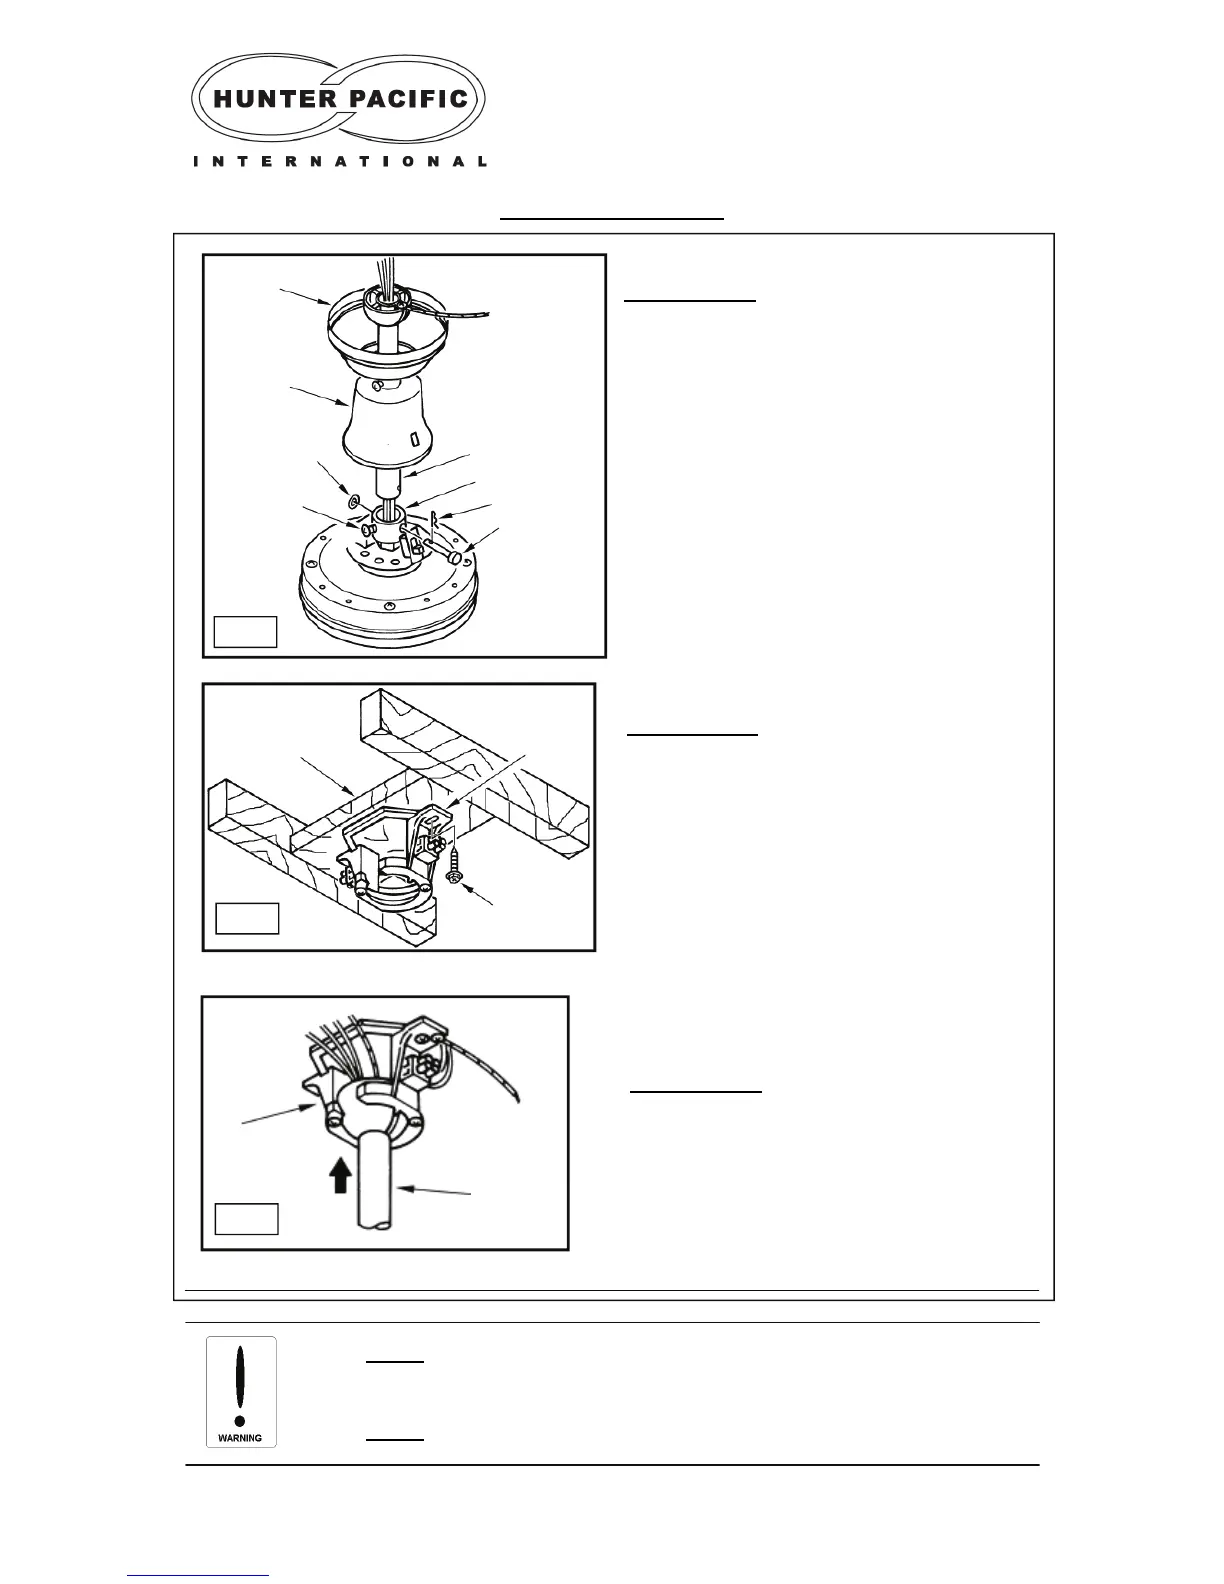
STEP 3 (Fig. 3)
a) THIGHTEN THE GRUB SCREW
(This is important to ensure the fan will not
wobble and the weight of the fan is supported).
b) Hang the ball joint into the hanger bracket.
Ensure the groove on the hanger bracket is
locked into the slot on the ball joint.
Assembling the fan
STEP 2 (Fig. 2)
a) Drill a hole in the timber nogging for wiring.
b) Secure the hanger bracket onto the timber
nogging, using the two hex head screws
provided. The timber nogging should be supplied
by the installing electrician and must be
supported between the two ceiling joists as
shown in the diagram above.
STEP 1 (Fig. 1)
PERFORM THIS STEP IF THE WIRES HAVE NOT
BEEN FED THROUGH THE DOWN ROD.
a) Loosen the ball joint screw and remove the
ball joint pin to separate the down rod from the
ball joint.
b) Remove canopy cover and reverse switch
cover.
c) Feed wires from motor housing up and
through the down rod.
d) Insert the cotter pin through the connection
collar and secure the down rod in place with the
cotter key and washer (avoid pinching wires).
e) Slide on canopy cover and refit the ball joint.
If an extension rod needs to be installed,
please go to page 12.
Hanger
Bracket
Down Rod
Fig. 3
Fig. 2
Timber Nogging
Hex Head Screw
Hanger
Bracket
Fig. 1
Hanger
Bracket
Screw
Washer
Canopy Cover
Reversing
Switch Cap
Down Rod
Connection Collar
Cotter Pin
Key