This document provides the installation and operation manual for the Hunter Alexander ceiling fan.
Function Description
The Hunter Alexander ceiling fan is designed to provide comfort and performance in your home or office. It circulates air to create a more comfortable environment, offering both updraft (clockwise rotation) for moving warm air downward in cooler months and downdraft (counterclockwise rotation) for a direct breeze and maximum cooling effect in warmer months. The fan also includes an integrated light kit to provide illumination.
Important Technical Specifications
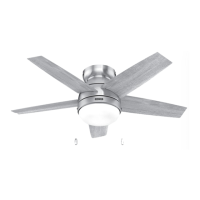
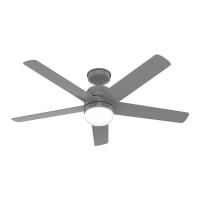
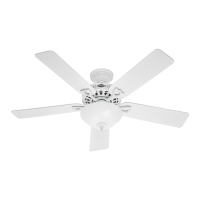
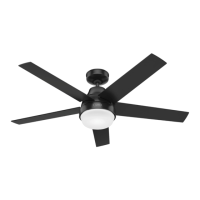
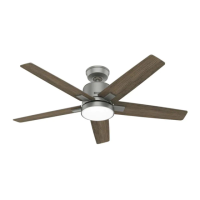
The Alexander ceiling fan comes in several models with different finishes:
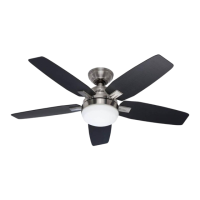
- Model 51795: Brushed Nickel
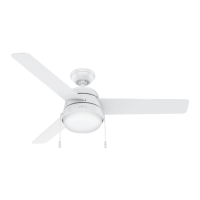
- Model 51939: Fresh White
- Model 51940: Matte Black
The fan weighs approximately 18.7 lbs (8.5 kg), with a tolerance of ±2 lbs.
Electrical Requirements:
- All wiring must be in accordance with national and local electrical codes ANSI/NFPA 70.
- The fan requires a 120 VAC, 60 Hz power supply.
- The fan is designed to be installed in a standard outlet box capable of supporting 70 lbs (31.8 kg).
Dimensions:
- The fan requires a minimum of 30 inches from the blade tip to the nearest wall or obstruction.
- A minimum of 7 feet from the bottom edge of the blade to the floor is required for safe operation.
Light Kit:
- The fan includes a light kit that requires bulbs. The manual illustrates the installation of two bulbs.
- The light kit assembly includes a 9-pin plug connector for easy connection.
Safety Standards:
- The fan is ETL listed, indicating compliance with applicable safety standards.
- It is designed for indoor use only.
Usage Features
Installation:
The installation process involves several key steps:
- Choosing the Right Installation Location: Ensure the ceiling box is capable of supporting the fan's weight and that there is adequate clearance from walls and the floor.
- Installing the Ceiling Bracket: Secure the ceiling bracket to the outlet box using machine screws and washers. For support structures, wood screws are used.
- Wiring the Fan: Connect the fan's wiring to the household electrical supply. The manual provides detailed instructions for both single-switch and dual-switch configurations, including grounding, neutral, and hot wire connections (white, black, and blue wires).
- Installing the Fan Body: Hang the fan body from the ceiling bracket hook and align the hanging slots. Secure the fan body to the mounting plate with canopy screws.
- Installing the Blades: Attach the fan blades to the fan body using blade washers and blade screws.
- Assembling the Light Kit: Connect the light kit wiring, secure the light kit assembly to the fan body, and install the bulbs.
- Installing the Bulbs and Glass: Screw in the included bulbs and attach the glass globe by lifting and turning clockwise until snug.
- Installing the Pull Chains: Feed the pull chains through the holes in the upper switch housing and attach the decorative pendants. One pull chain controls the fan speed (from high to off), and the other controls the light fixture (on and off).
Operation:
- Fan Speed Control: The fan speed is controlled by one of the pull chains, offering multiple settings from high to off.
- Light Control: The light fixture is controlled by the other pull chain, allowing it to be turned on or off.
- Reversing the Fan: The fan includes a reverse switch located inside the light fixture. To change the direction of air flow, turn the fan off, remove the glass, slide the reverse switch to the opposite position, and then restart the fan.
- Updraft (Clockwise Rotation): Creates a more indirect airflow, moving warm air downward, ideal for cooler months.
- Downdraft (Counterclockwise Rotation): Creates a direct breeze and maximum cooling effect, ideal for warmer months.
Maintenance Features
Cleaning:
- To clean the fan, use soft brushes or cloths to prevent scratching.
- Cleaning products may damage the finishes, so it's recommended to avoid them.
Troubleshooting:
The manual includes a troubleshooting section to address common issues:
- Fan Doesn't Work: Check if power is on, pull the pull chain to ensure it is on, check the reverse switch, ensure the circuit breaker is turned on, check wiring connections, and confirm the plug connection in the switch housing.
- Excessive Wobbling: Ensure blades are properly installed, check if the hanger ball is properly seated, and verify the balancing kit and instructions were used.
- Noisy Operation: Make sure the blades are properly installed and check for any cracked blades.
Limited Lifetime Warranty:
Hunter Fan Company grants a limited lifetime warranty to the original purchaser of this ceiling fan. This warranty covers:
- Motor – Limited Lifetime Warranty: The motor is warranted to be free from defects in material and workmanship for as long as the original purchaser owns the fan.
- Other One-Year Limited Warranty: All other parts of the fan, excluding light kits, are warranted to be free from defects in material and workmanship for one year from the date of purchase.
- Light Kits – Warranty May Vary:
- LED Light Kits: Warranted for three years from the date of purchase.
- Non-LED Light Kits: Warranted for one year from the date of purchase.
The warranty does not cover issues arising from improper installation, misuse, abuse, improper care, failure to follow instructions, damage caused by the owner, modifications to the fan, improper or incorrectly performed maintenance or repair, improper voltage supply, use of non-approved parts, or acts of God. Hunter Fan Company's sole responsibility under this warranty is to repair or replace the product at its discretion.