KEEP!
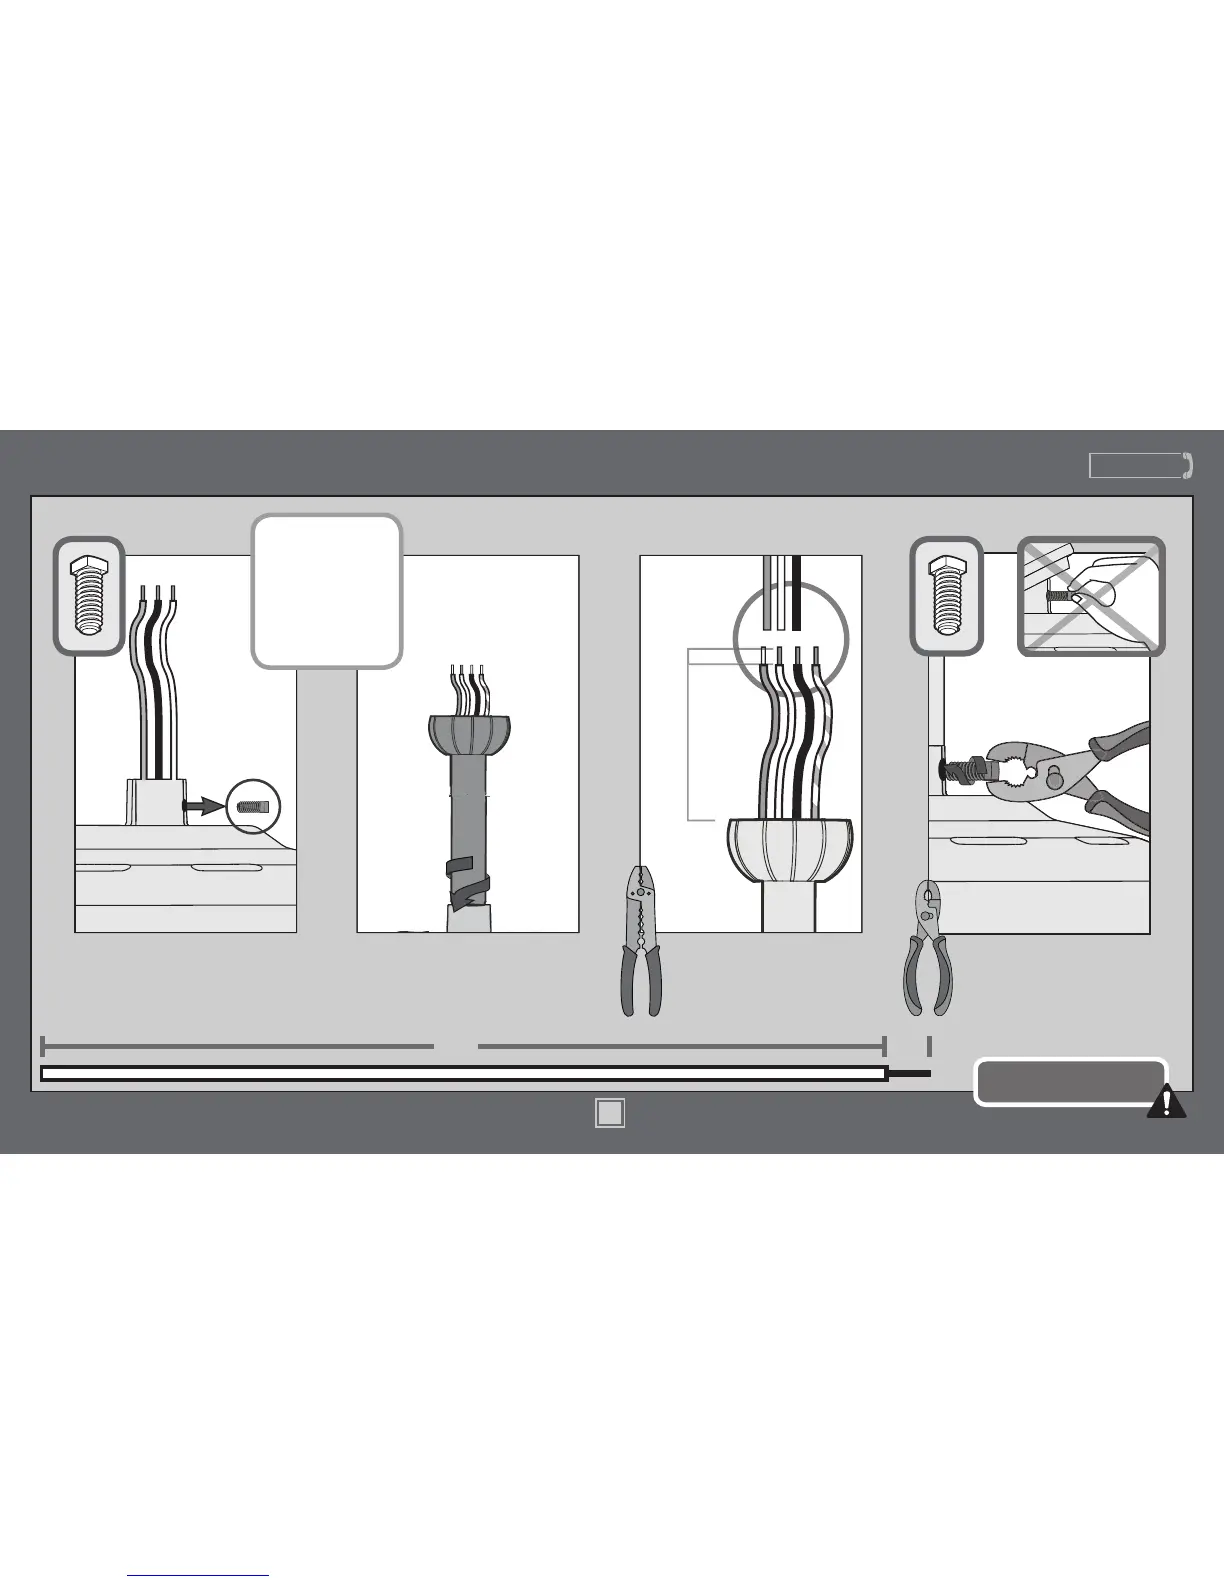
8”
3/8”
C
U
T
&
S
T
R
I
P
(not to scale)
Remove the pre-installed
setscrew so that the downrod
can be inserted.
Hand tighten the downrod (at
least 4-5 full turns) until it stops.
The wires can be cut, but
leave at least 8” extending
from the top of the downrod.
Downrod (continued)
8”
3/8”
Tighten the setscrew
with pliers. DO NOT
HAND TIGHTEN.
If the setscrew is not tightened
securely, the fan may fall.
K
E
E
P
!
1.888.830.1326
www.HunterFan.com
Tip: If you have
difculty feeding the
wires through the
downrod, try taping the
wires to a thin dowel
rod, then drop the dowel
rod and wires through
the downrod. Be sure to
remove all tape once the
wires are fed through to
the other side.
M0096-01 • 04/23/14 • © Hunter Fan Company
7