nt
r 1
• Gettin
Underwa
.4
. Connect the main sheet purchase to the boom and
nsta
t
e van
as t
e sa
s an
r
n
sect
on s
ows
4. Run the
ib
urlin
line throu
h the leads and
inall
throu
h the
ammer cleat located on the starboard side
f th
k.
. Install the battens in the mainsail
i
required
and install
th
m
in
il
nt
th
m
r
m th
t
n
. R
m
v
th
stop p
n or open t
e sa
ate
n t
e mast an
nsta
t
e
lu
slides into the track on the back o
the spar. Reinstall
the stop pin or close the sail
ate to prevent the slides
from fallin
back out a
ain. Connect the main sail to its
hal
ard and pack the sail on
our boom.
2. Install the out haul line in the boom with the messen
er
line provided and lead
rom the sheave at the back o
the
boom throu
h the lower crin
le at the back o
the sail and
aft to the end of the castin
.
. Install ree
in
lines in the boom with the messen
er
ne prov
e
per t
e
a
ram
n t
e sa
s an
r
n
sec-
tion. Pull enou
h slack into the ree
line so that the sail
an be
ull
raised unimpeded b
the ree
lines. Tie the
ma
nsa
onto t
e
oom w
t
t
e sa
t
es
rov
e
.
4. Install the
ib sheet onto the
ib and lead the sheets
ns
e t
e s
rou
s to t
e
ea
ammer
oc
s on t
e
un-
wahales. Tie
i
ure ei
ht knots in the end o
the sheets to
prevent them
rom runnin
back throu
h the
ams
. Raise and un
url sails, be
innin
with the main and
then the
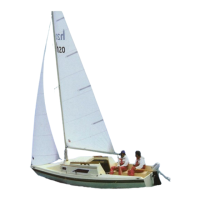
ib while powerin
into the wind.
nce each
a
ar
s tens
one
, t
e
a
ar
can
e pus
e
own
into its respective rope clutches. However, care should
be taken not to inadvertentl
open the rope clutches,
since the sails will lower rapidl
if this is done. When the
sails are raised, the boat can be laid o
and the en
ine
t
rn
.
.
nce the main is sheeted in and
ou are sailin
upwind, con
irm the main toppin
li
t position. The main
should be capable of sheetin
in hard without the toppin
li
t bein
ti
ht. With the main sheeted in hard, the toppin
li
t should have ei
ht to ten inches o
sa
and should be
a
uste
accor
n
7. A
ter a da
o
sailin
, the sails should be lowered
furled in while a
ain powerin
into the wind, with the
ib
urled in
irst and then b
lowerin
the main. Protect
our
sails b
coverin
them with the sail cover or
urlin
them
omp
ete
up.
6.4 Returnin
to Por
After completin
the da
’s cruise and moorin
our boat,
shut down the en
ine.
* Reduce en
ine speed to idle. Place transmission con-
trol in neutral. Allow en
ine to idle
or a
ew minutes.
* Move switch to
FF to shut down the en
ine
Before
oin
ashore, check the followin
items
Boat securel
tied to doc
il
r
r
enterboard and rudder are up if trailerin
.
A thorou
h washdown of
our hull, decks, and ri
in
with soap and fresh water will help keep
our boat lookin
like new
or
ears
6.4.1 Retrievin
DA NG ER
! !
e aware of nearb
power lines. Contact with power-
ines and the spar ma
result in electric shock caus-
in
severe in
ur
or death.
1. Raise
enterboard and rudder.
2. Back trailer into water rememberin
boat will be float-
in
lower i
there is more
ear on board than when
ou
t
rt
.
. Maneuver boat between trailer
uides and up to the
winch with the moorin
lines
4.
onnect the bow strap and with the winch in
ear,
winch boat up snu
a
ainst bow stop.
.
enter boat between upri
ht a
t trailer
uides
. Slowl
pull the boat from the water until the wei
ht o
th
t i
n th
tr
il
r
7. Confirm ali
nment on the trailer. Put trailer back in the
water to re-ali
n i
necessar
.
. make sure the rudder is pinned or tied in the upri
ht
position to prevent it
rom dra
in
on the
round.
. De-ri
and unstep mast if not alread
done. BE AWARE
F P
WERLINE
WHEN L
WERIN
MA
T!