This document is a user and care guide for the Husky 120-Volt Inflator, Model #H120N, Item #1009 544 671.
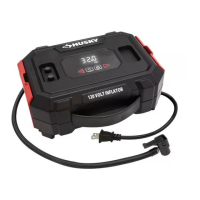
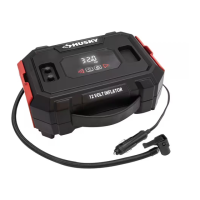
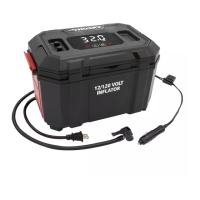
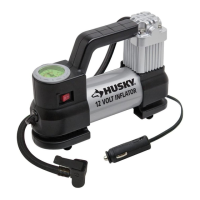
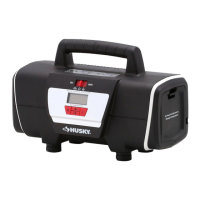
The Husky 120-Volt Inflator is a versatile tool designed for inflating various items such as car tires, bike tires, ATV tires, sports equipment, air mattresses, and beach toys. It operates on a standard 120-Volt AC power supply, making it suitable for use in a home or garage setting. The inflator is equipped with a digital pressure gauge for accurate pressure readings and features controls for setting a target PSI, ensuring precise inflation and preventing over-inflation.
Technical Specifications:
- Voltage: 120 VAC
- Power Requirement: 120 VAC / 60Hz / 1.1A
- Max. Pressure: 130 PSI
Key Features and Components:
The inflator's design incorporates several user-friendly features and components:
- Backlit Digital Pressure Gauge (A): Provides clear and accurate pressure readings, even in low-light conditions.
- LED Worklight (B): Illuminates the work area, useful when operating in dimly lit environments.
- Air Hose Storage (C): A dedicated compartment for neatly storing the air hose (M) when not in use.
- Tire Valve Cap Tray (D): A convenient tray for holding tire valve caps during inflation.
- Target PSI Decrease Button (E) and Target PSI Increase Button (K): Allow users to easily set the desired target pressure.
- 120-Volt Power Cord Storage (F): A compartment for storing the 120-Volt Power Cord (G).
- 120-Volt Power Cord (G): The main power supply cord for the inflator.
- Carrying Handle (H): Facilitates easy transport of the inflator.
- Start/Stop Button (I): Initiates or halts the inflation process.
- On/Off LED Worklight Button (J): Controls the LED worklight.
- Quick Connect Valve Adapter (L): A mechanism for quickly and securely attaching the air hose to tire valves or inflation accessories.
- Air Hose (M): The hose through which air is delivered for inflation.
- Accessories Storage (N): A compartment for storing various inflation accessories.
- Extra Tire Valve Caps (O): Spare valve caps for convenience.
- Mattress Nozzle (P): An accessory specifically designed for inflating air mattresses and similar items.
- Sports Needle (Q): An accessory for inflating sports balls.
- Presta Valve Adapter (R): An adapter for inflating bicycle tires with Presta valves.
Usage Features:
- Connecting the Inflator:
- Place the inflator on a flat surface.
- Plug the 120-Volt power cord (G) into a polarized 120-Volt outlet. The inflator will automatically power on.
- For tires, connect the quick connect valve adapter (L) to the tire air valve by pushing the valve lever down until it's securely attached.
- For toys and air mattresses, select the appropriate inflation accessory (P, Q, R) and insert it into the quick connect valve adapter (L), ensuring it's flush to prevent airflow blockage.
- Operating the Inflator:
- Press the target PSI button + or – (K or E) to set the desired target PSI. The digital display will flash the set PSI three times, then show the current air pressure, indicating readiness.
- Press the Start/Stop button (I) to begin or stop inflation.
- The inflator automatically shuts off when the target PSI is reached.
- To power off, unplug the power cord (G) from the outlet and allow the inflator to cool.
- Operating the LED Worklight: Press the LED worklight button (J) to turn it on or off.
- Disconnecting the Inflator:
- For tires, remove the air hose (M) by lifting up the quick connect valve adapter (L) lever and removing the adapter.
- For toys and air mattresses, remove the inflation accessory (P, Q, R) from the quick connect valve adapter (L).
- Unplug the power cord (G) to power off the inflator and allow it to cool.
- Read all instructions carefully before use.
- Keep the work area clean and well lit.
- Do not operate in explosive atmospheres or near flammable liquids/gases.
- Keep bystanders, children, and visitors away.
- Do not immerse the cord, plugs, or product in water.
- Close supervision is necessary when used by or near children.
- Unplug when not in use and before cleaning.
- Do not operate with a damaged cord, plug, or if the appliance malfunctions. Return to an authorized service facility for repair.
- Use only recommended accessories.
- Do not let the supply cord hang over edges or touch hot surfaces.
- Do not use for purposes other than inflation.
- Risk of Injury: Do not direct the air stream towards the body.
- Risk of Electric Shock: Store indoors, away from rain.
- Risk of Bursting: Use only recommended accessories and do not over-inflate. Follow manufacturer's instructions for the item being inflated.
- Allow the inflator to cool for 15 minutes after each 5 minutes of continuous operation.
- Disconnect from the 120-Volt power outlet to turn off.
- The inflator is not a toy; keep away from children.
- Do not carry by the air hose or power cord.
- Do not leave unattended while in operation.
- The appliance has a polarized plug (one blade wider than the other) for safety; do not modify the plug.
- Ensure proper ventilation; do not block the inflator's openings.
Maintenance Features:
- Servicing of a Double-Insulated Product: The inflator is a double-insulated product, meaning it has two systems of insulation instead of grounding. Servicing requires extreme care and knowledge of the system and should only be done by qualified service personnel. Replacement parts must be identical to original parts.
- Care and Cleaning:
- Clean the inflator with a non-abrasive, slightly damp cloth as needed.
- Locate the inflator in a clean, dry, and well-ventilated area to ensure proper cooling. Do not place rags or other materials on or near the ventilation openings.
- Wipe plastic parts clean using mild soap and warm water.
- Any other servicing should be done by an authorized service representative.
Troubleshooting:
- Problem: The unit will not start.
- Possible Cause: The cord is not plugged in.
- Solution: Plug the cord into a working 120-Volt AC power outlet.
- Possible Cause: The circuit breaker is tripped.
- Solution: Reset the circuit breaker.
Recommended Pressure (Guidelines only; always follow manufacturer's guidelines for specific items):
- Car Tire: 25-35 PSI
- SUV Tire: 30-45 PSI
- Bike Tire: 40-110 PSI
- Sports Balls: 5-15 PSI
The manual emphasizes the importance of retaining the manual for future use and provides contact information for Husky Customer Service for any questions, problems, or missing parts.