Home
Husqvarna
Lawn Mower
310
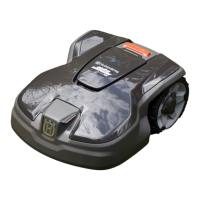
Husqvarna 310 Technical Manual
4
of 1
of 1 rating
100 pages
Give review
Manual
Specs
To Next Page
To Next Page
Loading...
HU
SQ
V
ARNA A
UT
OMO
W
ER
®
310/31
5
GARDENA SI
LENO/SILENO+
R100L
i
, R1
00
L
i
C
,
R1
30
L
i
, R1
3
0
L
i
C
, R1
6
0
L
i
T
EC
H
N
ICAL MANU
AL
TH_1158203_310_315_GARDENA_US.indd 1
2016-05-11 10:15:47
2
Table of Contents
Default Chapter
3
Table of Contents
3
Function
5
Husqvarna Automower® 310/315, What Is What
5
GARDENA R100Li, R100Lic,R130Li, R130Lic and R160Li, What Is What
6
Introduction
7
Technical Data
8
Software
10
Mowing Technique
11
The Loop System's Control Signals
13
Boundary Loop
14
The Loop System's Status
14
Guide Loop
16
Searching Methods to Find the Charging Station
16
Automatic Detection of Passages
18
Battery
18
Docking and Charging
18
Sensors
19
2 Special Menu Functions
20
Quick Info
20
Ascertain the PIN Code
24
Tools Menu
24
Main Menu Overview Husqvarna Automower
25
Main Menu Overview GARDENA R100Li, R100Lic,R130Li, R130Lic and R160Li
26
Tools Menu Overview
27
Tools Menu, Functions
28
3 Installation
35
Charging Station
35
Boundary Loop
36
Guide Wire
38
Testing the Installation
39
Calibrate Guide
40
One Robotic Lawnmower for Several Working Areas
41
Even Mowing Results in Complex Working Areas
41
Weather Timer / Sensor Control
42
Safe Operation on Slopes
42
New Loop Signal
43
4 Autocheck Experience, Service Program
44
Installation and Login
44
Connection to the Robotic Lawnmower
45
Use
47
5 Repair Instructions
54
Design and Function
55
Disassembling and Assembling the Robotic Lawnmower
59
Disassembling the Charging Station
63
Assembling the Charging Station
63
Replacing the Charging Strips
64
Replacing the Battery on Husqvarna Automower® 310/315
64
Replacing the Battery on GARDENA R100Li, R100Lic, R130Li, R130Lic and R160Li
65
Replacing the Main Circuit Board
65
Replacing the GARDENA Smartsystem Board
66
Replacing the HMI Circuit Board
67
Replacing the Keypad
68
Replacing the Main Switch
69
Cleaning or Replacing the Ventilation Filter
69
Replacing the Sensors
70
Replacing the Blade Motor
72
Replacing the Wheel Motor
73
Replacing the Rear Collision Columns
73
Replacing the Front Collision Column / Lift Sensor
74
Changing and Regreasing Lower Front Wheel Bearing
75
Replacing the Main Circuit Board, Charging Station
76
Replacing the Contact Strips, Charging Station
76
Assembling the Sealing Strip
77
Fitting Screws
78
Mounting Thread Plugs
78
Screw Fasteners
79
6 Troubleshooting
80
Messages
81
Symptoms
87
Loop Signal
90
Troubleshooting the Loop Signal
90
Finding a Break in the Boundary Loop
92
Battery Test
94
7 Maintenance and Service
96
Cleaning
96
Winter Storage
96
Service Schedule
98
English
98
Other manuals for Husqvarna 310
Operator's Manual
92 pages
Quick Guide
8 pages
4
Based on 1 rating
Ask a question
Give review
Questions and Answers:
Need help?
Do you have a question about the Husqvarna 310 and is the answer not in the manual?
Ask a question
Husqvarna 310 Specifications
General
Type
Robotic lawn mower
Sound level Measured
58 dB(A)
Typical charging time
60 minutes
Cutting system
3 pivoting blades
Battery type
Lithium-ion
Related product manuals
Husqvarna RC 318T
144 pages
Husqvarna Rider 318
36 pages
Husqvarna Rider 316T
36 pages
Husqvarna RC 318T AWD
164 pages
Husqvarna AUTOMOWER 310
92 pages
Husqvarna AUTOMOWER 315
92 pages
Husqvarna AUTOMOWER 315X
64 pages
Husqvarna Rider 316T AWD
36 pages
Husqvarna Rider 316T/s AWD
120 pages
Husqvarna Rider 316TXs AWD
36 pages
Husqvarna AUTOMOWER 310 MARK II
52 pages
Husqvarna AUTOMOWER 315 MARK II
8 pages