117364 6-5 REV B
Belts
Inspect belts frequently for wear and serviceability. Replace a
belt that shows signs of severe cuts, tears, separation, weather
checking and cracking, or burns caused by slipping. Slight
raveling of belt covering does not indicate failure; trim ravelings
with a sharp knife.
Inspect the belt pulley grooves and flanges for wear. A new
belt, or one in good condition, should never run against the
bottom of the groove. Replace the pulley when this is the case,
otherwise, the belt will lose power and slip excessively.
Never pry a belt to get it on a pulley as this will cut or damage
the fibers of the belt covering.
Keep oil and grease away from belts, and never use belt
dressings. Any of these will destroy the belt composition in a
very short time.
Center Deck Belts Adjustment
The deck belt tension remains constant by means of a tension
idler and spring. The spring tension should be such that the belt
does not slip under normal operating load conditions, assuming
the belt is not excessively worn or damaged. As the belt
stretches and wears in, adjustment may become necessary. To
increase belt tension, move the spring chain one (or more)
link(s) at the anchor point on the deck frame. Figure 6-14,
Figure 6-15 & Figure 6-16
IMPORTANT: Do not over tension the spring to compensate
for a badly worn belt or pulley.
Side Deck Belt Adjustment
The side deck belt tension is adjusted by changing the
compressed length of the idler spring.
1. Loosen the jam nut. Figure 6-16
2. Rotate the adjustment nut the proper the direction until
the idler spring is compressed to the dimension shown.
Figure 6-16
3. Tighten the jam nut against the adjustment nut. Figure 6-
16
Deck Troubleshooting
If you are experiencing issues with cut quality, deck
discharge, or deck functionality refer to the Troubleshooting
section of this manual.
Figure 6-11
Figure 6-12
Figure 6-13
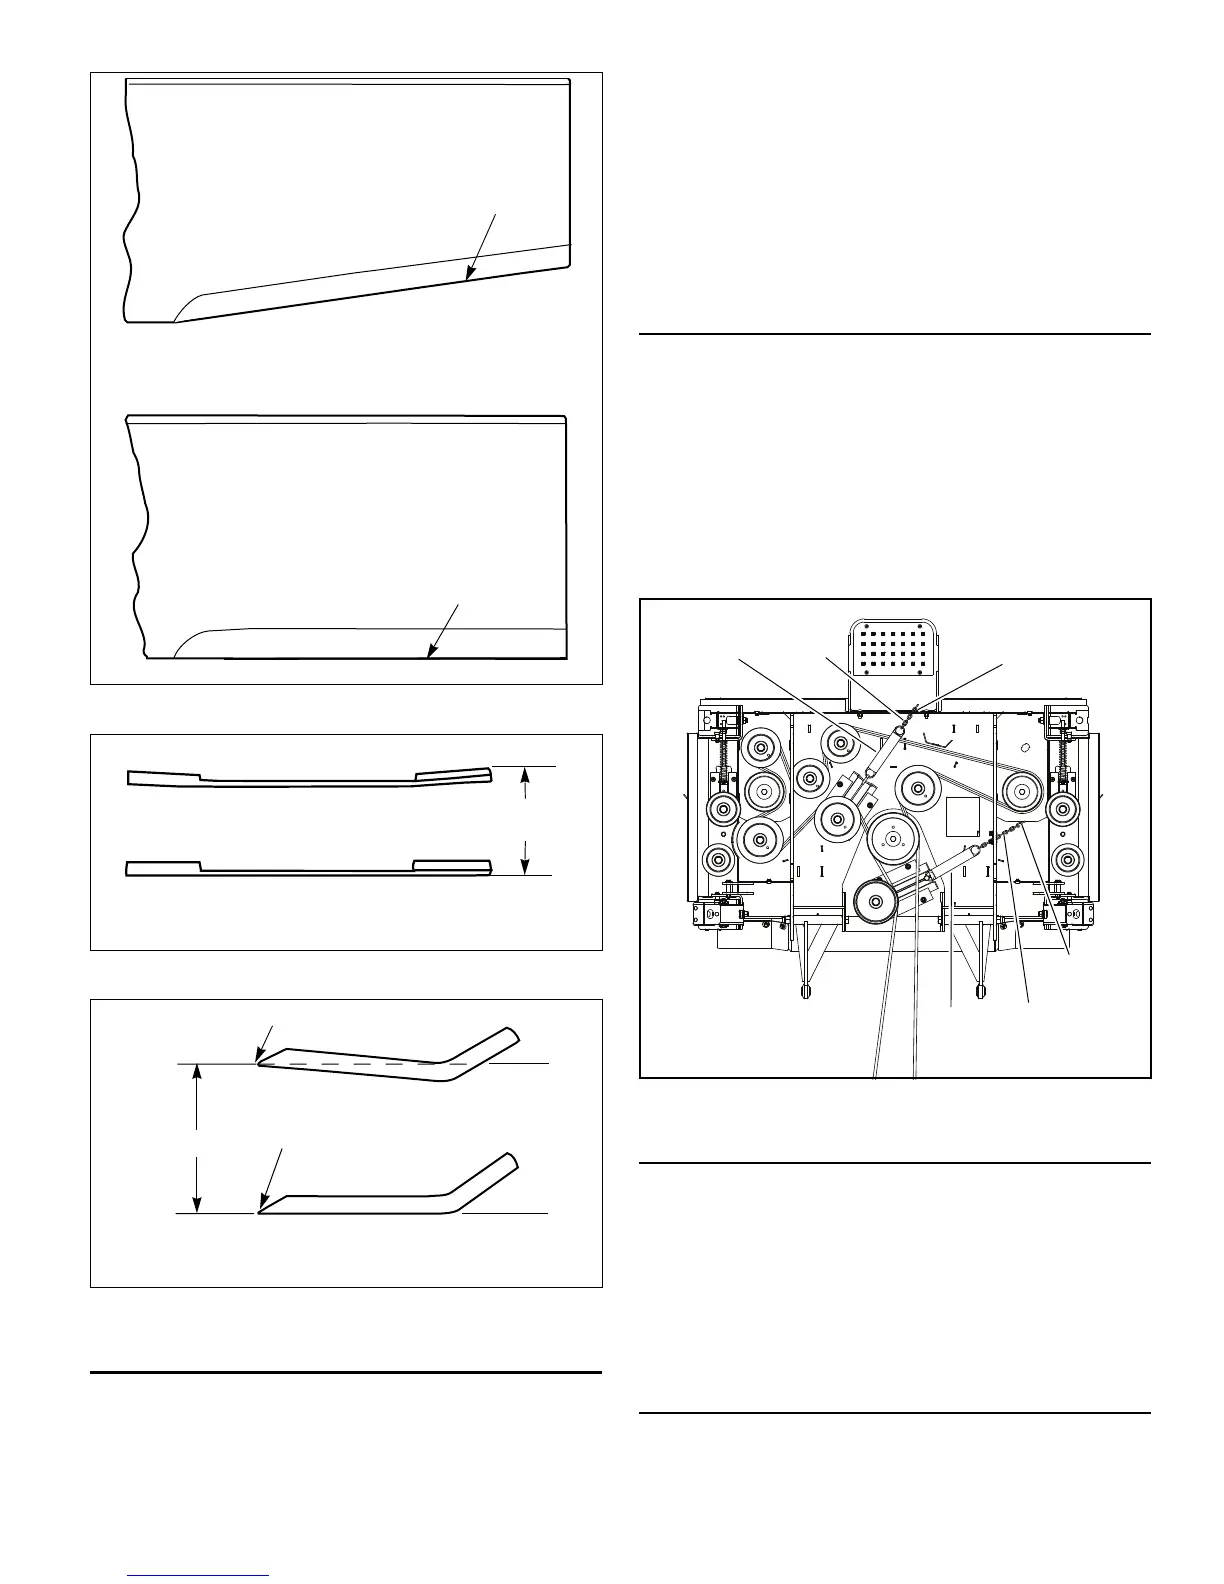
Resharpening
pattern
Do not sharpen to original pattern (below). It is
easier to get a straight cutting edge following
the resharpening pattern shown above.
Original edge
Warped Blade (Replace)
Straight Blade
Cutting
plane
Comparison of Warped and Straight Blades
Cutting edge
Twisted Blade Edge
(replace)
Cutting edgeCutting Plane
Straight Blade Edge
End view of blades, comparing
twisted and straightened blades
Figure 6-14
Spring
chain
Spring chain
anchor point
Idler
spring
Spring
chain
Spring chain
anchor point
Idler
spring

 Loading...