EasyManua.ls Logo

Hyd-Mech H18 A User Manual

Hyd-Mech H18 A
74 pages
To Next Page IconTo Next Page
Page #1 background imageLoading...
Page #1 background image
1
THANK YOU,
On behalf of everyone at HYD·MECH Group Limited, we would like to thank and congratulate you on your decision to
purchase a HYD·MECH bandsaw.
Your new machine is now ready to play a key role in increasing the e󰀩ciency of your operation, helping you to reduce cost
while boosting quality and productivity.
To ensure you are maximizing the power and versatility of your new HYD·MECH bandsaw, please take the time to
familiarize yourself and your employees with the correct operation and maintenance procedures as outlined in this
manual. Please keep this instruction manual for future reference in a known location and easily accessible to all users of
the device.
HYD·MECH o󰀨ers a great variety of options, components, and features for its various models. Therefore, some of the
equipment described in this manual (various illustrations and drawings) may not be applicable to your particular machine.
The information and specications provided in this manual were accurate at the time of printing. HYD·MECH reserves the
right to discontinue or change specications or design at any time without notice and without incurring any obligation.
Thank you.
Hyd·Mech Group Limited
P.O. Box 1659, 1079 Parkinson Road
Woodstock, Ontario, N4S 0A9
Phone : (519) 539-6341
Service : 1-877-237-0914
Sales : 1-877-276-SAWS (7297)
Fax : (519) 539-5126
e-mail : info@hydmech.com
Printed SEPTEMBER 2014
H18 A & H22 A
395598
REV G

Table of Contents

Question and Answer IconNeed help?

Do you have a question about the Hyd-Mech H18 A and is the answer not in the manual?

Hyd-Mech H18 A Specifications

General IconGeneral
BrandHyd-Mech
ModelH18 A
CategorySaw
LanguageEnglish

Summary

SECTION 0 - SAFETY INSTRUCTIONS

SUMMARY

Overview of essential safety information and requirements for machine operators.

RESPONSIBILITIES OF THE OPERATOR AND MAINTENANCE PERSONNEL

Outlines duties for safety equipment, emergency stops, safe operation, and hazard labels.

Put Safety First

Emphasizes the importance of prioritizing safety in all machine operations.

Safety equipment

Machine delivered with safety equipment that must not be removed. Check function regularly.

Emergency Stop Button (E-Stops)

Always be aware of E-stop location and keep it accessible.

Safe Operation

Operate only when in good order, with protective equipment, and maintain safe distances.

Safety Hazard Labels

Observe and maintain visibility of safety hazard labels. Replace if damaged.

Master Disconnect

Procedure for locking out the machine before maintenance/repairs.

Hazardous Voltage Inside

Warning about high voltage and precautions during servicing.

Moving Bandsaw Blade Will Cut

Warning about the danger of the moving blade and hand placement.

Pinch Point

Warning about pinch points created by moving parts and vises.

Moving Parts Can Crush and Cut

Caution about chip auger movement and potential crushing/cutting hazards.

SECTION 1 - INSTALLATION

SECTION 2 - OPERATING INSTRUCTIONS

START-UP

Critical checks and procedures before starting the machine.

EMERGENCY STOP

Function of the mushroom-shaped emergency stop button.

SINGLE PART CYCLE OPERATION

Step-by-step guide to cutting a single piece to a desired length.

AUTOMATIC OPERATION

Overview of automatic mode and preparation for jobs.

PROCEDURE FOR EDITING OR STARTING A NEW JOB IN AUTO MODE

Steps to program and start jobs in automatic mode.

SHUTTLE EMERGENCY STOP

Location and function of the second emergency stop button on the shuttle.

CUTTING PARAMETERS CHART

Guide to determining effective material width for optimal cutting.

STEP 1: DETERMINE EFFECTIVE MATERIAL WIDTH - W (inches) or (mm)

How to measure or estimate the effective width of material for cutting.

STEP 2: SET FEED FORCE LIMIT

How to set the maximum feed force based on material width.

STEP 3: DETERMINE OPTIMUM BLADE PITCH - TEETH PER INCH (T.P.I.)

How to select the correct blade pitch based on material width.

STEP 4: DETERMINE OPTIMUM BLADE SPEED, V (ft/min) (m/min)

How to determine the optimal blade speed using material width and hardness.

STEP 5: DETERMINE FEED RATE SETTING, FR (in/min) (mm/min).

How to set the feed rate based on blade speed and pitch.

SECTION 3 – MAINTENANCE

SAFETY DURING MAINTENANCE AND TROUBLESHOOTING

Procedures for safe maintenance and troubleshooting.

LOCK OUT PROCEDURE

Step-by-step instructions for safely locking out the machine.

RESTORING MACHINE TO USE

Steps for safely returning the machine to operation after maintenance.

BLADE CHANGE MODE PROCEDURE

Safety procedure for changing the bandsaw blade.

BLADE REMOVAL

Step-by-step instructions for safely removing the bandsaw blade.

BLADE INSTALLATION

Step-by-step instructions for safely installing a new bandsaw blade.

SECTION 8 - SPECIFICATIONS

H-18 ASV BANDSAW SPECIFICATIONS

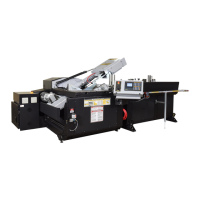
Technical specifications for the H-18 ASV bandsaw model.

H-22 ASV BANDSAW SPECIFICATIONS

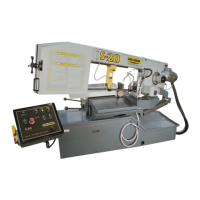
Technical specifications for the H-22 ASV bandsaw model.

SECTION 9 - WARRANTY

Related product manuals