Installation: Wiring and Connections
The Hypervolt requires two types of connections; one for supplying power and one for sending CT information (Load Management (ALM), Solar Input etc.)"
The CT connection can also be used for hardwiring internet if a primary Wi-Fi connection is not available or too weak, please refer to our website on this. Cat5 cable
should be used for the CT/Hardwire connection as it contains enough cores for all eventualities. Hypervolt can supply HyperConnect Cable which contains the power
& data cable (Cat5) all in one for a neater easier install. Cables should only come in via. the bottom gland positions. Position (14) can be drilled out and a gland fitted
to bring in a separate data cable and maintain separation. Separate data & power cables should not be run directly next to each other outside of the unit."
STEP 4
Connect the power cables to the incoming terminals (1) and tighten to 2Nm.
We recommend using ferrules on stranded cables. Pictured is HyperConnect
(3) cable available from us. Do not use powered screwdrivers to tighten
terminals."
Tighten the CTS Gand provided to hold the incoming cable in place. If you
are using an SWA cable then the CTS gland should be replaced for an SWA
Gland (Not Provided).!
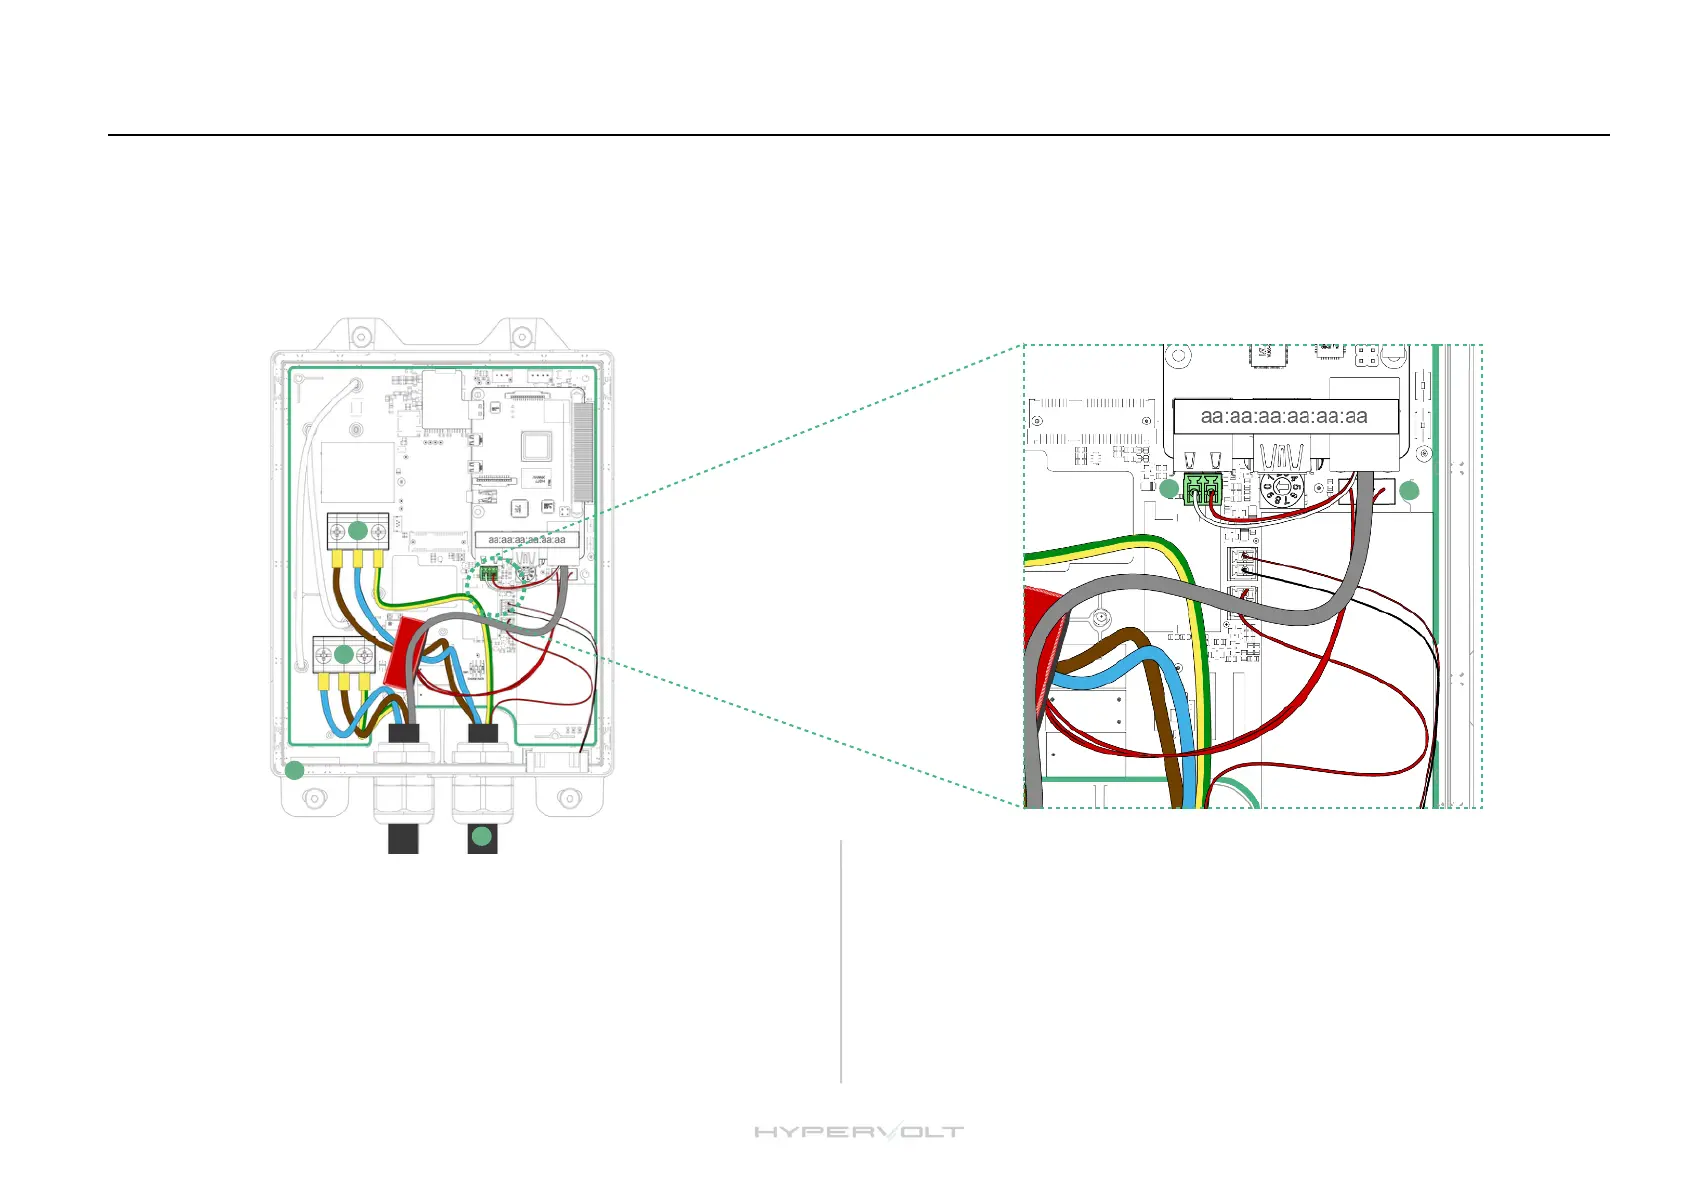
STEP 5
Connect the Cat5 cable to the CT green plug (8), use the brown pair keeping the
White/Brown cable to the left and the Brown to the right. Remember to joint the
White/Brown to the White cable a the CT and the Brown to the Black.!
If you need hardwired internet use the remaining Orange and Green pairs
terminated in an RJ45 plug which can be inserted in the RJ45 socket (9). More
details of this are on our website.!
 Loading...