Please read before starting your install!
-
Hypervolt products must be installed by suitably qualified trained personnel only. !
-
Above all else the Requirements for Electrical Installations as set out in BS7671 (as amended) must be followed
with special attention to section 722.!
-
In addition to the above the guidance given in the “Code of Practice for Electric Vehicle Charging Equipment
Installation” (as amended) by the IET must also be followed.!
-
If you are unsure about any part of the installation of a Hypervolt product you must obtain clarification from our
technical department before proceeding.!
-
After installation and within 48hrs the unit must be registered as having been installed. This is done by scanning
the QR code on the side of the unit or online. This is to validate the warranty, failure to do so will void the
warranty. Installers should aim to do this before leaving site.
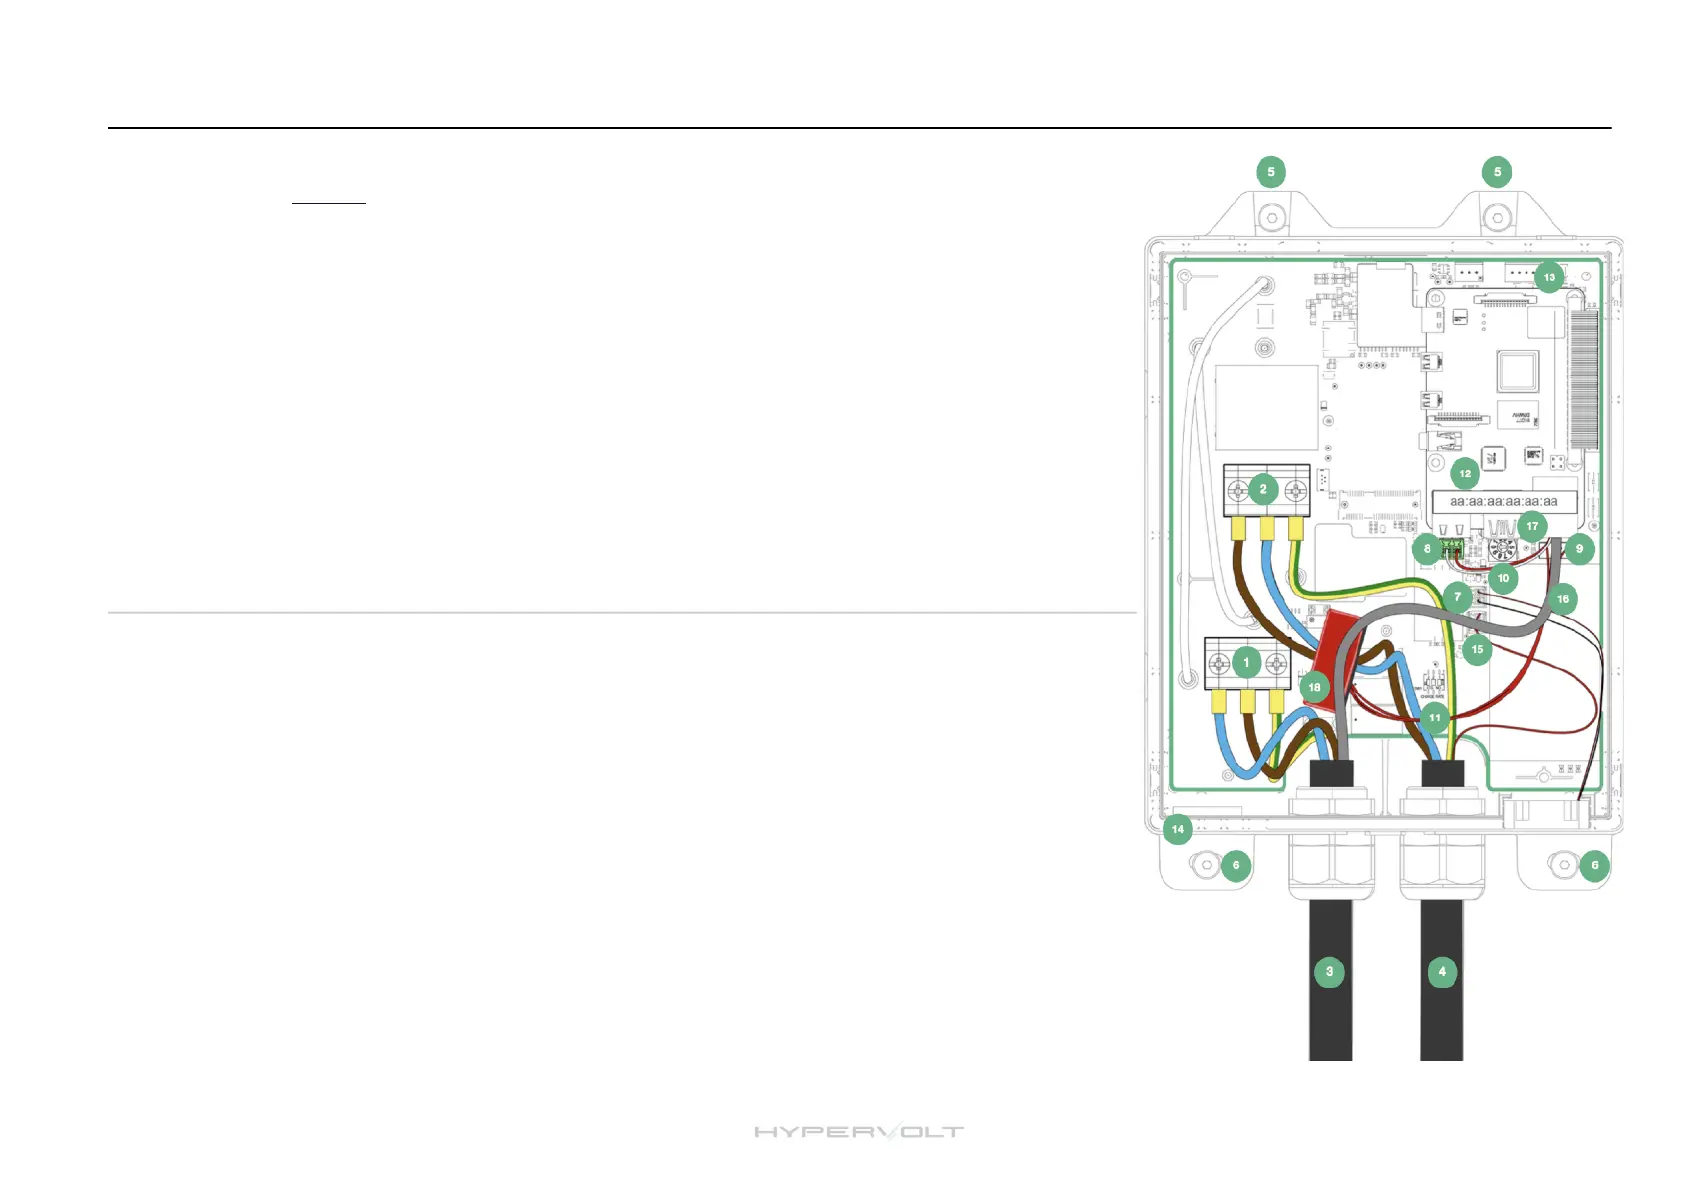
1. Incoming Supply Connections (up to 10mm²)
2. Tethered Cable Connections
3. Incoming Supply Cable (HyperConnect)
4. Tethered Cable with Plug
5. Top Mounting Holes
6. Bottom Mounting Holes
7. Fan Connection
8. CT Connection (Current Clamp)
9. RCD Connection
10. ALM Adjustment Dial
11. Derating DIP Switches
12. Raspberry Pi
13. LED Front Plate Connection
14. Cutout for Additional Cable Gland
15. CP Connection
16. RJ45 Hardwire Connection
17. Ethernet Port
18. RCD
 Loading...
