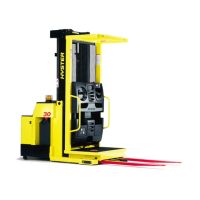
4000 SRM 522 Safety Procedures When Working Near Mast
General
WARNING
Before working on or near the mast, see Safety
Procedures When Working Near Mast in this
section.
This section has the repair procedures for the
Two-Stage, Limited Free-Lift (LFL); Two-Stage, Full
Free-Lift (FFL); Three-Stage, Full Free-Lift (FFL)
masts; and for the sideshift carriages. Carriage
Adjustment and Troubleshooting are at the end of
this section. See the section Mast Description
4000 SRM 521 fo
r the description and operation of
the masts.
NOTE: Hoses ha
ve a service life that is determined
by applicatio
n and time. All hoses must be inspected
at the interv
als specified in the Maintenance Sched-
uleforthehy
draulic system. Install a new hose if the
hose is worn,
damaged, soft or hard, and no longer
flexible. If
necessary, make a comparison to a new
hose that is
the correct replacement for the hose you
are inspect
ing.
Safety Procedures When Working Near Mast
The following procedures MUST be used when in-
specting or working near the mast. Additional pre-
cautions and procedures can be required when re-
pairing or removing the mast.
WARNING
Mast parts are heavy and can move. Distances
between parts are small. Serious injury or
death can result if part of the body is hit by
parts of the mast or the carriage.
• Never put any part of the body into or under
the mast or carriage unless all parts are com-
pletely lowered or a safety chain is installed.
Also make sure the power is off and the key
is removed. Put a DO NOT OPERATE tag in
the operator’s compartment.
• Be careful of the forks. When the mast is
raised, the forks can be at a height to cause
an injury.
• DO NOT climb on the mast or lift truck at any
time. Usealadderorpersonnellifttowork
on the mast.
• DO NOT use blocks to support the mast weld-
ments nor to restrain their movement.
• Mast repairs require disassembly and re-
moval of parts and can require removal of
the mast or carriage. Follow the repair pro-
cedures in the correct Service Manual for
the mast.
WHEN WORKING NEAR THE MAST ALWAYS:
• Lower the mast and carriage completely.
Push the lift/lower control lever forward and
make sure there is no movement in the mast.
Make sure all parts of the mast that move are
fully lowered.
OR
• If parts of the mast must be in a raised po-
sition, install a safety chain to restrain the
moving parts of the mast. Connect moving
parts to a part that does not move. Follow
these procedures:
1. Put the mast in a vertical position.
2. Raise the mast to align the bottom crossmem-
ber of the weldment that moves in the outer
weldment with a crossmember on the outer
weldment. On the two-stage and free-lift mast,
the moving part is the inner weldment. On the
three-stage mast, it is the intermediate weld-
ment. See Figure 1.
3. Usea9.5mm(3/8in.) minimumsafetychain
with a hook to fasten the crossmembers together
so the movable member cannot lower. Put the
hook on the back side of the mast. Make sure
the hook is completely engaged with a link in
the chain. Make sure the safety chain does not
touch lift chains or chain sheaves, tubes, hoses,
fittings, or other parts on the mast.
4. Lower the mast until there is tension in the
safety chain and the free-lift cylinder (two-stage
full free-lift and three-stage masts only) is com-
pletely retracted. If running, stop the engine.
Apply the parking brake. Install a DO NOT
REMOVE tag on the safety chain(s).
NOTE: After lowering or restraining the mast, shut
off the power and remove the key. Put a DO NOT
OPERATE tag in the operator’s compartment.
1



 To Next Page