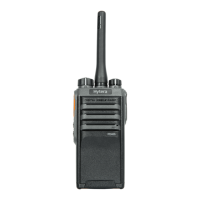
Hytera PD405 - Quick Reference Guide www.ninehundred.co.uk 2
HYTERA PD405
QUICK REFERENCE GUIDE
3
Programmable Keys
For enhanced convenience, you may request your dealer to program the
SK1
and
SK2
keys as shortcuts to certain feature.
Product Overview
Before Use
Attaching the Battery
To attach the battery, do as follows.
To remove the battery, please turn off the radio first. Then
slide the battery latch upwards to unlock the battery.
Attaching the Antenna
Do not hold the radio by its antenna, otherwise the
performance and lifespan of the antenna will be reduced.
1
2
“ click ”
“ click ”
Assemble Disassemble
Note
Assemble Disassemble
Caution
4
1
2
3
1
2
Before Use
Attaching the Belt Clip
Attaching the Accessories
Remove the screws Assemble the Belt Clip
Caution
Charging the Battery
Charging the Radio
Charging the Battery
LED Indication Current Status
The LED Indicator flashes red slowly
Standby (no load)
The LED Indicator glows red
Charging
The LED Indicator glows orange
90 %
90% charged
The LED Indicator glows green
100 %
Fully charged
The LED Indicator flashes red rapidly
Charging error
●
Make sure the radio is powered off before charging.
Read the Safety Information Booklet in advance to
get necessary safety information.
●
Charge a new battery for at least 5 hours before initial
use for best performance.
Before Use
LED
LED
Checking the Battery Power
You may check the curr e n t battery power by holdin g down the
programmed
Battery Power Indicator
key preset by your dealer. And
release the key to exit. Battery power indications are listed below:
LED Indication Battery Power
The LED indicator glows green High
The LED indicator glows orange Medium
The LED indicator glows red Low
The LED indicator glows red and
low battery alert sounds
Under the low battery
threshold. Charge or replace
the battery for proper radio
operation
LED Indication Product Status
The LED indicator flashes green Powering on
The LED indicator glows green Receiving
The LED indicator glows red Transmitting
The LED indicator flashes orange slowly Scanning
The LED indicator glows orange
Call hung period.
No voice is being
transmitted or received
on the traffic channel
during a call. Within
such period, you can
hold down the
PTT
key to talk to the other
party
.
Status Indication
LED Indicator

 Loading...