10
Step 5.
Release the stop plate and push the sliding door
handles to move the sliding doors back to fully
closed as shown in Fig 23 - spring-loaded, will slam
shut, ensureÊtheÊslidingÊdoorÊhandleÊcatchÊisÊlockedÊ
intoÊtheÊlatchÊhousing.
Installaon is complete when both entry and exit
sliding doors are assembled.
Step 3.
Pull open the sliding doors (by hand), pivot the stop
plates (at each end) to hold the doors fully opened
before proceeding to the next stage of the installaon
as shown in Fig’s 19, 20 & 21
Fig 19
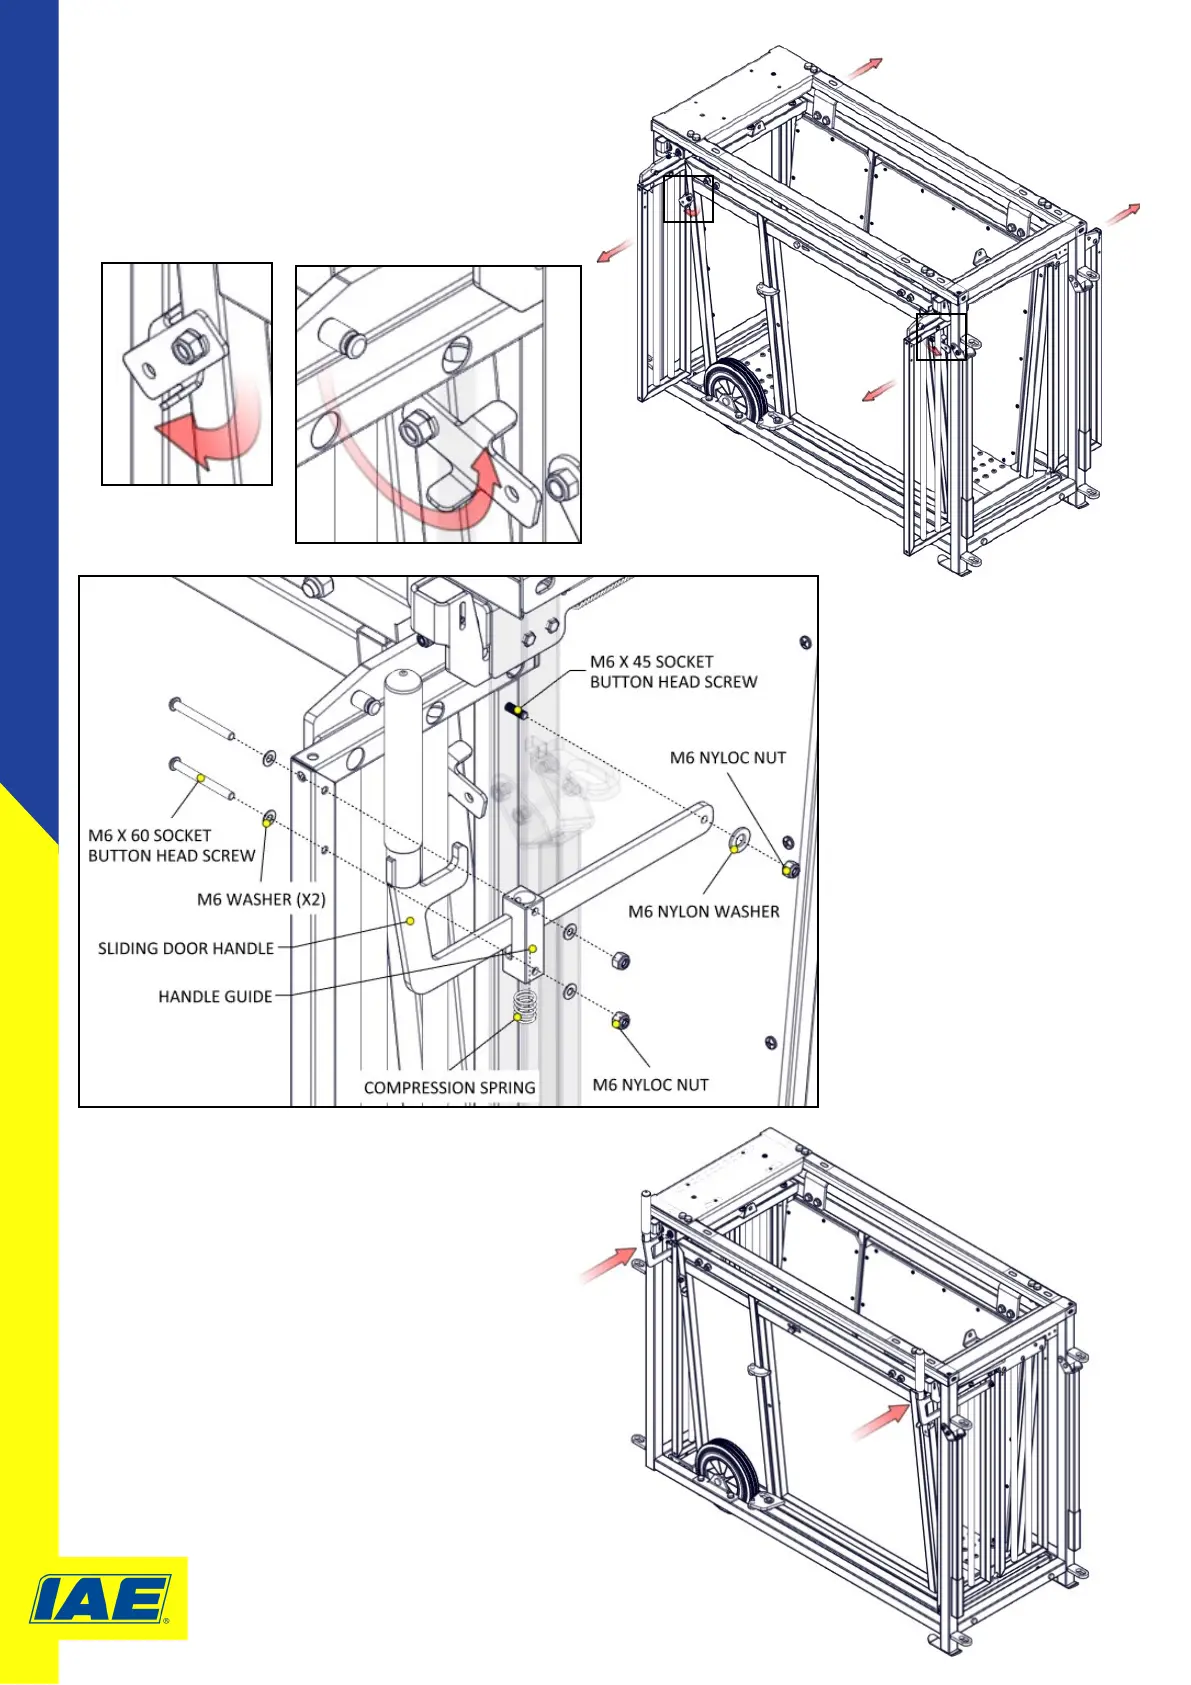
Step 4.
Build up the sliding door handle
assemblies (le and right hand) -
InsertÊtheÊslidingÊdoorÊhandleÊ
throughÊtheÊslotÊinÊtheÊhandleÊ
guideÊ.
Fasten to the sliding gate (at each
end) using M6 bolt fixings as shown
in Fig 22 -ÊtheÊcompressionÊspringÊ
fitsÊinsideÊtheÊhandleÊguideÊshaÊ
(betweenÊtheÊundersideÊofÊtheÊ
handleÊandÊtheÊboomÊbolt)Ê
Fig 22 is detailing the right hand
handle and guide assembly (leÊ
handleÊtoÊbeÊfiedÊupÊmirroring)
Fig 22
Fig 20
(ComponentsÊtransparentÊforÊclarityÊinÊFigÊ22)
Fig 23
Fig 19
(ComponentsÊ
transparentÊforÊ
clarityÊinÊFigÊ20)
Fig 21