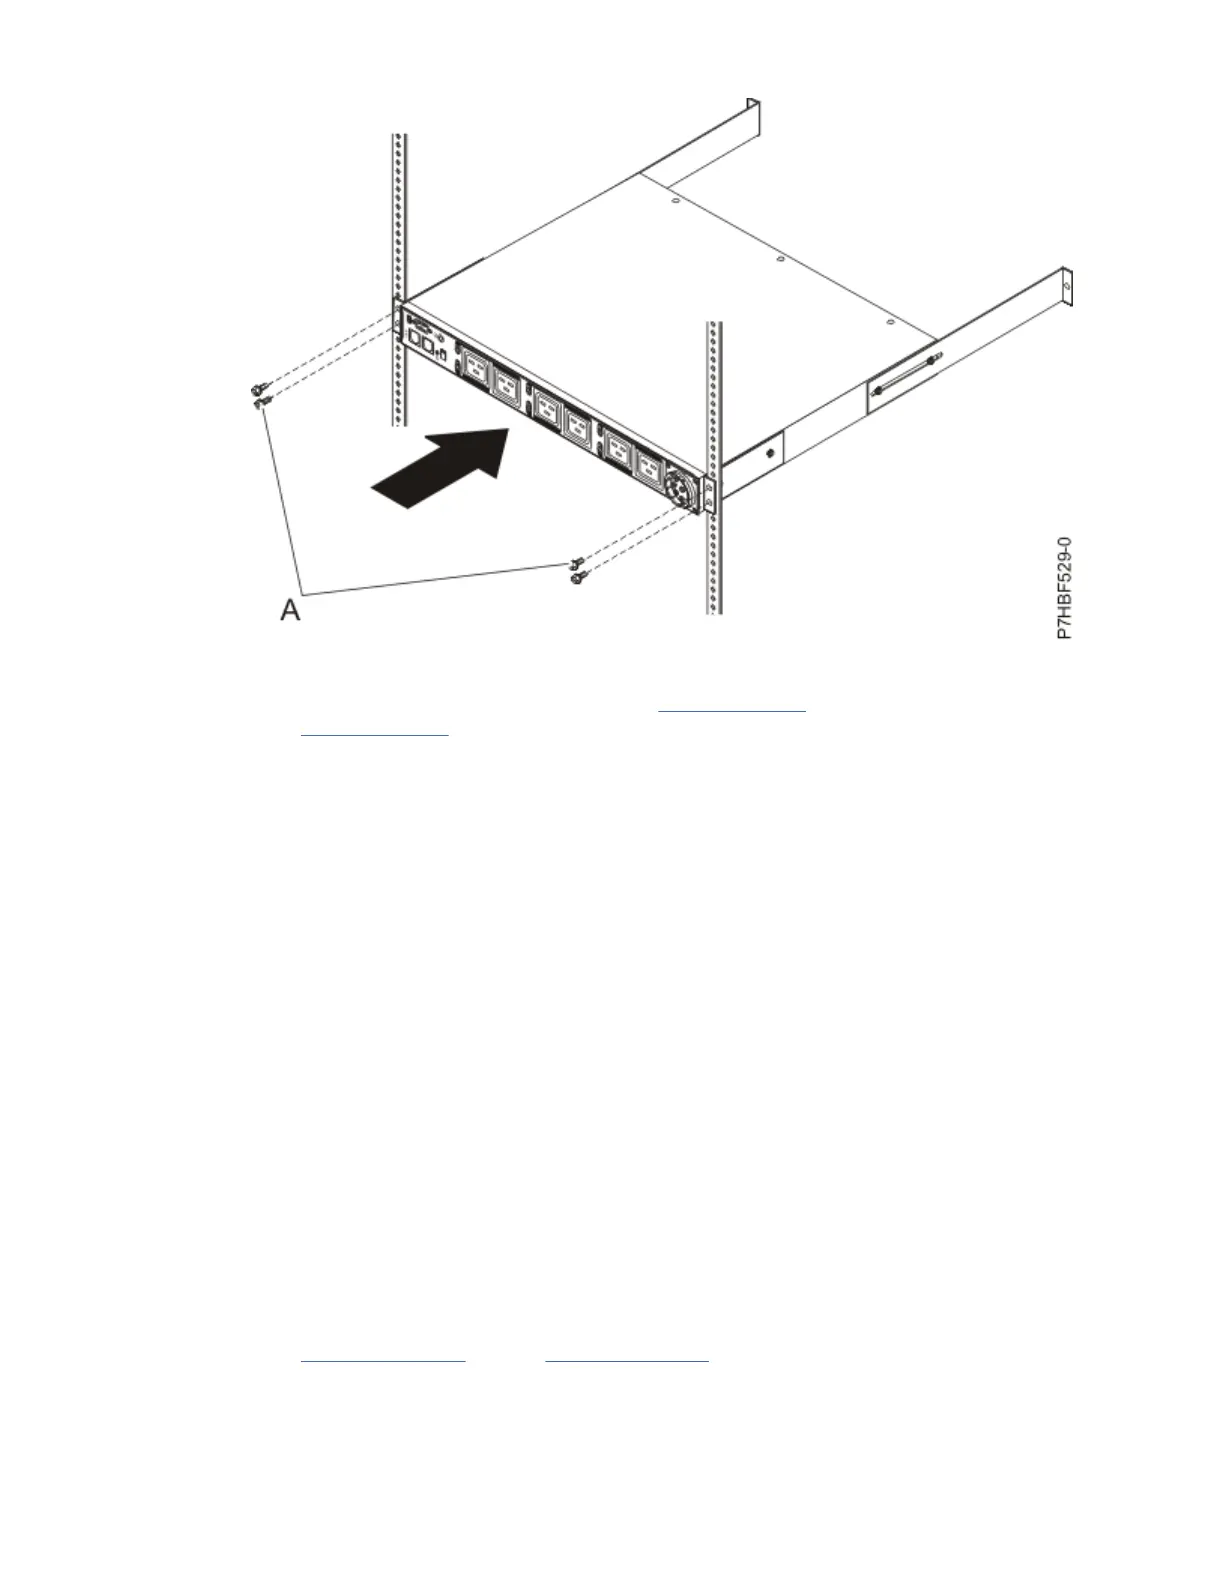
Figure 44. Attaching the front of the PDU+ or Intelligent Switched PDU in the rack
12. If the side covers are installed, continue with step “13” on page 61. If you removed the side covers,
go to step “14” on page 62.
13. Secure the long mounting brackets and the blank ller panel (A) to the rack cabinet by completing the
following steps:
a. Adjust the long mounting brackets to t the depth of the rack cabinet.
b. Place a mark on both rails at the rear of the PDU, PDU+, Intelligent Switched PDU, or Intelligent
Switched PDU+.
c. Remove the two M6 screws (A) if cage nuts are used, or M5 screws that secure the PDU, PDU+,
Intelligent Switched PDU, or Intelligent Switched PDU+ to the rack flanges.
d. Carefully remove the PDU, PDU+, Intelligent Switched PDU, or Intelligent Switched PDU+ from
the rack frame.
e. Position the marks on the rails so that they are at the rear of the PDU, PDU+, Intelligent Switched
PDU+, or Intelligent Switched PDUPDU, PDU+, Intelligent Switched PDU, or Intelligent Switched
PDU+.
f. Tighten the M3 pan-head screws that secure the long mounting brackets to the PDU, PDU+,
Intelligent Switched PDU, or Intelligent Switched PDU+ model.
g. Hold the PDU, PDU+, Intelligent Switched PDU, or Intelligent Switched PDU+ model at a slight
angle and carefully insert it into a mounting space that is a single EIA unit within the rack
cabinet. Pushing in slightly on both of the long mounting brackets helps clear the brackets from
the rack flanges.
h. Align the end of the PDU, PDU+, Intelligent Switched PDU, or Intelligent Switched PDU+ model
with the short mounting brackets with the outside of the rack flanges. Ensure that the rails align
properly with the front rack flanges. If not, mark and readjust the mounting rails length by
removing the PDU, PDU+, Intelligent Switched PDU, or Intelligent Switched PDU+ and repeating
steps “13.b” on page 61 through “13.g” on page 61. Use two M6 screws (A) if cage nuts are used
or M5 screws if nut clips are used per bracket to attach the brackets to the nut clips or cage nuts
on the rear rack flanges.
i. Make sure that the long mounting brackets are aligned with the inside of the rack flanges.
Racks and rack features
61
 Loading...