26
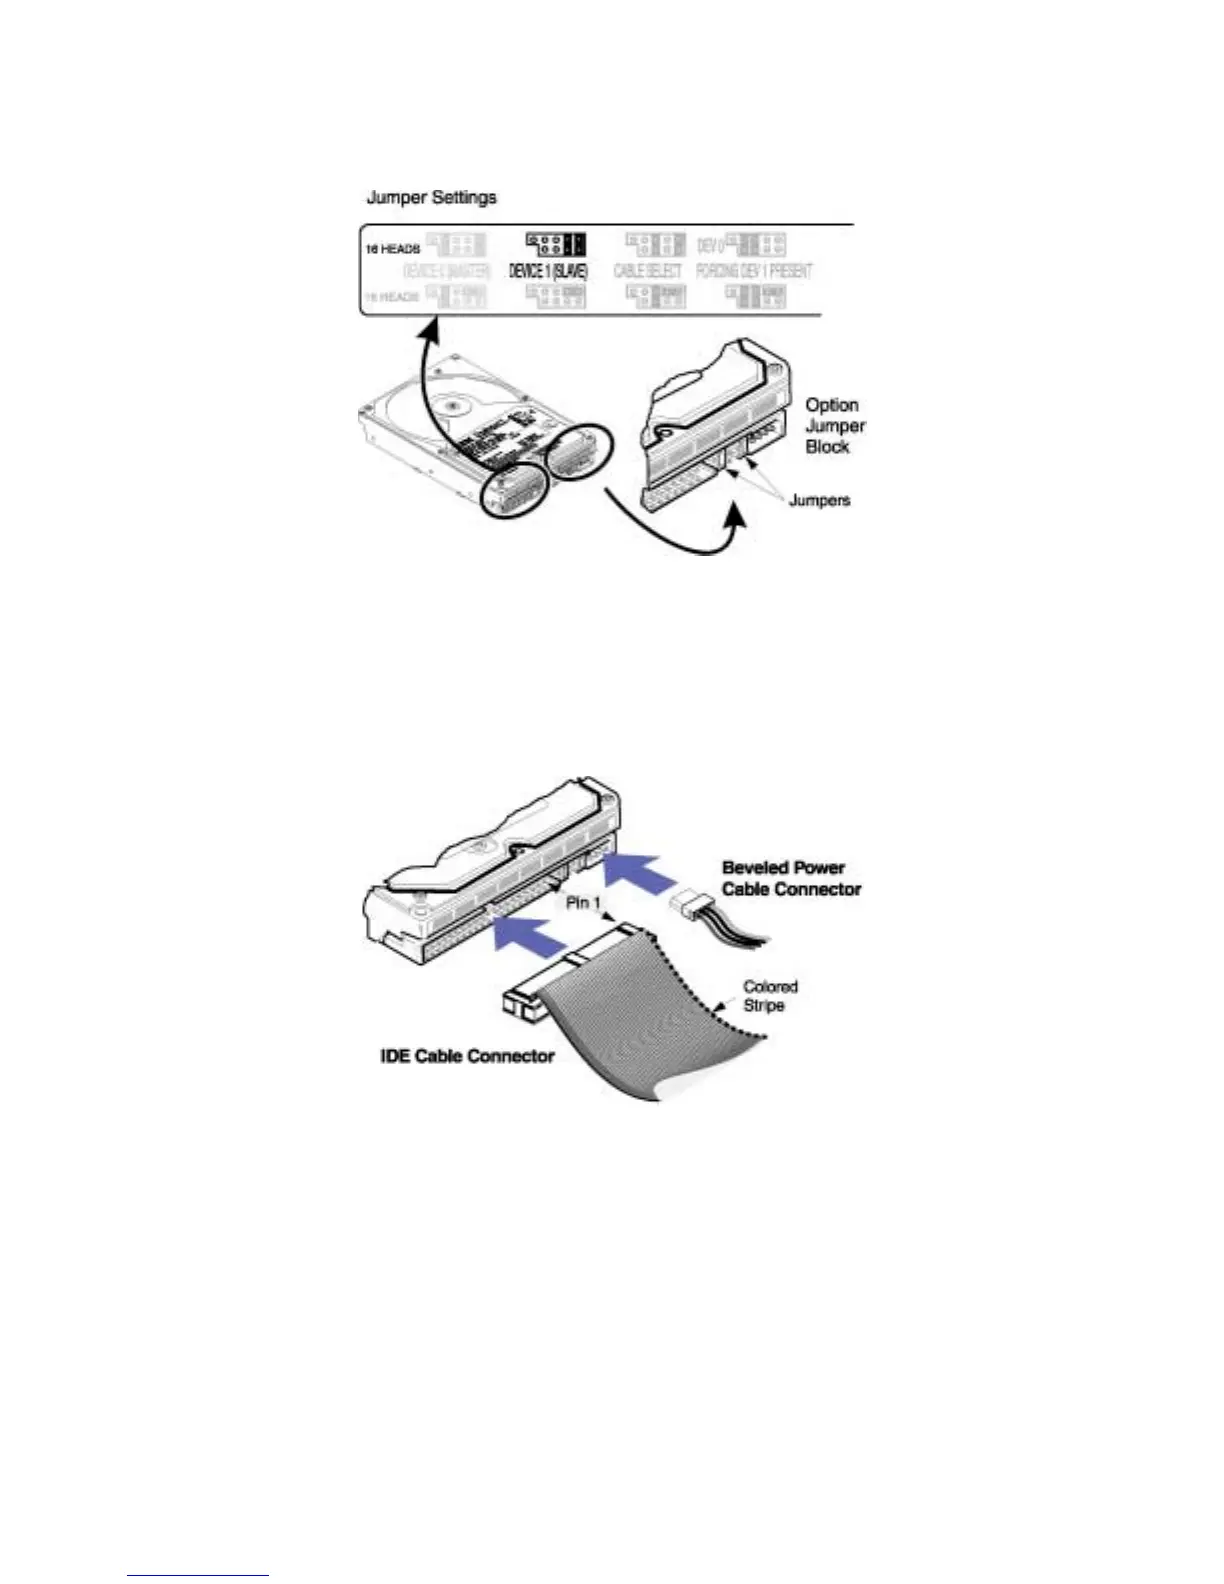
3. Set the jumpers to Slave, 16 heads.
Note: The IBM Deskstar has an option jumper block located next to the interface connector. Setting these
jumpers allows you to use the different options of the hard disk drive. See the "Jumpers" section of the
Appendix for jumper setting descriptions.
Attach the cables
Note: With some system chassis, it may be more convenient to attach the cable after the drive is mounted.
The order of the following steps may change depending upon your system.
Note: The 40-pin, 80-conductor ATA/IDE cable provided with the IBM Deskstar is color-coded for the
Master, Slave, and system connectors. The Master connector is black, the Slave connector is gray, and the
system connector is blue.
1. To use the provided ATA/IDE cable, remove the existing cable from the primary ATA/IDE
connector of your motherboard or controller card.
2. Attach the blue connector of the ATA/IDE cable to the ATA/IDE connector marked "Primary" or "0"
on the motherboard or controller card. The primary ATA/IDE connector controls the first and second
ATA/IDE devices in the system.
Note: The pin 1 edge of an ATA/IDE cable is marked with a colored stripe. The connectors are also keyed to
insert one way only.
 Loading...