3. Carefully slide the enclosure into the rack along the rails until the enclosure is
fully inserted.
Notes:
a. The preinstalled rails on the sides of the enclosure must fit into the
rack-mounted rails that you previously installed.
b. The rails are not designed to hold an enclosure that is partially inserted.
The enclosure must always be in a fully inserted position.
c. Do not have more than one enclosure extended out of the rack at the same
time to avoid the danger of the rack toppling over.
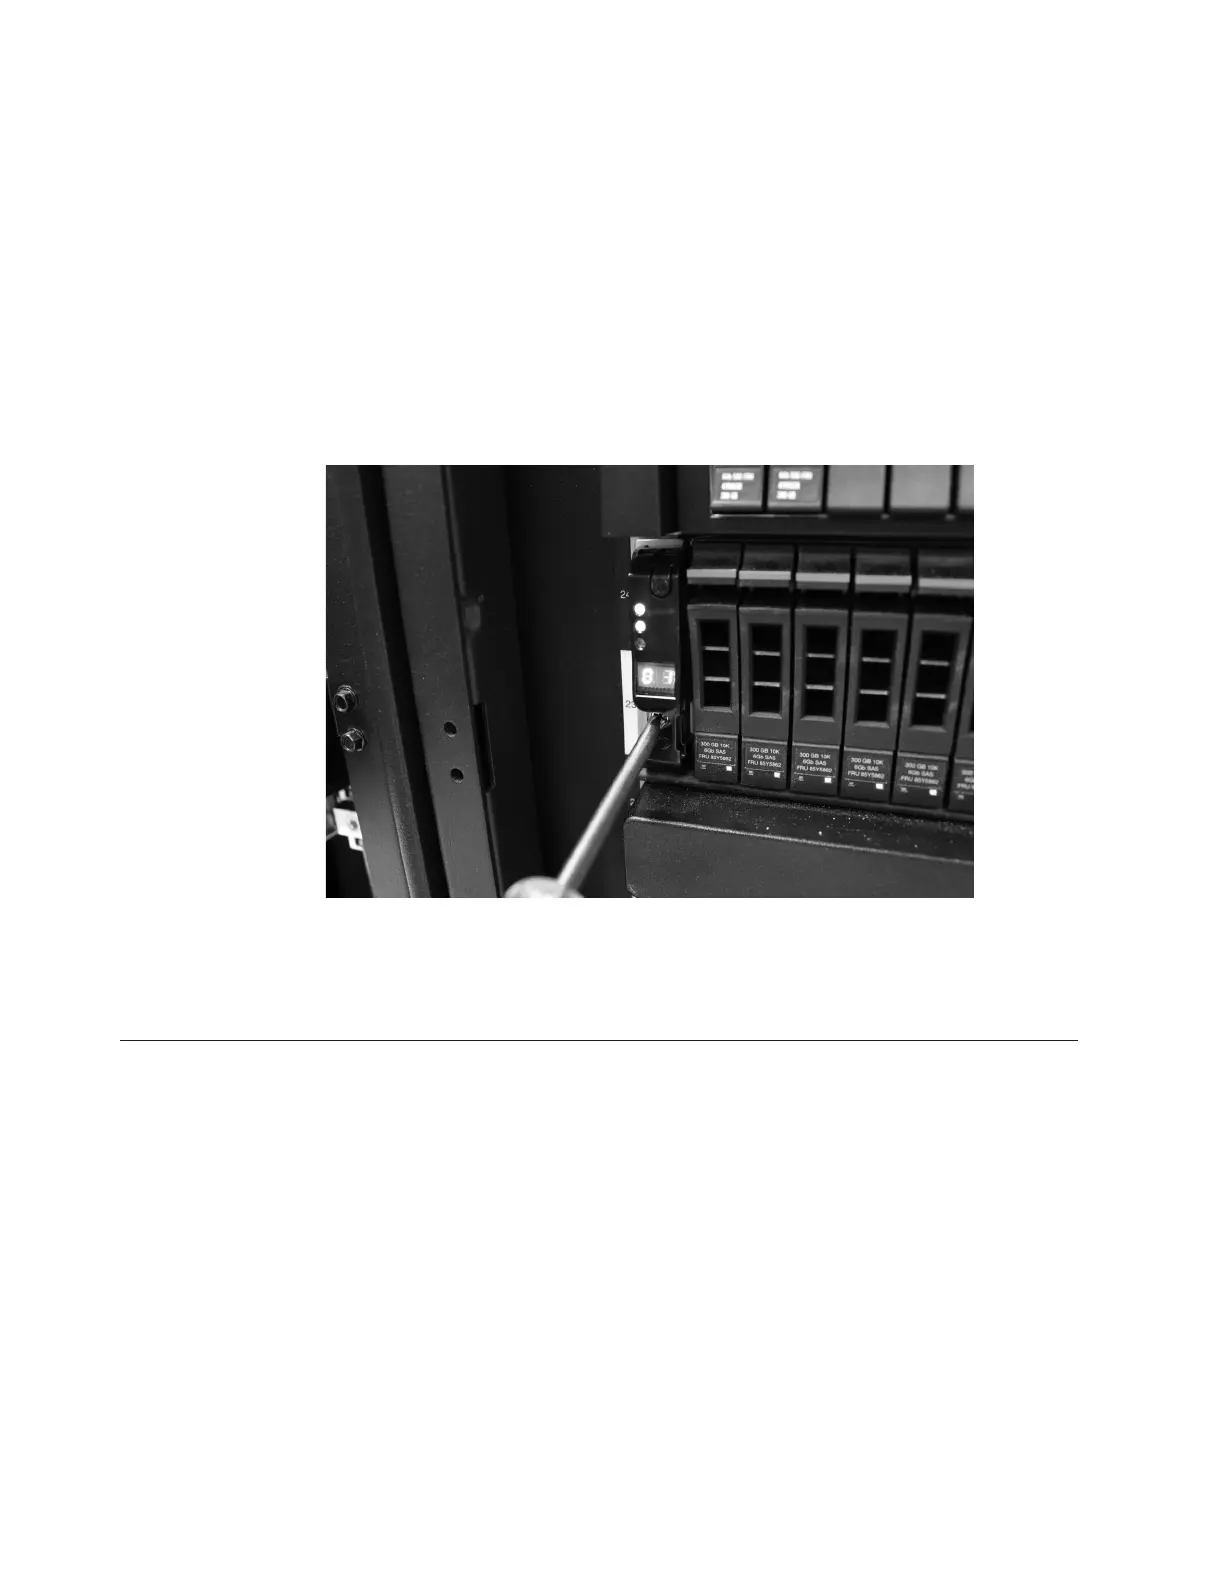
4. Insert a screw into the hole behind each enclosure end cap and tighten the
screw, as shown in Figure 7.
5. After matching each end cap's serial number to the serial number found on the
rear of each enclosure, push the end caps back into position.
6. Repeat this procedure for each additional enclosure that you install.
Connecting the SAS cables
This topic describes the general cabling guidelines for attaching SAS cables when
installing one or more expansion enclosures.
About this task
This task applies if you are installing one or more expansion enclosures.
Note: The enclosure terminology that is used in this topic is described fully in
“Identifying the hardware components” on page 6.
Be aware of these guidelines when you begin to attach the cables to the SAS ports:
v Attach cables serially between enclosures; do not skip an enclosure.
v Ensure that cables are installed in an orderly way to reduce the risk of cable
damage when replaceable units are removed or inserted.
v Arrange your cables to provide access to:
svc00688
Figure 7. Securing an enclosure to a rack cabinet
12 IBM Storwize V7000: Expansion Enclosure Installation Guide
 Loading...


