37
2. Configuration
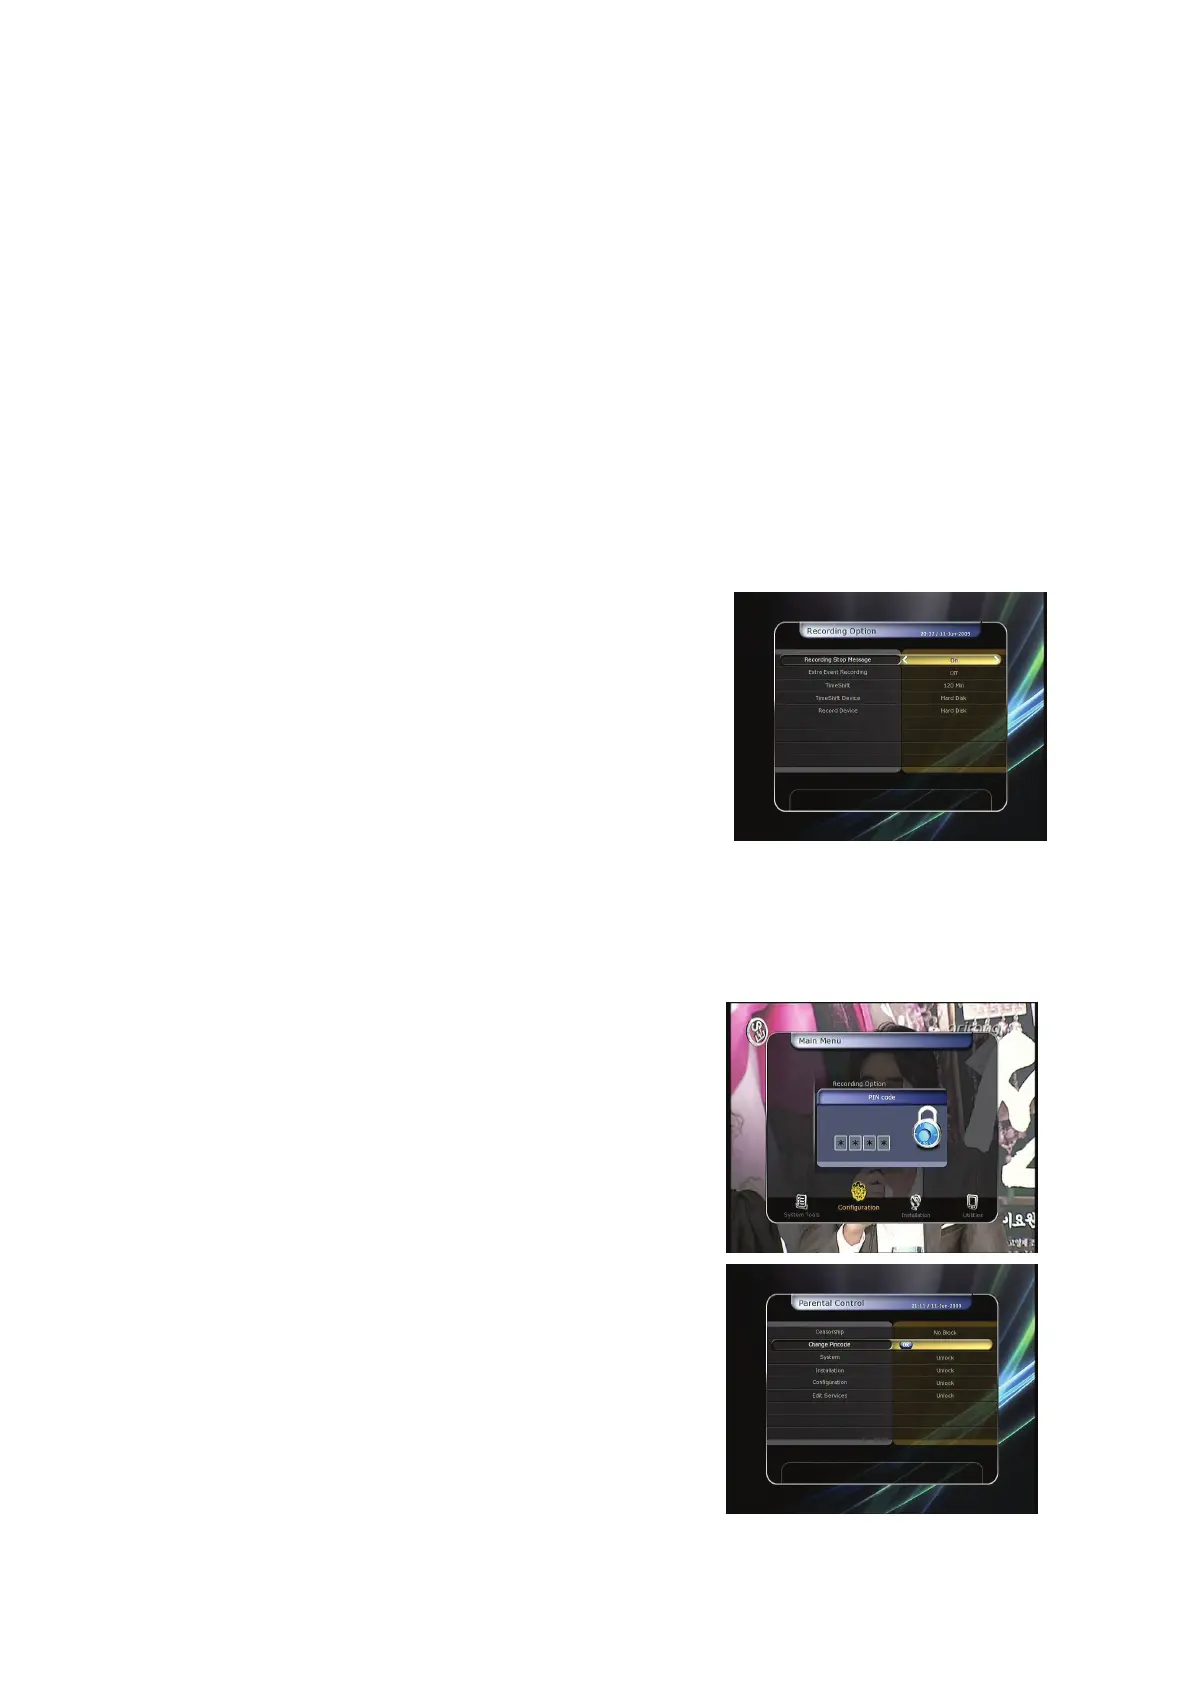
2.1 Recording Option
Confirmation message when ‘stopping’ your Recording process :
- Set 'On' : When you press the STOP button while recording, then a confirmation window is
displayed.
- Set 'Off' : When you press the STOP button while recording, the STB will stop the recording process
immediately / instantly with no extra confirmation message.
Extra Event Recording :
You can add an extra recording time(1 Min/2 Min/3 Min/4 Min/5 Min/10 Min/15 Min/off ) to
scheduled recording events.
If you set an extra recording time by using the ARROW and OK buttons, the scheduled recording
event will have a ‘Start’ and ‘End’ time of additional recording time added to the basic event..
This option only works for real time events. But, when you schedule a service recording in the Timer
Settings menu, this option has no affect.
Time-Shift :
You can adjust the time-shift in 30 minute intervals.
(30 Min/60 Min/90 Min/120 Min)
When selected, time shifting function works automatically up
to the limit of time that you set, as long as the Time-Shift
storage device has enough memory space.
If you set this option to ‘OFF’ status, then the time shifting
function never works.
Time-Shift Device :
You can select the Time-Shift Device you want, such as Hard Disk / USB1(Front) / USB2(Rear).
Record Device :
You can also set a Recording Device which you want to use, such as the Hard Disk / USB1(Front) /
USB2(Rear). Recorded files are stored in the device you set.
2.2 Parental Control
User’s access rights to a service and programs are controlled by
a 4-digit secret code that is defined by the user. Whenever you
attempt to access the parental control menu, a pop-up
window will ask you to input a PIN code. (If necessary, you can
change it.)
NOTE : The default PIN code is ‘0000’
Censorship : Set the parental guidance rating of highlighted
censorship classification. The parental level is given as an age-
based number.
Change Pin code : To change your PIN code, input the new
PIN code using the NUMERICAL buttons. To verify the new
PIN code, input the new PIN code again.
System : Set the access rights to the System menu.
Installation : Set the access rights to the Installation menu.
Configuration :
Set the access rights to the Configuration menu.
Edit Service : Set the access rights to the Edit menu.