EasyManua.ls Logo

ICM Controls ICM325HN - User Manual

ICM Controls ICM325HN
2 pages
To Next Page IconTo Next Page
Loading...
• Line voltage:120,208,240,and480VAC
• Control voltage:18-30VAC
• Frequency:50-60Hz
• Operating temperature:-40ºFto+176ºF(-40°Cto+75°C)
• Sensors:10Kohmsat77°F(25°C)
• Heat pump override:24VACN.C.orN.O.
Note:Amaximumofthreesensorscanbeconnectedtothecontrol.
• Weight:12ounces(341grams)
Note:The ICM325HN should be applied to motors and equipment that have been designated by their
respective manufacturers as capable of being speed controlled.
• Mounting:
– Surfacemountusing(4)#8screws
– TheICM325HNshouldbesurfacemountedtoacleanmetalorotherthermallyconductivesurfacefor
maximumheatdissipation
– ItisrecommendedthattheICM325HNbemountedawayfromthecondenserexhaustairinordertomaintain
loweroperatingtemperatures
Specifications
Installation of the ICM325HN shall be performed by trained technicians only. Adhere to all local and national
electric codes.
Disconnect all power to the system before making any connections.
Caution!
ICM325HN
Installation, Operation & Application Guide
For more information on our complete range of American-made
products – plus wiring diagrams, troubleshooting tips and more,
visit us at www.icmcontrols.com
Head Pressure
Control with
Optional
Heat Pump Override
Temperature sensitive
control regulates
head pressure
1. Removepowerfromsystem.
2. FieldinstallawirefromLine 1wiretoLine 1terminal.
3. CutLine2wire;afxmotorsidetoMotor2terminalandline
sidetoLine2terminal.
4. Make24VAC,probeandHPconnections.
5. Verifywiringiscorrect.
6. Powerupsystemandcheckoperation.
Connections for ICM325HN at 480 VAC
PSC
Fan
Motor
Run
Capacitor
480VAC
Typical condenser fan
Line
1
480VAC
Line
2
Motor
2
PSC
Fan
Motor
Run
Capacitor
480VAC
Field
Installed
Wire
Typical condenser
fanwithICM325HN
installed
Connections for ICM325HN at 120/208/240 VAC
1. Removepowerfromsystem.
2. FieldinstallawirefromLine 1wiretoLine 1terminal.
3. CutLine2wire;afxmotorsidetoMotor2terminalandline
sidetoLine2terminal.
4. Make24VAC,probeandHPconnections.
5. Verifywiringiscorrect.
6. Powerupsystemandcheckoperation.
PSC
Fan
Motor
Run
Capacitor
Line
1
120/240
VAC
Line
2
Motor
2
PSC
Fan
Motor
Run
Capacitor
Field
Installed
Wire
Typical condenser
fanwithICM325HN
installed
120/208/240
VAC
Typical condenser fan
120/208/240
VAC
Connecting the Probe
Example
1. Installthetemperatureprobeseveralbendsintothecondenser.Itcanbeattachedtothe
U-bendorplacedbetweenthensintheupper1/3ofthecondenser(seeothersidefor
moreinformation).
Note:
Theresponseofthesystemcanbenetunedbyrepositioningtheprobe.Place
theprobeonthecondenserwhereitis100°Fwhenpressuresarecorrectfor
bestresponse.
2. Connectthetwowiresfromthesensortotheterminal
blockwhereitismarkedPROBE S1.Ifadditionalprobesarenecessaryformultiple
refrigerantcircuits,theymaybeattachedtoterminalsmarkedPROBES2andPROBES3.
Note:
Thecontrolwillrespondtotheprobethatsensesthehighesttemperature.
Connections for Air Conditioning Only
1. For non-heat pump applications,theheat
pumpselectjumpermustbeintheDefault
(N.O.)position,andtheHPterminalsmust
beleftunconnected.
2. SettheCutout SpeedandtheHard Start
Timetotheappropriatepositionsforthetype
ofmotoryouhave(seeotherside).
TemperatureProbe24VAC
Additional
Probes
ProbeS1
HP
HeatPump
SelectJumper
DefaultPosition
ICM325HN Typical Installation
Question and Answer IconNeed help?

Do you have a question about the ICM Controls ICM325HN and is the answer not in the manual?

ICM Controls ICM325HN Specifications

General IconGeneral
Voltage24 VAC
Control TypeDirect Spark Ignition
Frequency50/60 Hz
Trial for Ignition Time4 seconds
Ignition Retries3
Contact FormSPST
Terminal TypeScrew terminal
MaterialPlastic
Current Rating3A
Dimensions4.5 x 4.0 x 1.5 inches
Operating Temperature-40 to 175°F
Flame Current Range1 μA AC minimum

Summary

Wiring Connections

120;208;240 VAC Connections

Details wiring for 120/208/240 VAC systems, including typical condenser fan diagrams with and without the control.

480 VAC Connections

Details wiring for 480 VAC systems, including typical condenser fan diagrams with and without the control.

Specifications and Mounting

Product Specifications

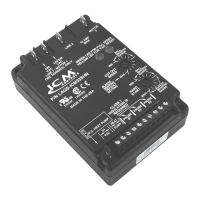
Lists electrical ratings, operating temperatures, sensor type, heat pump override, and weight of the ICM325HN control.

Mounting Guidelines

Recommends surface mounting on clean metal for heat dissipation and placement away from exhaust air.

Probe Installation and Configuration

Connecting the Temperature Probe

Guides on installing the temperature probe into the condenser for accurate sensing and fine-tuning response.

AC-Only Configuration

Instructions for setting the heat pump jumper and leaving HP terminals unconnected for AC-only applications.

Heat Pump System Wiring

Heat Pump Reversing Valve Control

Explains connecting the 24 VAC signal from the reversing valve coil to the HP terminals for heating mode operation.

Troubleshooting

Unit Startup and Circuit Issues

Addresses problems like unit failure to start, blown fuses, or circuit issues, suggesting sensor checks and wiring verification.

Fan Operation and Modulation Problems

Covers fan cycling or failure to operate, recommending adjustments to hard start time and probe location.

High Pressure Trips and Indicator Lights

Troubleshoots high pressure switch trips and alternating green/yellow LEDs by checking voltage and probe connections.

Operating Modes and Settings

Mode of Operation Description

Explains control behavior (full speed, variable speed, off) based on probe temperatures and LED indicators.

Heat Pump Bypass Operation

Details how the fan runs at full speed in heat mode via the HP terminals or jumper settings for maximum air movement.

Setting the Cutout Speed

Guides on adjusting the cutout speed dial for sleeve bearing and ball bearing motors to achieve desired voltage range.

Setting the Hard Start Time

Instructs on adjusting the hard start dial for motor startup protection and bearing lubrication.

Appendices

Sensor Mounting Comparison

Compares mounting a sensor in the condenser versus the liquid line for faster response to head pressure changes.

Temperature vs. Probe Resistance Chart

Provides a table correlating temperature (°C/°F) with the sensor's resistance in KiloOhms (KΩ).

Related product manuals