SECTION 3 DISASSEMBLY INSTRUCTIONS
3 - 1
H
Chassis unit
K
G
Front panel
F
I
L
L
L
M
Chassis unit
Main unit
C
Rear panel
A
B
Front panel
D
E
F
Main seal
•
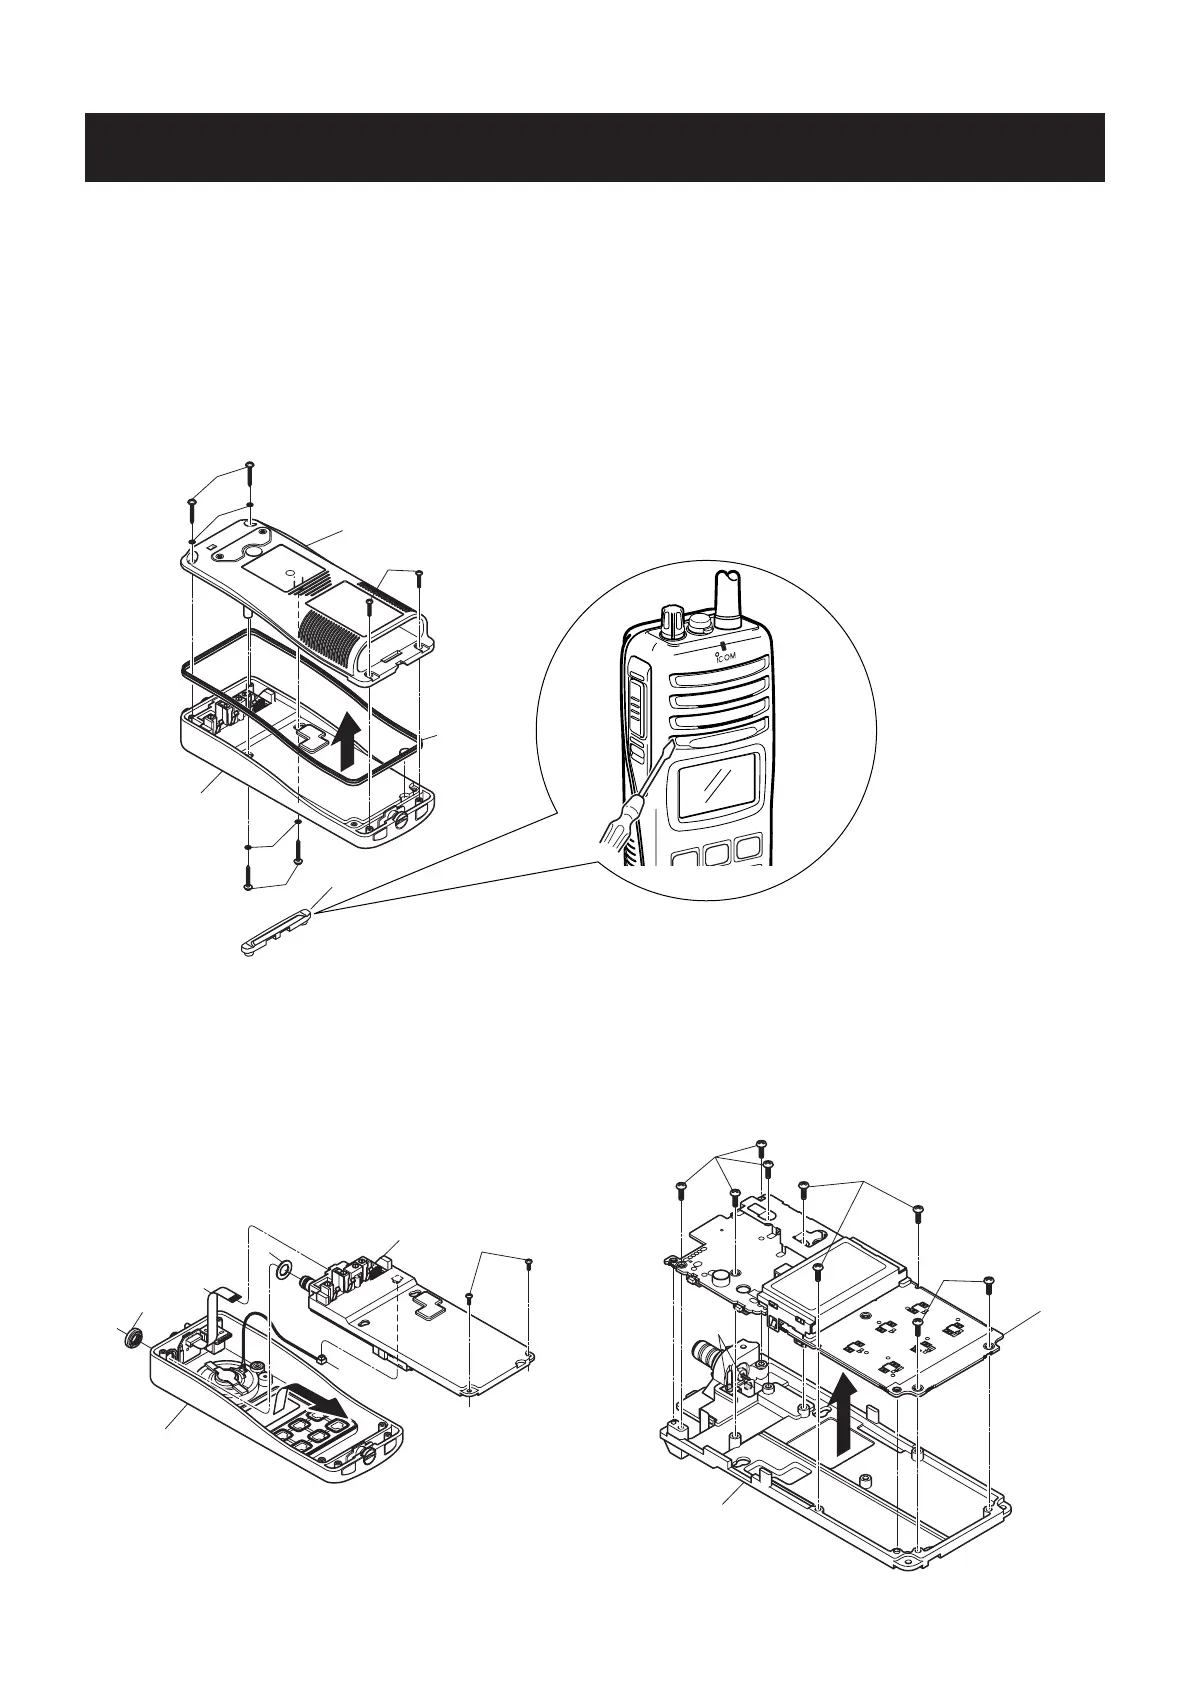
REMOVING THE CHASSIS UNIT
1 Unscrew 1 nut G.
2 Unscrew 2 screws H.
3 Take off the chassis unit in the direction of the arrow.
4 Unplug the connector I and the cable J from the
chassis unit.
5 Remove 1 washer K.
•
REMOVING THE REAR PANEL
1 Remove the speaker panel A.
2 Unscrew 2 screws B, and remove 2 washers C.
3 Unscrew 2 screws D.
4 Unscrew 2 screws E, and remove 2 washers F.
5 Remove the rear panel and the main seal from the front
panel.
•
REMOVING THE MAIN UNIT
1 Unscrew 9 screws L.
2 Unsolder 2 points M, and take off the main unit in the
direction of the arrow.
Note: When replacing the screws, 10–12 kg of torque MUST
be applied to ensure water resistance.
#)-
0
3
R
7!2.).'.%6%2ATTEMPTTOREMOVETHESPEAKERPANEL
USINGYOURFINGERNAILSTHISMAYRESULTINJURLY
5SEAFLATHEADSCREWDRIVERORASIMILAR
FLATINSTRUMENT