39
Connect QconPro X to your Mac/PC with the provided USB cable and launch iMap.
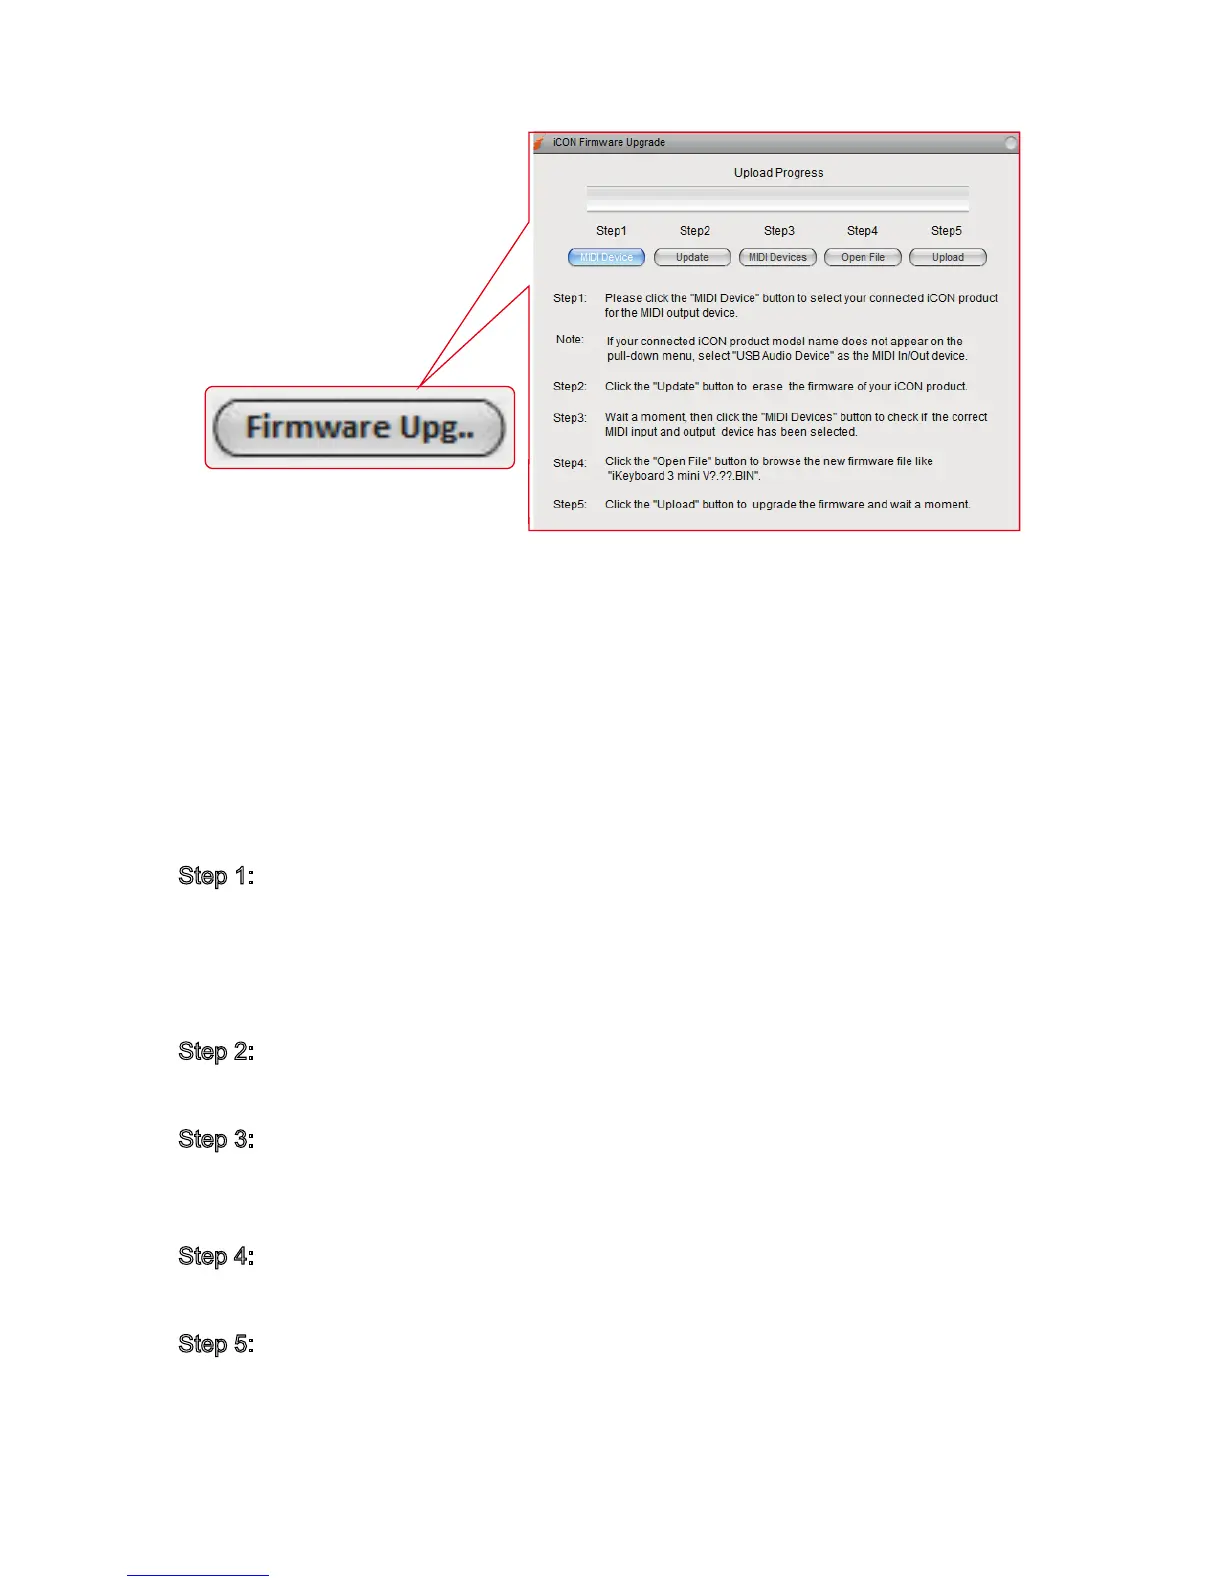
Click “Firmware Upgrade” to launch the window and follow the steps below carefully
to upgrade
Warning: The rmware upload process “MUST” be completed and not be
interrupted during the le upload process, otherwise the unit may not able
to be restored, in which case your device may require service centre
repair before it can be reactivated.
Step 1: Please click the rst "MIDI Device" button above to select QconPro X as
the MIDI output device.
Note: If QconPro X does not appear on the pull-down menu, select "USB
Audio Device" as the MIDI In/Out device.
Step 2: Click "Update" to erase the rmware. A pop-up message will show after
the rmware has erased successfully.
Step 3: Please wait a few seconds to ensure the unit has completely rebooted,
and then click the third button "MIDI Devices", to check if the correct MIDI
input and output device has been selected.
Step 4: Click "Open File" to browse to the new rmware such as "QconPro X
V1.00.BIN".
Step 5: Click "Upload" to upgrade the rmware, and wait until its completion.