ICON MOTOSPORTS VARIANT MANUAL
9
ICON MOTOSPORTS VARIANT HELMET
10
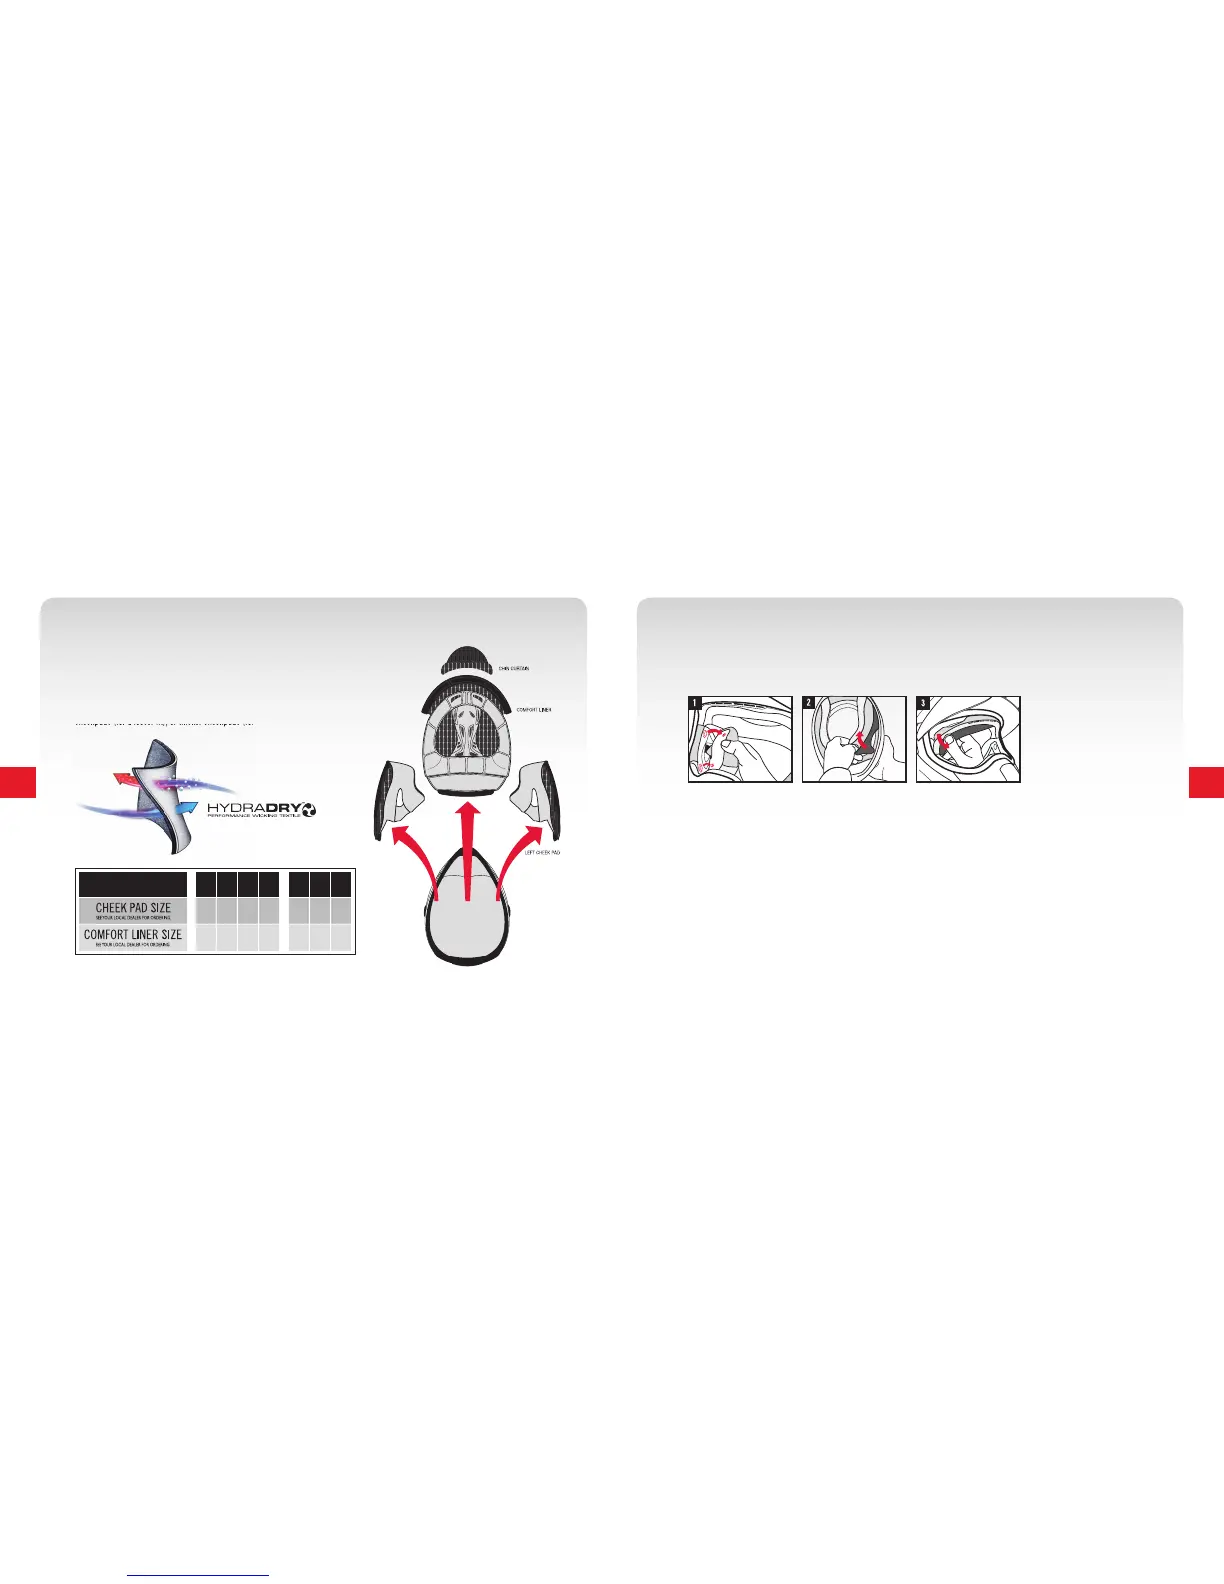
Icon helmets feature a fully customizable HydraDry™ moisture wicking interior
comfort liner. The size of a helmet is based on a combination of three factors:
outer shell size, inner eps thickness, and cheekpad thickness. The fi t of the
helmet can be customized by replacing your existing cheekpads with thinner
cheekpads (for a looser fi t), or thicker cheekpads (for a tighter fi t).
INTERIOR
1. Release each cheekpad from the helmet by pulling inward, freeing it from the three snap system. It is
easiest to do this by reaching through the helmet eye port.
2. Flip your helmet over and pull on the cheekpad. Note how the cheekpad plate slips between the helmet shell
and EPS liner for reassembly.
3. Remove your comfort liner by releasing it from the two snap sytem on the back of the helmet. Then
remove the crown comfort liner attachment point, taking note of how the crown plate attachment slips into
place between the shell and EPS liner.
4. To reinstall the interior, reverse steps 1 - 3. For more information, instructional videos can be
found at www.rideicon.com in the technical video section which is located under the culture tab.
COMFORT LINER REMOVAL
Follow these steps to remove your interior for cleaning or replacement:
*PLEASE NOTE: YOUR HELMET SHELL SIZE CAN BE FOUND BY FOLLOWING THE STEPS ON PAGE 5