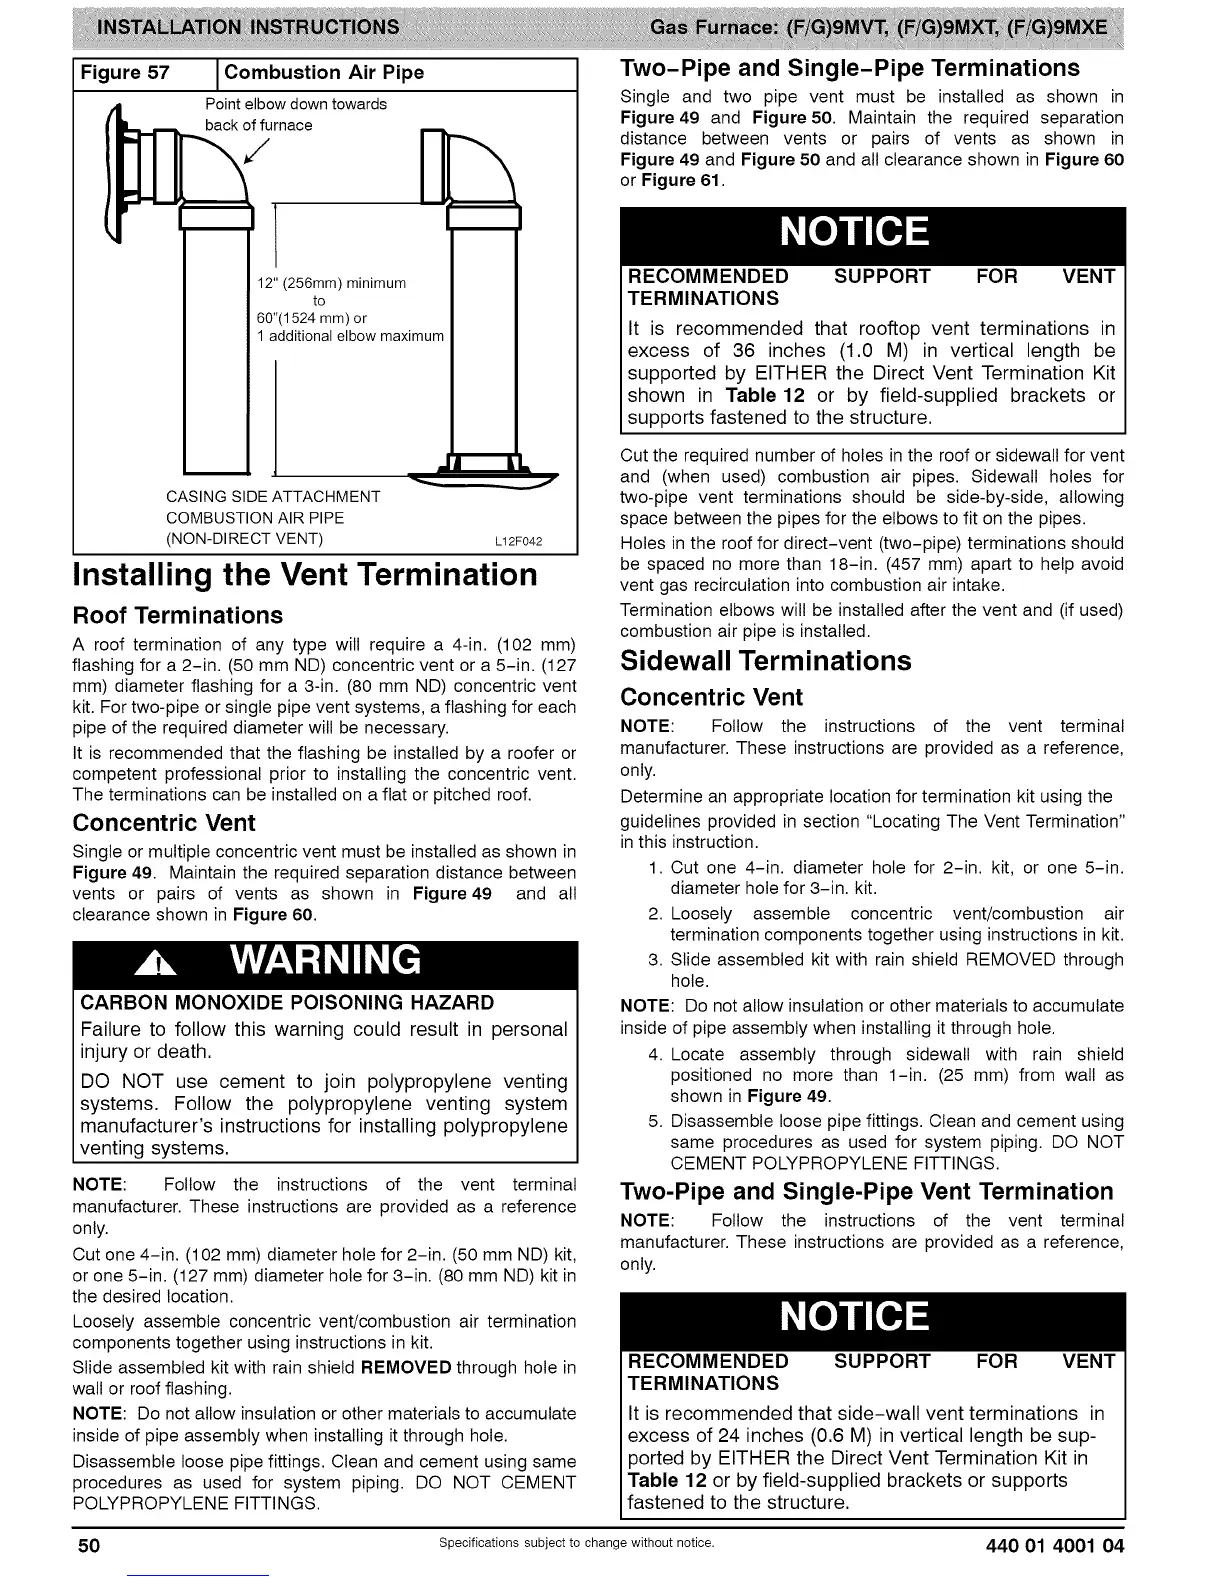
Figure 57
I Combustion Air Pipe
Point elbowdown towards
back offurnace
/
12" (256mm) minimum
to
60"(1524 mm) or
1 additional elbow maximum
CASING SIDE ATTACHMENT
COMBUSTION AIR PIPE
(NON-DIRECT VENT) Lt2F042
Installing the Vent Termination
Roof Terminations
A roof termination of any type will require a 4-in. (102 mm)
flashing for a 2-in. (50 mm ND) concentric vent or a 5-in. (127
mm) diameter flashing for a 3-in. (80 mm ND) concentric vent
kit. For two-pipe or single pipe vent systems, a flashing for each
pipe of the required diameter will be necessary.
It is recommended that the flashing be installed by a roofer or
competent professional prior to installing the concentric vent.
The terminations can be installed on a flat or pitched roof.
Concentric Vent
Single or multiple concentric vent must be installed as shown in
Figure 49. Maintain the required separation distance between
vents or pairs of vents as shown in Figure 49 and all
clearance shown in Figure 60.
CARBON MONOXIDE POISONING HAZARD
Failure to follow this warning could result in personal
injury or death.
DO NOT use cement to join polypropylene venting
systems. Follow the polypropylene venting system
manufacturer's instructions for installing polypropylene
venting systems.
NOTE: Follow the instructions of the vent terminal
manufacturer. These instructions are provided as a reference
only.
Cut one 4-in. (102 mm) diameter hole for 2-in. (50 mm ND) kit,
or one 5-in. (127 mm) diameter hole for 3-in. (80 mm ND) kit in
the desired location.
Loosely assemble concentric vent/combustion air termination
components together using instructions in kit.
Slide assembled kit with rain shield REMOVED through hole in
wall or roof flashing.
NOTE: Do not allow insulation or other materials to accumulate
inside of pipe assembly when installing it through hole.
Disassemble loose pipe fittings. Clean and cement using same
procedures as used for system piping. DO NOT CEMENT
POLYPROPYLENE FITTINGS.
Two-Pipe and Single-Pipe Terminations
Single and two pipe vent must be installed as shown in
Figure 49 and Figure 50. Maintain the required separation
distance between vents or pairs of vents as shown in
Figure 49 and Figure 50 and all clearance shown in Figure 60
or Figure 61.
RECOMMENDED SUPPORT FOR VENT
TERMINATIONS
It is recommended that rooftop vent terminations in
excess of 36 inches (1.0 M) in vertical length be
supported by EITHER the Direct Vent Termination Kit
shown in Table 12 or by field-supplied brackets or
supports fastened to the structure.
Cut the required number of holes in the roof or sidewall for vent
and (when used) combustion air pipes. Sidewall holes for
two-pipe vent terminations should be side-by-side, allowing
space between the pipes for the elbows to fit on the pipes.
Holes in the roof for direct-vent (two-pipe) terminations should
be spaced no more than 18-in. (457 mm) apart to help avoid
vent gas recirculation into combustion air intake.
Termination elbows will be installed after the vent and (if used)
combustion air pipe is installed.
Sidewall Terminations
Concentric Vent
NOTE: Follow the instructions of the vent terminal
manufacturer. These instructions are provided as a reference,
only.
Determine an appropriate location for termination kit using the
guidelines provided in section "Locating The Vent Termination"
in this instruction.
1. Cut one 4-in. diameter hole for 2-in. kit, or one 5-in.
diameter hole for 3-in. kit.
2. Loosely assemble concentric vent/combustion air
termination components together using instructions in kit.
3. Slide assembled kit with rain shield REMOVED through
hole.
NOTE: Do not allow insulation or other materials to accumulate
inside of pipe assembly when installing it through hole.
4. Locate assembly through sidewall with rain shield
positioned no more than 1-in. (25 mm) from wall as
shown in Figure 49.
5. Disassemble loose pipe fittings. Clean and cement using
same procedures as used for system piping. DO NOT
CEMENT POLYPROPYLENE FITTINGS.
Two-Pipe and Single-Pipe Vent Termination
NOTE: Follow the instructions of the vent terminal
manufacturer. These instructions are provided as a reference,
only.
RECOMMENDED SUPPORT FOR VENT
TERMINATIONS
It is recommended that side-wall vent terminations in
excess of 24 inches (0.6 M) in vertical length be sup-
ported by EITHER the Direct Vent Termination Kit in
Table 12 or by field-supplied brackets or supports
fastened to the structure.
50 Specifications subject to change without notice. 440 01 4001 04