Do you have a question about the ICP NAC248AKA1 and is the answer not in the manual?
Essential safety rules to follow during installation and operation of the unit.
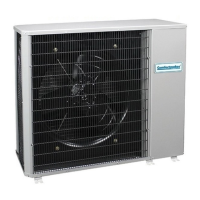
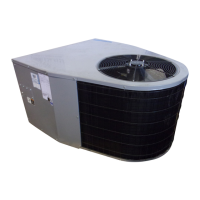
Guidelines for selecting an appropriate and safe location for the outdoor unit.
Specifies required minimum distances around the unit for proper operation and servicing.
Details methods and materials for properly supporting the outdoor unit.
Recommendations for supporting units placed on the ground.
Guidelines for installing units on rooftops, including structural considerations.
Importance of using approved system components for compatibility and performance.
Information on the restrictor orifice and its role in system performance.
Proper types of tubing and handling for refrigerant line installations.
Specific guidance for installations where the condenser is elevated above the evaporator.
Recommended procedures and safety precautions for brazing refrigerant lines.
Step-by-step guide for properly evacuating the system using a vacuum pump.
Instructions on how to operate and secure service valves on the unit.
Instructions for safe and correct electrical connections to the unit.
Requirements for properly grounding the unit for safety and code compliance.
Details on making line voltage and low voltage connections.
How to safely access the unit's control box for wiring or adjustments.
Overview of the heat pump's control box and its components.
Diagram showing typical low voltage wiring for A/C systems.
Diagram illustrating low voltage control wiring for heat pump systems.
Guidance on adjusting refrigerant charge for optimal system performance.
Importance of establishing correct airflow for system adjustments and performance.
Procedure for checking and adjusting refrigerant charge using the superheat method.
Procedure for checking refrigerant charge in heating mode for optimal performance.
Explanation of the electronic defrost system and its operational parameters.
How to adjust the defrost cycle frequency for heat pump operation.
Instructions for maintaining the condensate drain to ensure proper drainage.
Tips for keeping the outdoor unit clean for better efficiency and longevity.
General conditions, limitations, and coverage provided under the product warranty.
Specific warranty terms and exclusions applicable to residential installations.
This document provides comprehensive installation, startup, and maintenance instructions for Split System Performance Line AC & HP Condensers. It emphasizes safety, proper installation techniques, and routine care to ensure optimal performance and longevity of the unit.
The Split System Performance Line AC & HP Condensers are designed to provide efficient cooling and heating for residential and commercial applications. These outdoor units work in conjunction with an indoor evaporator coil and furnace/air handler to form a complete HVAC system. The condenser's primary function is to release heat to the outdoors during cooling cycles and absorb heat from the outdoors during heating cycles (for heat pump models), thereby regulating indoor temperature. The system utilizes R-22 refrigerant, and proper charging and line sizing are critical for its operation.
The manual details several key aspects related to the usage and setup of the condenser units:
The manual emphasizes the importance of regular maintenance for efficient and long-lasting operation:
The document also includes a Limited Warranty Certificate, detailing the terms, conditions, and exclusions of the warranty for various components, including heat exchangers, compressors, and other functional parts. It specifies different warranty periods for residential and commercial applications and emphasizes the need for proper installation, operation, and yearly maintenance to keep the warranty valid.
| Category | Air Conditioner |
|---|---|
| Seasonal Energy Efficiency Ratio (SEER) | 16 |
| Refrigerant | R410A |
| Model | NAC248AKA1 |
| Heating Seasonal Performance Factor (HSPF) | 9.0 |
| Power Supply | 208-230V/60Hz/1Ph |
| Cooling Capacity | 24000 BTU/h |
| Heating Capacity | 24000 BTU/h |