Do you have a question about the ICP PHF336000K00A1 and is the answer not in the manual?
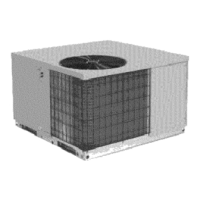
View of unit and location of access panels.
Location must allow minimum clearances for proper operation and sound.
Unit must be installed level front to rear and side to side.
Connections for line voltage are made in the unit control box.
Location of thermostat affects home comfort. Follow manual for correct wiring.
Proper sizing affects temperature, airflow, velocity, and efficiency.
Outdoor ductwork requires minimum 2" thick fiberglass insulation and vapor barrier.
Use flexible, non-combustible connectors between main trunk ducts and plenums.
All return air must pass through a filter before entering the unit.
Details blower speeds for rated and high airflow based on model.
Verify blower speed settings, clean filters, and replace access panels.
Step-by-step process for turning on the unit after installation.
Describes cooling cycle for 2-3.5 Ton and 4 Ton models.
Describes heating cycle for 2-3.5 Ton and 4 Ton models.
Delays compressor start for 5 minutes after power interruption.
Indoor fan operates continuously when selected on thermostat.
Details the defrost cycle initiation, timing, and termination.
Includes checks for air filters and condensate drain.
Focuses on cleaning the condenser coil and checking condensate drain.
Annual inspection includes cleaning coils, checking fan motors, and blower assembly.
Condenser fan motor is permanently lubricated; no additional lubrication is needed.
Procedure for accessing the blower motor compartment.
Instructions for removing and replacing blower wheel or housing.
Visually inspect blower wheel for dirt; clean compartment and wheel.
Schematic showing electrical connections for 2 to 3-1/2 Ton models.
This document provides installation instructions and technical specifications for the PHF3 Series Package Heat Pumps, available in 2 to 4 TON capacities. These units are designed for residential and light commercial heating and cooling applications, offering a self-contained solution that integrates all necessary components into a single outdoor cabinet.
The PHF3 Series Package Heat Pumps are unitary air conditioning systems capable of both heating and cooling. They operate by extracting heat from the air in heating mode and rejecting heat in cooling mode, utilizing a refrigerant cycle. The units are designed for either ground-level or rooftop installation and include an indoor fan, outdoor fan, compressor, and a defrost board for managing the defrost cycle in heating mode. The system is controlled by a thermostat, which can be single-stage for 2 to 3.5 Ton models or two-stage for 4 Ton models, allowing for precise temperature regulation.