EasyManua.ls Logo

ICP PHX336000K00A1 - User Manual

ICP PHX336000K00A1
13 pages
Print Icon
To Next Page IconTo Next Page
Loading...
Installation Instructions
PHX3 Series
2 to 5 TON
PACKAGE HEAT PUMPS
TABLEOF CONTENTS
UNITDIMENSIONS ...................................... 2 - 3
SAFEINSTALLATIONREQUIREMENTS ......................... 4
LOCATINGTHE UNIT ....................................... 4
CLEARANCES ............................................ 4
INSTALLATION............................................ 5
GROUNDLEVELINSTALLATION .............................. 5
RooftopINSTALLATION..................................... 5
HOISTING................................................ 5
DOWNFLOWCONVERSION.................................. 5
CONDENSATEDRAIN....................................... 5
ELECTRICALWIRING................................... 6
DUCTWORK.......................................... 7
FILTERS ............................................. 7
AIRFLOWADJUSTMENT ................................ 8
START-UPPROCEDURES ............................... 9
SEQUENCEOF OPERATION.............................. 9
MAINTENANCE ...................................... 10
RIGGING ........................................... 12
WIRINGDIAGRAMS ................................... 13
_ CLIS_IEDUS
518 O1 1301 OO 1-4-O6
Printed in U.S.A.
CODE: PHX3
Question and Answer IconNeed help?

Do you have a question about the ICP PHX336000K00A1 and is the answer not in the manual?

Summary

Unit Dimensions

B CHASSIS UNIT DIMENSIONS

Provides detailed dimensional specifications and diagrams for the "B" chassis heat pump units.

ROOF CURB

Details dimensions and requirements for roof curb installations for "B" chassis units.

SAFE INSTALLATION REQUIREMENTS

Safety and Location Guidelines

Covers essential safety precautions, unit placement, access panel locations, and minimum clearances for safe operation.

Installation and Handling Procedures

Outlines procedures for unit installation, including ground level, rooftop, hoisting, downflow conversion, and condensate drain setup.

ELECTRICAL WIRING

Electrical Safety Connections

Specifies requirements for disconnect switches and proper ground connections to ensure electrical safety.

Wiring Connections

Guides for making line voltage and low voltage/thermostat wiring connections within the unit.

DUCTWORK

Ductwork Installation and Connections

Details guidelines for ductwork sizing, insulation, connections, and ensuring proper airflow.

FILTERS

Explains the necessity of filters and lists minimum recommended filter sizes for various unit models.

AIRFLOW ADJUSTMENT

CIRCULATING AIR BLOWER SPEEDS

Presents a table of blower speeds and corresponding air delivery (CFM) at various static pressures.

Blower Tap Connections

Illustrates blower speed tap settings for low, rated, and high capacity airflow for different models.

Airflow Adjustment Procedures

Describes how to adjust blower speeds for heating and cooling, including specific wiring instructions.

START-UP PROCEDURES

CHECK BEFORE STARTING

Lists essential checks to perform before powering on the unit for initial startup.

SEQUENCE OF OPERATION

Cooling and Heating Operation

Details the operational sequence for both cooling and heating modes, including stage changes and fan control.

Special Operation Features

Explains features like the scroll recycle delay timer, continuous fan operation, and defrost mode sequences.

MAINTENANCE

Monthly Maintenance Checks

Outlines routine monthly inspections, including checking and replacing air filters.

Cooling Season Checks

Details monthly checks for the cooling season, focusing on the condenser coil and condensate drain.

Annual Maintenance Checks

Covers comprehensive annual inspections, including fan motors, blower access, and cleaning procedures.

Rigging Instructions

Wiring Diagrams

2 to 5 Ton Wiring Diagram

Presents the schematic wiring diagram for the 2 to 5 ton PHX3 series heat pumps.

Overview

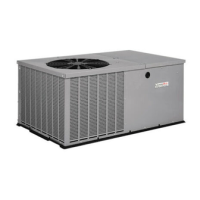
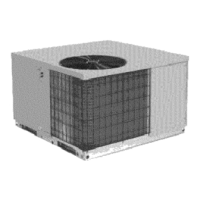
This manual describes the PHX3 Series Package Heat Pumps, available in 2 to 5 ton capacities. These are fully self-contained electric heat pump units designed for outdoor installation. They feature return and discharge openings for both horizontal and downflow configurations, with downflow duct openings factory-covered.

Function Description:

The PHX3 Series units provide both heating and cooling functions. In cooling mode, a two-stage indoor thermostat controls the operation. A first-stage call for cooling (Y1) energizes the indoor fan (low stage) and, after a 5-minute time delay (for initial start-up), the compressor (low stage) and outdoor fan motor. If the cooling demand is not met, a second-stage call (Y2) switches the compressor to high-stage cooling via an internal solenoid valve within the scroll compressor and switches the indoor fan to high stage. When the second-stage cooling demand is satisfied, Y2 de-energizes, returning to low-stage cooling. When the low-stage cooling demand is met, Y1 de-energizes, shutting off the compressor, indoor fan, and outdoor fan.

In heating mode, a first-stage call for heating (Y1) energizes the indoor fan (low stage) and, after a 5-minute time delay, the compressor (low stage) and outdoor fan motor. If the heating demand is not met, a second-stage call (Y2) switches the compressor to high-stage heating via an internal solenoid valve within the scroll compressor and switches the indoor fan to high stage. Auxiliary or backup heat is controlled by a third stage (W2) and, if the demand is still not met, W3 is energized for staged heating. When heating demand is satisfied, W3, W2, and Y2 sequentially de-energize, returning to low-stage heating. When the low-stage heating demand is met, Y1 de-energizes, shutting off the compressor, indoor fan, and outdoor fan.

The units are equipped with a defrost mode. When the defrost sensor closes in heating mode, a delay (30, 60, 90, or 120 minutes, selectable via dipswitches on the defrost board) precedes the defrost cycle. During normal defrost, the condenser fan turns off, the reversing valve energizes to cooling mode, and auxiliary electric heat (W2) is energized. After the defrost sensor opens or a maximum of 10 minutes, the condenser fan energizes (after 20 seconds), and the reversing valve de-energizes to heat mode. Electric strip heat also de-energizes (after 15 seconds) unless required by the thermostat. A scroll recycle delay timer on the defrost board delays compressor start-up for 5 minutes after a power interruption to prevent reverse rotation.

Important Technical Specifications:

  • Capacity: 2 to 5 tons.
  • Dimensions:
    • "B" Chassis (PHX324-36): 47-3/8" x 47-3/8" base. Height 32-1/2".
    • "C" Chassis (PHX342-60): 47-3/8" x 73" base. Height 36".
  • Roof Curb Dimensions:
    • "B" Chassis: 47-3/8" x 47-3/8" units require a 42-3/4" x 39-3/4" base.
    • "C" Chassis: 47-3/8" x 73" units require a 67-3/4" x 64-3/4" base.
    • Roof curbs are also available in 8" and 24" heights.
  • Condensate Drain: 3/4" (19.1mm) female PVC connection. Requires a field-supplied condensate trap with a standing water column of at least 2" (50.8mm), with the trap outlet at least 1" (25.4mm) below the unit outlet.
  • Electrical Connections: Requires copper conductors for connections between the field-supplied electrical disconnect switch and the unit. High-voltage power must be within the operating voltage range indicated on the unit rating plate. A ground lug is provided in the control box area.
  • Thermostat: Requires a two-stage thermostat with "R", "W/W1", "Y1", "O", and "G" terminals.
  • Ductwork: Maximum recommended velocity in trunk ducts is 1000 feet per minute; in branch ducts, 800 feet per minute. Outdoor ductwork requires a minimum 2" thick fiberglass "wrap" insulation and a weatherproof vapor barrier.
  • Filters: Minimum recommended filter sizes vary by model and filter type (disposable or washable). For example, PHX324000K00A1 requires one 1x20"x20" disposable filter (384 sq inches) or one 1x10"x20" washable filter (192 sq inches).
  • Blower Motor: Features 5 speeds (1, 2, 3, 4, 5) for airflow adjustment.
  • Defrost Timer Settings: Selectable delays of 30, 60, 90, or 120 minutes. Backup defrost terminate time is fixed at 10 minutes. Compressor recycle delay is 5 minutes.

Usage Features:

  • Installation Flexibility: Can be installed at ground level or on a rooftop. Adaptable for both horizontal and downflow configurations. Downflow conversion involves removing blockoff plates from the return and supply air compartments and reinstalling them on the horizontal openings.
  • Leveling: Units must be installed level front to rear and side to side, with a slope no greater than 1/8" per foot (10mm per meter). The drain side must always be lower for proper condensate drainage.
  • Clearances: Minimum clearances to combustible construction include 2" for duct side (6" on large chassis models), 30" for condenser inlet, blower service side, control service side (front combustion air inlet), and clearance between a 3 ft. overhang and top of unit. A 26" minimum clearance is needed at the side of the unit for filter removal (for units with available filter racks).
  • Hoisting: Units should be hoisted using two lifting slings attached to rigging shackles through holes in the base rail. Spreader bars must be used to protect the unit from damage.
  • Airflow Adjustment: Blower speeds can be adjusted by selecting the appropriate tap on the blower motor. Specific wiring instructions are provided for using the same speed for heating and low-stage cooling.
  • Safety Features: Equipped with a defrost board that includes a recycle delay timer to protect the compressor.

Maintenance Features:

  • Air Filters: Must be inspected at least monthly and replaced or cleaned as required. Dirty filters are a common cause of inadequate performance and compressor failures. Units should not be operated without a filter.
  • Condenser Coil: Keep the condenser inlet and outlet area clean and free of debris. Shrubbery must be trimmed back to at least 30 inches from the unit.
  • Condensate Drain: Check for proper drainage and clean as required.
  • Annual Inspection: Includes cleaning the unit, especially the condenser and evaporator coils. All access panels and the top may need to be removed for thorough cleaning.
  • Blower Motor: Permanently lubricated; no further lubrication is required. Access involves removing the blower access panel, screws securing the blower motor housing, and red wires attached to the limit switch.
  • Motor Removal/Replacement: Required for replacing or repairing the blower wheel, blower housing, or inaccessible components. Involves removing screws around the unit top, raising the top, and disconnecting wires from the housing.
  • Circulating Air Blower: Visually inspect the blower wheel for dirt/lint accumulation and clean as needed. If accumulation is excessive, the blower assembly may need to be removed. The blower motor is permanently lubricated.

ICP PHX336000K00A1 Specifications

General IconGeneral
BrandICP
ModelPHX336000K00A1
CategoryHeat Pump
LanguageEnglish

Related product manuals