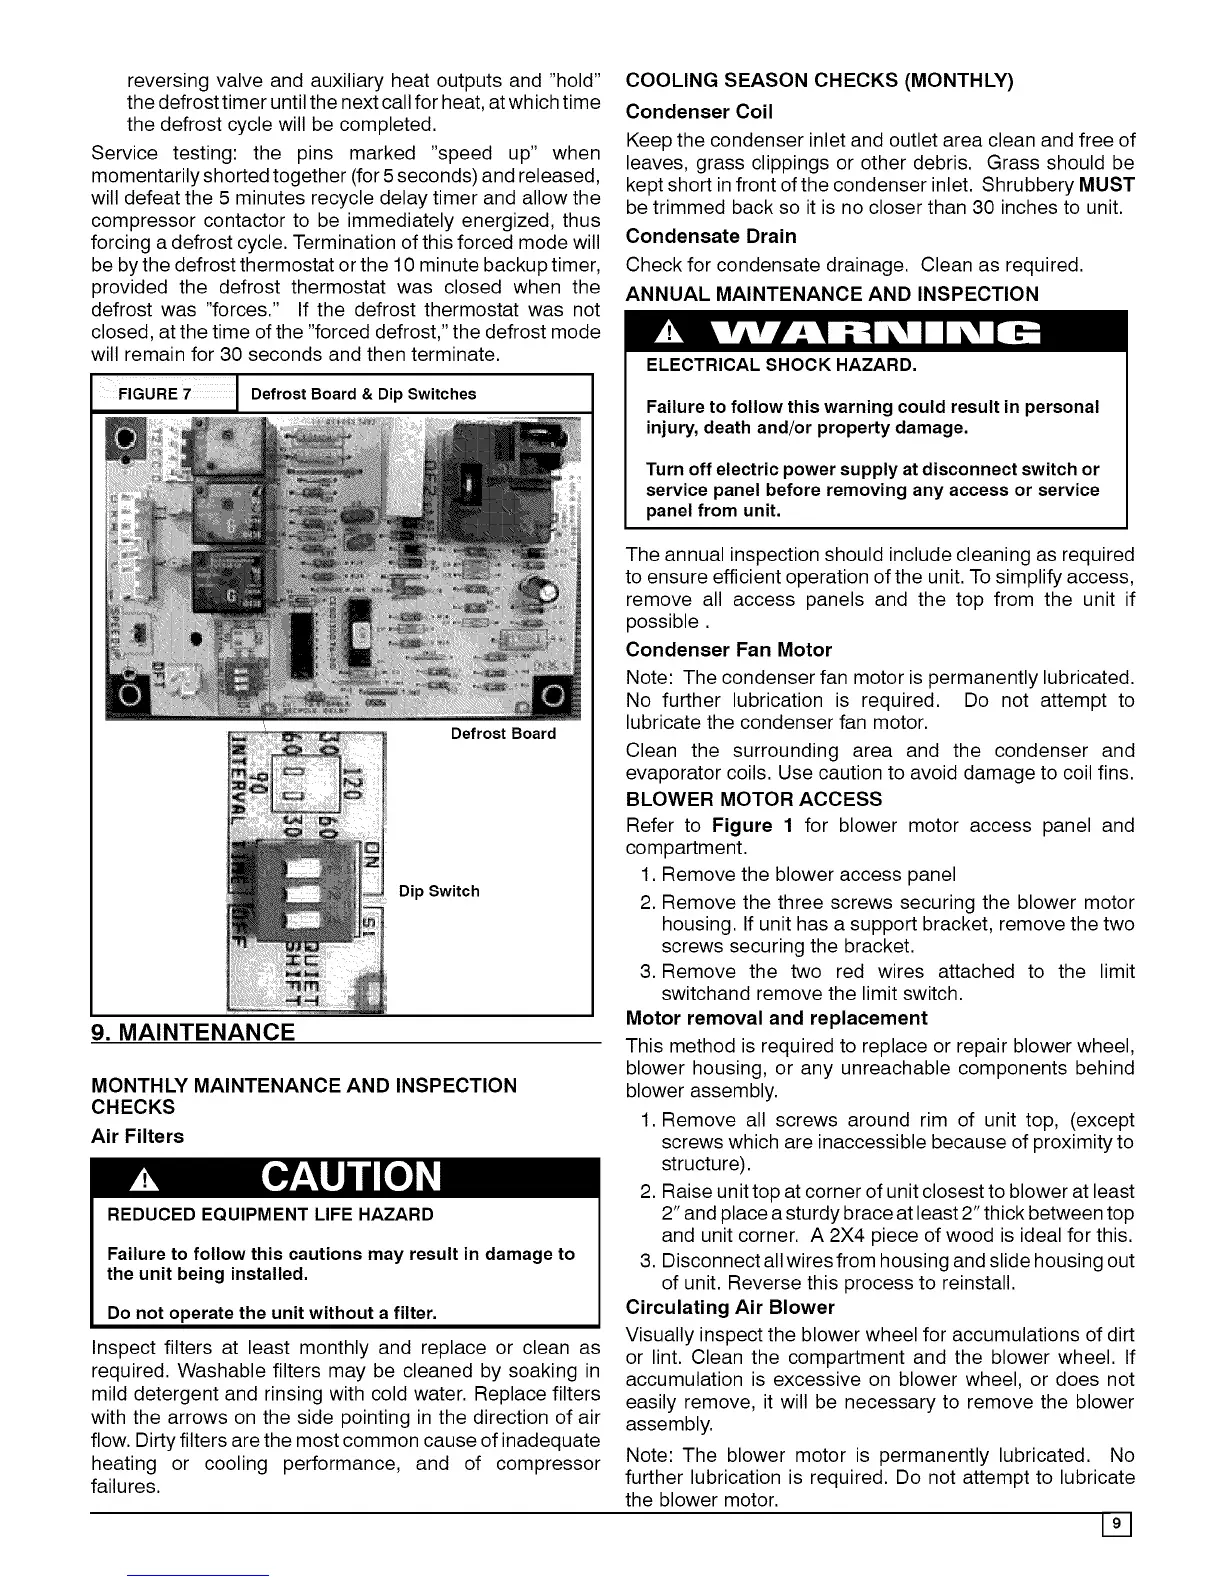
reversingvalveandauxiliaryheatoutputsand"hold"
thedefrosttimeruntilthenextcallforheat,atwhichtime
thedefrostcyclewillbecompleted.
Servicetesting:the pins marked"speedup" when
momentarilyshortedtogether(for5seconds)andreleased,
willdefeatthe5 minutesrecycledelaytimerandallowthe
compressorcontactorto beimmediatelyenergized,thus
forcingadefrostcycle.Terminationofthisforcedmodewill
bebythedefrostthermostatorthe10minutebackuptimer,
providedthe defrostthermostatwas closedwhenthe
defrostwas"forces."If the defrostthermostatwasnot
closed,atthetimeofthe"forceddefrost,"thedefrostmode
willremainfor30secondsandthenterminate.
Defrost Board & Dip Switches
Defrost Board
Dip Switch
9. MAINTENANCE
MONTHLY MAINTENANCE AND INSPECTION
CHECKS
Air Filters
REDUCED EQUIPMENT LIFE HAZARD
Failure to follow this cautions may result in damage to
the unit being installed.
Do not operate the unit without a filter.
Inspect filters at least monthly and replace or clean as
required. Washable filters may be cleaned by soaking in
mild detergent and rinsing with cold water. Replace filters
with the arrows on the side pointing in the direction of air
flow. Dirty filters are the most common cause of inadequate
heating or cooling performance, and of compressor
failures.
COOLING SEASON CHECKS (MONTHLY)
Condenser Coil
Keep the condenser inlet and outlet area clean and free of
leaves, grass clippings or other debris. Grass should be
kept short in front of the condenser inlet. Shrubbery MUST
be trimmed back so it is no closer than 30 inches to unit.
Condensate Drain
Check for condensate drainage. Clean as required.
ANNUAL MAINTENANCE AND INSPECTION
ELECTRICALSHOCKHAZARD.
Failure to follow this warning could result in personal
injury, death and/or property damage.
Turn off electric power supply at disconnect switch or
service panel before removing any access or service
panel from unit.
The annual inspection should include cleaning as required
to ensure efficient operation of the unit. To simplify access,
remove all access panels and the top from the unit if
possible.
Condenser Fan Motor
Note: The condenser fan motor is permanently lubricated.
No further lubrication is required. Do not attempt to
lubricate the condenser fan motor.
Clean the surrounding area and the condenser and
evaporator coils. Use caution to avoid damage to coil fins.
BLOWER MOTOR ACCESS
Refer to Figure 1 for blower motor access panel and
compartment.
1. Remove the blower access panel
2. Remove the three screws securing the blower motor
housing. If unit has a support bracket, remove the two
screws securing the bracket.
3. Remove the two red wires attached to the limit
switchand remove the limit switch.
Motor removal and replacement
This method is required to replace or repair blower wheel,
blower housing, or any unreachable components behind
blower assembly.
1. Remove all screws around rim of unit top, (except
screws which are inaccessible because of proximity to
structure).
2. Raise unit top at corner of unit closest to blower at least
2" and place a sturdy brace at least 2" thick between top
and unit corner. A 2X4 piece of wood is ideal for this.
3. Disconnect all wires from housing and slide housing out
of unit. Reverse this process to reinstall.
Circulating Air Blower
Visually inspect the blower wheel for accumulations of dirt
or lint. Clean the compartment and the blower wheel. If
accumulation is excessive on blower wheel, or does not
easily remove, it will be necessary to remove the blower
assembly.
Note: The blower motor is permanently lubricated. No
further lubrication is required. Do not attempt to lubricate
the blower motor.
[2J