This document is the instruction manual for the "Snow Dispenser Ice-maker (NSD-151MW)" manufactured by ICT Nakajo Co., Ltd. and sold by Nakajo International Co., Ltd. It provides comprehensive information on the safe and proper use, installation, operation, maintenance, and specifications of the device.
Function Description
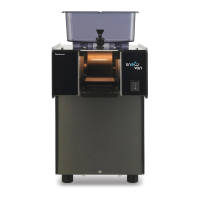
The NSD-151MW is a snow dispenser ice-maker designed to produce snow-pattern ice. It operates by freezing a liquid material on a rotating drum, which is then scraped off by a cutter blade to create the snow-like consistency. The device is intended for commercial or professional use, given the detailed safety and maintenance instructions.
Important Technical Specifications
- Model Name: NSD-151MW
- Manufacturer: ICT Nakajo Co., Ltd.
- Product Name/Brand: SNOW DISPENSER-TYPE ICE-MAKER / SNOW VAN
- Power Source: AC 220V 60Hz
- Current: 6A
- Power Consumption: 1300 W
- Cooling Water Supply System: Direct connection to water supply
- Water Pressure in Use: 1 bar ~ 6 bar
- Climate Class Rating: T
- IPX Ratings: IP X rating 0
- Outside Dimension (WDH): 295 mm * 450 mm * 460 mm
- Weight: 42 Kg
- Ice-making Quantity: 280 Kg/day (90% in case of milk) at Room temperature 20°C and Cooling water temperature 17°C.
- Rated Voltage: AC 220V (requires an electrical outlet with 15A or more capacity).
Usage Features
Installation
The manual provides detailed instructions for installation, emphasizing safety and proper setup:
- Power Connection: The device requires a properly grounded AC 220V 60Hz electrical outlet with a capacity of 15A or more. Multiple power plugs should not be connected to one electrical outlet or extension cord to prevent overload and fire.
- Cooling Water Connection: An on/off valve and connection nipple (PT1/4") must be installed on the water pipe. A PE tube (1/4" (Ø6.35)) connects to the "IN (water supply)" port on the back of the product, and another PE tube from the "OUT (water drain)" port connects to a drain hole. It's crucial to ensure the PE tube hose is not bent or folded.
- Ground Connection: A green ground wire must be connected to the ground contact part on the lower back side of the product, following electric safety rules. Water or gas pipes should not be used for grounding.
- Placement: The product should be installed in an environment where the ambient temperature is between 10°C and 43°C, and the cooling water temperature is between 5°C and 25°C. Operating outside these ranges may cause product breakdown or affect ice quality and quantity. The product must be level, with deviations of 2mm or less between front, rear, left, and right, to ensure uniform snow-pattern ice. If cooling water pressure exceeds 6 bar, a pressure reducer is needed; if below 1 bar, a booster pump is recommended.
Operation
The operation process is straightforward:
- Open Cooling Water Valve: Ensure the cooling water supply pipe valve is open.
- Insert Power Plug: Plug the power cord into the grounded AC 220V electrical outlet after connecting the cooling water supply and drain hoses.
- Add Material: Pour the ice-making material into the material container.
- Start Ice-making: Press the upper part of the power switch (I) to turn the device ON.
- Feed Material: Lift the lever on the material container for about 3 seconds to feed the material to the drum plate. This step is critical and must be done within 10 seconds of turning on the power switch to prevent product breakdown.
- End Ice-making: Lower the material container lever for two or three seconds to stop material feeding. Once the desired quantity of ice is made or the material is used up, press the middle part of the power switch to turn the device OFF.
Drum Plate and Material Container Installation
- Drum Plate: The drum plate is installed by aligning it with the drum and pushing it all the way inside, ensuring it fits the front and rear supports.
- Ice-making Material Container: The valve rod is assembled onto the valve body, with different transparent valve rods available for various fluid viscosities (blue for water, purple for milk, pink for high-viscosity fluid). The assembled valve rod and material container are then inserted into the groove on top of the product.
Maintenance Features
Daily cleaning and proper storage are emphasized for hygiene and product longevity:
Daily Washing and Cleaning
- Frequency: The drum surface, material container, drum plate, and other parts should be washed daily after each ice-making operation to prevent bacterial growth and bad smells.
- Safety Precautions:
- Always unplug the power cord before cleaning.
- Do not sprinkle water directly onto the product (except for the drum surface).
- Use only clean hands and cloth.
- Avoid abrasive powders, detergents, oil, hot water (40°C or above), rough wire brushes, acids, thinners, benzene, or alkaline detergents, as these can damage the plastic surface.
- When using cleaning agents or fungistatic agents, refer to their container labels for precautions. Ensure all residuals are completely removed to prevent health issues or rust.
- Never clean the inside of the machine unless instructed by an authorized service technician.
- Cleaning Procedure:
- Remove Front Cover: Loosen the bolt securing the front cover and pull it forward.
- Remove Material Container: Lift and remove the material container.
- Remove Drum Plate: Loosen the bolt securing the cover on the bottom of the drum plate, remove the cover, push in the drum plate while aligning with the drum, and then pull it down along the diagonal line.
- Disassemble Material Container Valve: Remove the valve from the material container, then remove the valve rod from the valve body. Remove the O-rings (P16 and P14) from the valve body, noting their sizes for reassembly. Rotate the valve body counterclockwise to remove it.
- Wash Drum: After removing the material container and drum plate, press the power switch downward (II) to rotate the drum. Wash the drum while sprinkling water. Exercise caution as the drum rotates during washing. Turn the switch OFF (press the middle part) once washing is complete.
- Reassembly: After washing, completely remove residual moisture and reassemble the drum plate and other parts in reverse order of disassembly.
- Cleaning Agents:
- Cleaning Liquid: Dilute a commercially available neutral detergent with water at a ratio of 1:500 (e.g., 2.0ml of liquid per 1 liter of water).
- Fungistatic Agent: Rubbing alcohol (50-80% concentration) in a spray container or sodium hypochlorite solution (6% concentration) diluted with water at a ratio of 1:30 (e.g., 3.3ml solution per 1 liter of water).
- Brush: A brush with stiff hair is preferred.
- Water: Use water at room temperature or warm water (40°C or below).
- Cloth: A clean cloth is required.
Extended Period Storage
If the product will not be operated for an extended period:
- Unplug the power cord.
- Close the cooling water pipe valve.
- Thoroughly wash and clean all removable parts (material container, cover, valve, ice-making drum, drum plate, etc.), remove any residual moisture, and store them in a safe, dust-free place.
Troubleshooting
The manual includes a troubleshooting guide for common issues, such as the drum not operating, repeated stopping, failure to make ice, or uneven ice production. For any problems, users are advised to contact the service center and never disassemble, repair, or modify the product arbitrarily.
Warranty
The product comes with a 1-year warranty from the date of purchase. However, service fees may apply even within the warranty period for issues caused by user carelessness, unauthorized disassembly, relocation, inappropriate application, natural disasters, or improper grounding.