Do you have a question about the IDEAL Exalt and is the answer not in the manual?
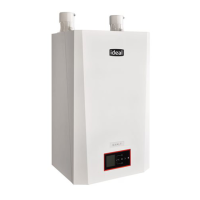
This document outlines the procedures for replacing the venturi in Exalt boilers, ensuring proper installation, combustion testing, and adjustments. It is intended for qualified installers and service technicians to maintain the safe and efficient operation of the boiler.
The venturi replacement kit is designed to restore optimal combustion performance in Exalt 110, 155, and 199 models, accommodating both Natural Gas (NG) and Liquid Propane (LP) fuel types. The kit includes essential components such as the venturi itself, a venturi/blower O-ring, a venturi gasket, venturi/blower screws, and gas pipe gaskets. These components are crucial for creating a secure and leak-free seal within the gas train, which is vital for the boiler's safety and efficiency.
Before commencing any work, it is imperative to verify that the correct venturi replacement kit has been selected for the specific boiler model. This information can be cross-referenced with the provided table, which lists kit part numbers corresponding to different Exalt models and fuel types. For instance, EXRKIT07 is for NG Venturi Replacement in Exalt 110, while EXRKIT12 is for LP Venturi Replacement in Exalt 199. This initial verification step prevents incorrect part installation, which could lead to operational issues or safety hazards.
Safety is a paramount concern throughout the replacement process. The document emphasizes several critical safety warnings. Before any physical work begins, the electrical power supply to the boiler must be turned off at the service panel, and the unit should be allowed to cool down to prevent electrical shock and scald hazards. The manual gas shut-off valve to the unit must also be closed. To confirm the absence of electrical power, a voltmeter should be used to check the boiler's high voltage terminals L and N. Failure to adhere to these preliminary safety measures can result in severe personal injury or death.
The removal of the old venturi involves a series of precise steps. First, the front panel of the Exalt boiler needs to be removed by unscrewing the bottom edge and lifting it off. Next, the silicone tube connected to the air inlet elbow is detached, followed by the removal of the air inlet elbow itself. The venturi interface is then rotated approximately 60 degrees clockwise to disengage its clamping mechanism, allowing for its removal along with the old gasket between the venturi and the interface, which should be discarded. The gas valve to venturi pipe is disconnected by loosening the nuts at both ends with an adjustable wrench, and the old gaskets at these connections are removed and replaced with new ones from the kit. Finally, the venturi itself is detached from the fan assembly by removing three bolts using a 10 mm wrench.
The installation of the new venturi is essentially the reverse of the removal process, but with additional critical checks and new components. The threaded connection for the gas piping must be correctly oriented. A new blower/venturi O-ring must be installed into the blower, and a warning highlights that failure to do so can cause a gas leak, leading to substantial property damage, serious injury, or death. The new venturi is then secured to the fan assembly with the three bolts. The gas valve to venturi pipe is reassembled, ensuring that the new gaskets are properly seated before tightening the nuts. Another warning reiterates the risk of gas leaks if these gaskets are not correctly installed. The new gasket is then installed, and the venturi interface is attached to the venturi, rotating counterclockwise until it locks into place. The air inlet elbow is installed, and the silicone tube is reattached. A warning here emphasizes that improper installation of the air inlet elbow and silicone tube can affect combustion, leading to property damage, serious injury, or death.
After the physical installation, the manual gas shut-off valve to the unit is opened. Before the boiler is put back into operation, all gas connections must be tested for leaks using a bubble test. The document explicitly warns against using an open flame for leak detection, as this can result in substantial property damage, serious injury, or or death. Any detected leaks must be repaired immediately.
A crucial part of the venturi replacement process is the combustion test and adjustments. This step is mandatory and must be performed by a qualified installer, service agency, or gas supplier using calibrated equipment to ensure accurate readings. The purpose is to verify that the boiler's combustion levels meet recommended settings at both high and low input firing rates, ensuring the burner operates at optimum conditions. Failure to perform a complete combustion test can lead to incomplete combustion and the production of carbon monoxide, which poses a severe risk of personal injury, death, or substantial property damage.
The document provides detailed instructions for accessing the installer functions on the boiler's control panel. This involves simultaneously touching the up and down soft keys for three seconds, entering a specific installer access code ("054"), and navigating to the "Manual Operation" icon. From there, the fan icon is highlighted to manually fire the burner and power the CH circulator. An important notice advises ensuring an adequate CH load is present to dissipate the heat generated during the combustion test; if not available, an indirect water heater can be used to create a DHW call.
The firing rate is then adjusted to 100% (high fire) by holding down the RIGHT button. If the combustion levels (O₂ and CO₂) at high fire are outside the recommended settings (provided in a table), the THROTTLE SCREW must be adjusted using a flat-blade screwdriver. Counter-clockwise adjustment decreases O₂ and increases CO₂, while clockwise adjustment increases O₂ and decreases CO₂. Once high-fire combustion is set, the boiler is manually placed into low-fire mode (1% firing rate) by pressing the LEFT button. If low-fire combustion levels are outside the recommended settings, Ideal USA Technical Support should be contacted. After testing, the burner is shut down by pressing the CENTER button while the fan icon is highlighted, and the service mode is exited. Finally, the front panel is replaced, and the boiler is put back into operation.
The document includes a table of "Combustion Settings" for NG 110, 155, NG 199, and Propane models, specifying the acceptable ranges for CO₂ and O₂ at both high and low fire, as well as maximum CO levels. For instance, for NG 110, 155, the high-fire CO₂ range is 9.0 to 10.5%, and the O₂ range is 4.85 to 2.15%. The low-fire CO₂ range is 9.0 to 10.0%, with O₂ lower than or equal to high-fire CO₂ level, and an O₂ range of 4.85 to 3.0%. The maximum CO for these models is 150 ppm at high fire and 10 ppm at low fire. These precise values are critical for ensuring the boiler operates efficiently and safely, minimizing harmful emissions. A diagram clearly indicates the location of the throttle screw on the gas valve, facilitating the adjustment process.
In summary, this comprehensive guide provides a step-by-step procedure for replacing the venturi in Exalt boilers, emphasizing safety, correct installation, and meticulous combustion testing and adjustment. Adherence to these instructions by qualified personnel is essential for the long-term reliability, efficiency, and safety of the heating system.
| Model | Exalt |
|---|---|
| Manufacturer | IDEAL |
| Continuity | Yes |
| Diode Test | Yes |
| Display | LCD |
| DC Current Range | 10A |
| Temperature Range | -40°C to 1000°C |