classic HE P - Installation & Servicing
41
SERVICING
77
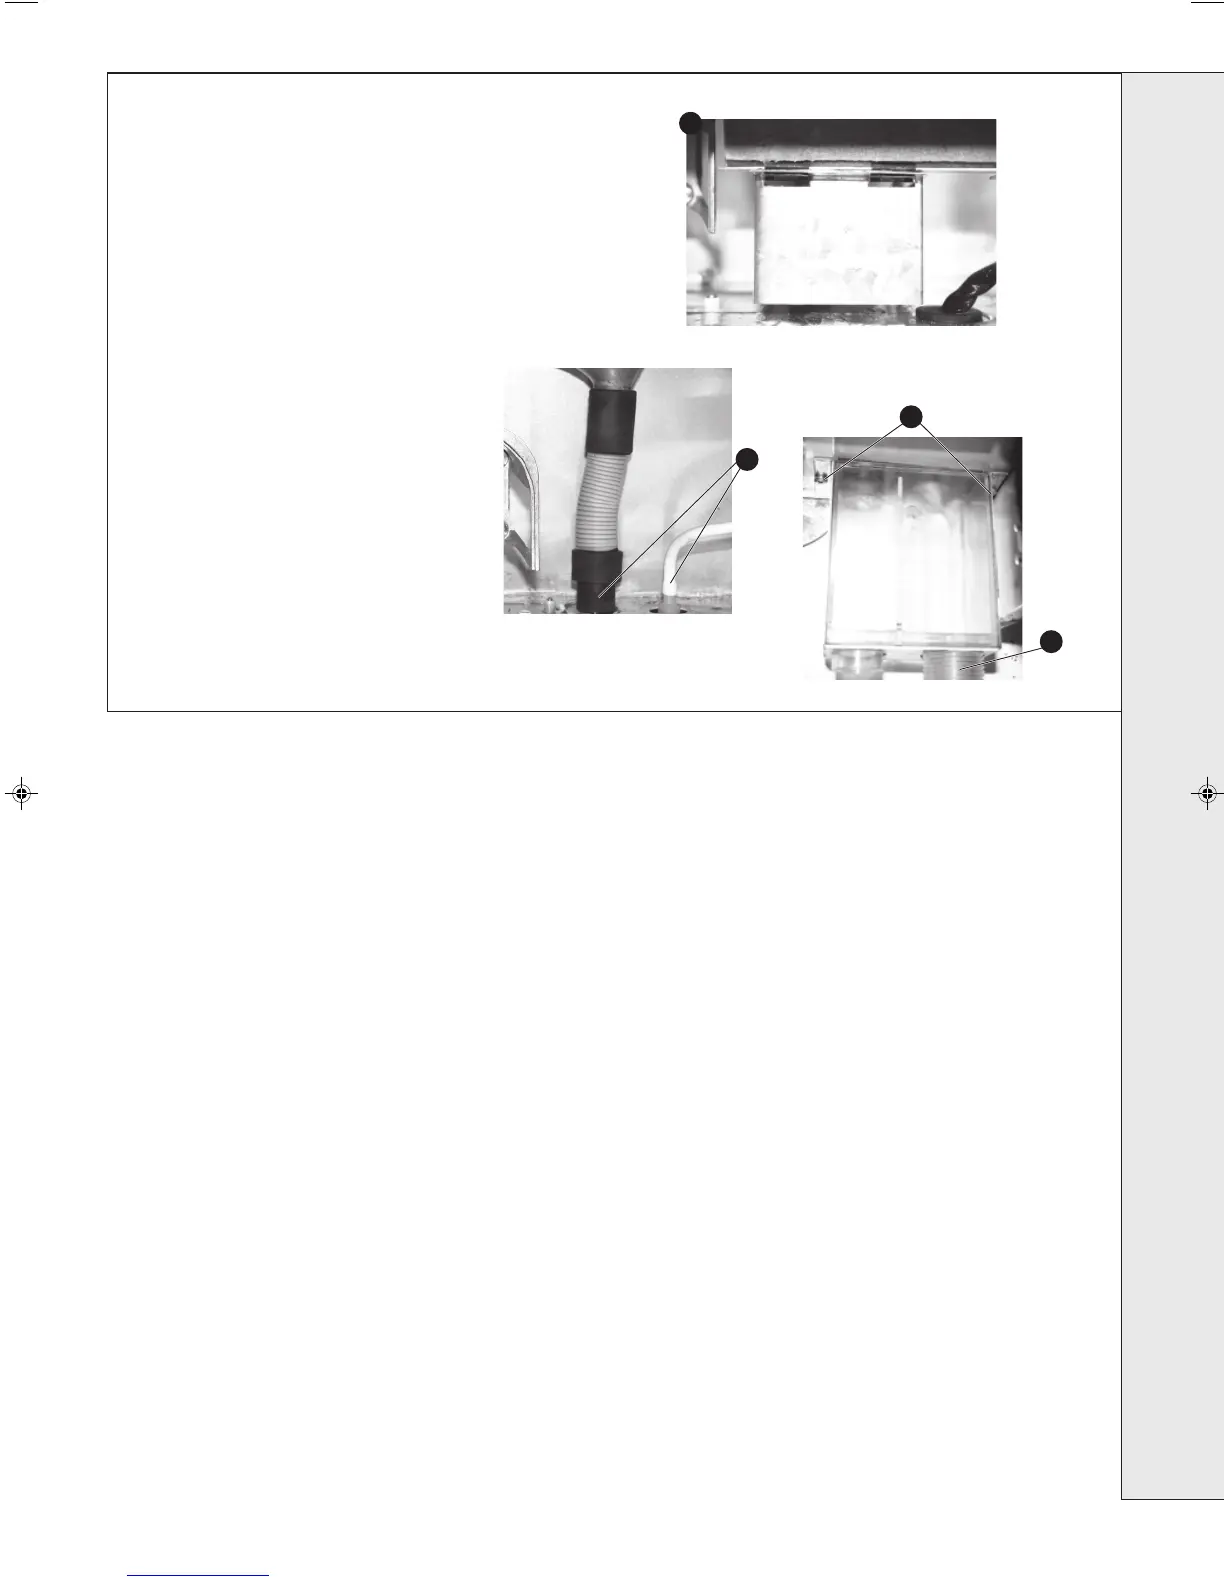
SIPHON REPLACEMENT
1. Refer to Frame 61.
2. Remove the burner. Refer to
Frame 54.
3. Pull the heat shield forward to
remove from clips.
4. Pull off the rubber sump connecting
pipe and the blockage sensing pipe.
5. Unscrew the siphon union
connection.
6. Remove the two siphon retaining
screws and remove siphon.
7. Re-fit the new siphon and gasket
and reassemble in reverse order,
ensuring the rubber sump
connecting pipe and blockage
sensing pipe are correctly
replaced.
8. Ensure the siphon is charged with
water and the heat shield is
replaced.
4
6
5
3
SERVICING
202107-6.pmd 20/02/2008, 13:5841