45
sERVICINg
47
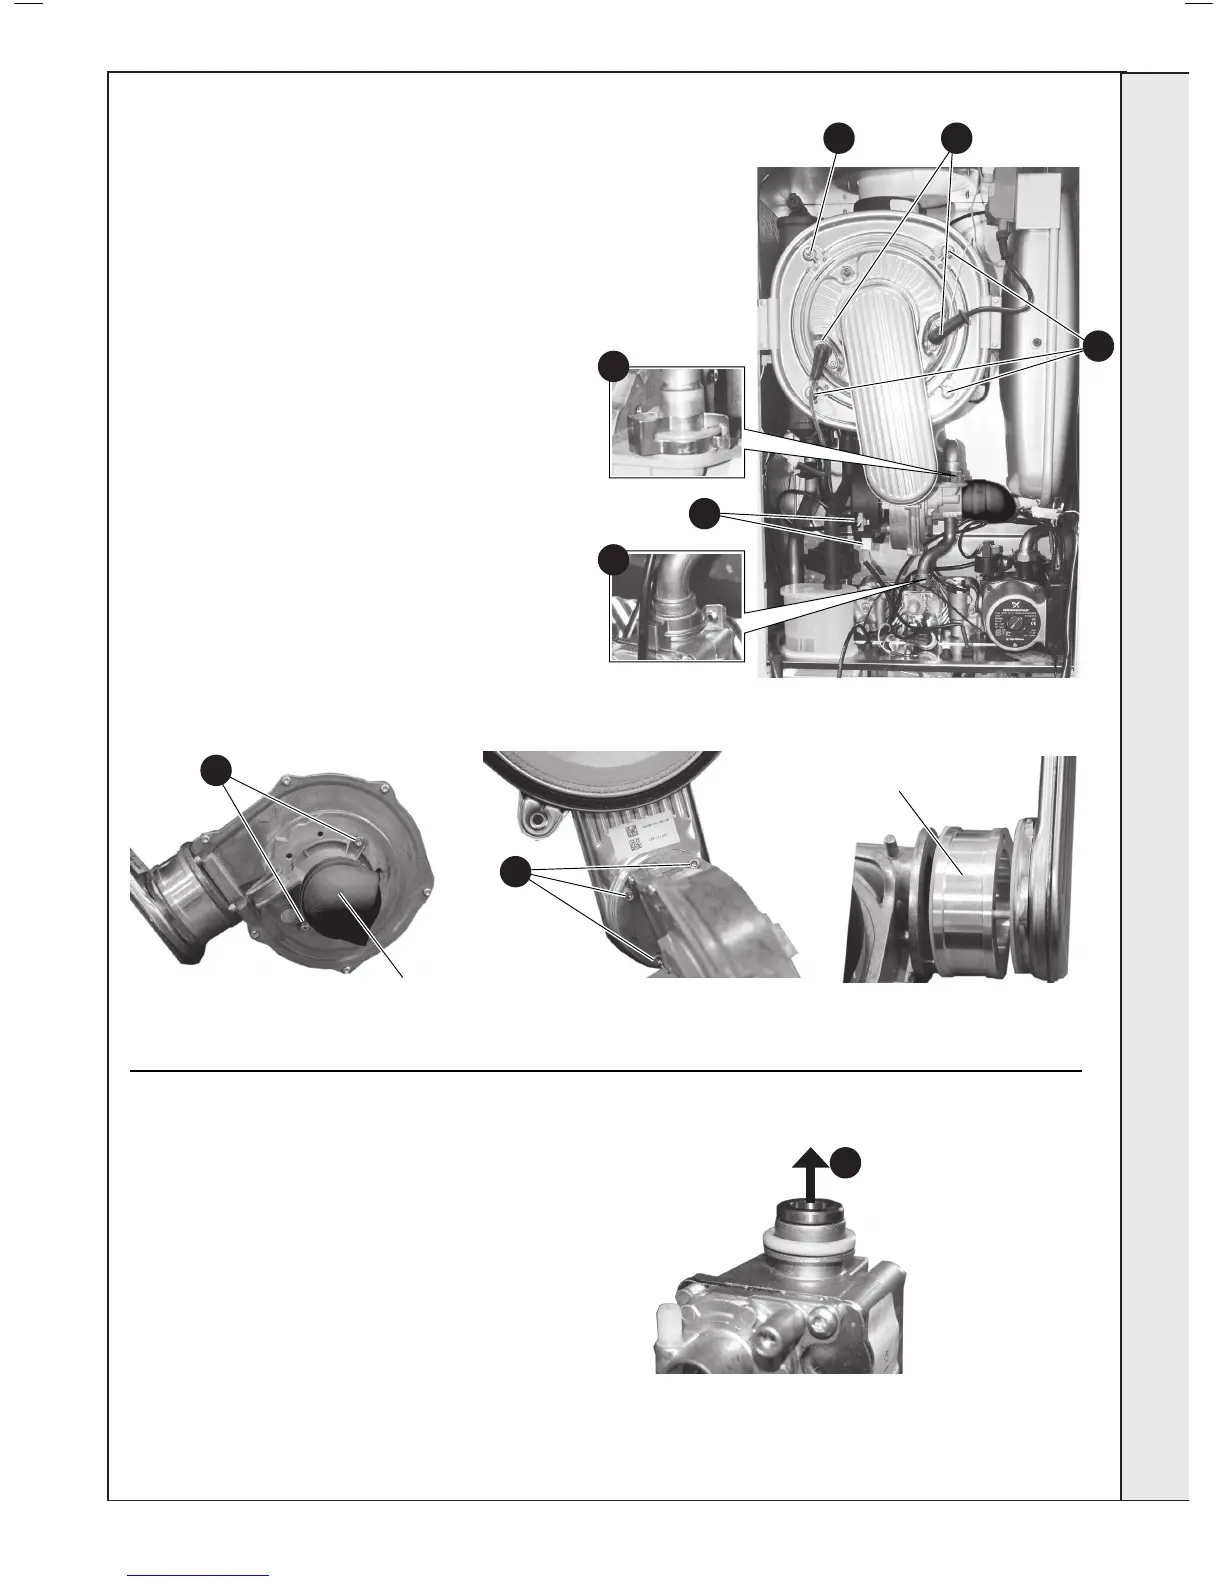
FAN AND VENTURI AssEMBLy REMOVAL AND CLEANINg
1. Refer to Frame 45 & 46.
2. Remove the ignition, detection and earth leads.
3. Remove the 2 clips securing the gas inlet pipe
and remove the pipe.
4. Remove the fan leads.
5. Remove the 4 securing nuts retaining the burner/
fan assembly.
6. Remove the assembly from the heat exchanger.
7. To remove the venturi release the 2 securing
screws to gain access for cleaning.
8. When replacing check the sealing gasket is
undamaged or replace as necessary, and secure
with the 2 screws.
*Note a noise damper is tted to the venturi inlet
on c40 models
9. To remove the fan, rst remove the venturi as
above and release the 3 screws securing the fan
to the burner. (Note a mounting spacer is tted to
the fan outlet on c40 model only)
10. Remove the fan from the burner assembly. When
replacing check the sealing gasket is undamaged
or replace as necessary, and secure with the 3
screws.
48
REMOVAL OF INj ECTOR
1. Refer to Frames 45 & 46.
2. Refer to Frame 53.
3. Remove the 2 clips securing the gas inlet pipe and
remove the pipe (as point 3 above).
4. Carefully ease the injector out of the gas valve.
5. Examine or clean as necessary
6. Re-t in reverse order ensuring the sealing o ring is in
good condition or replace if necessary.
7. Ret the gas pipe ensuring the seals are in good
condition and correctly located & secure with clips.
2
3
3
4
7
Noise Damper
Fitted only to c40
& c32 models
Mounting Spacer
Fitted only to c40
9
4
5
5
sERVICINg
 Loading...